Introduction
This guide will show you how to replace the headlights on a 2005 Buick Lesabre. As is common knowledge, driving without functioning headlights is not only illegal in most areas, but is also dangerous.
In this guide, you will replace one or more XtraVision Headlight and Fog Light Bulb 9006XV-2 headlights. If you are replacing any low beam lightbulbs you will instead use XtraVision Headlight and Fog Light Bulb 9005XV-2 headlights. Typically, if one light has gone out, the other will follow soon so it is best to do the both at the same time.
Before beginning this repair, ensure that the car is off, and hasn't been running for at least 20-30 minutes. If the repair is performed immediately after the car has been shut off, the engine can retain a large amount of residual heat. This can lead to the possibility of suffering burns while attempting the repair. Avoid touching the glass of the headlight bulb as the oils and salt on your hands can weaken it over time and cause it to burn out more quickly or even shatter.
During step 5 of the guide, the headlight housing can fall out from the front of the car. This will damage the headlight wiring, possibly severing the power cables. To prevent this from occurring, be sure to keep hold of the housing while completing the repair. It may help to have an assistant for help.
Parts
-
-
Pull the hood latch lever located underneath the hood, above the Buick crest up.
-
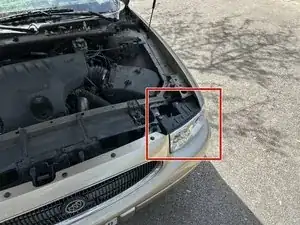
Lift the hood all the way up and secure it in place.
-
-
-
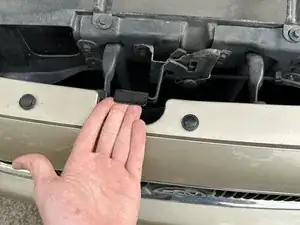
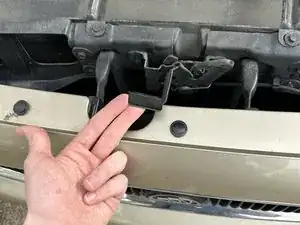
Loosen the housing by gently pulling it out toward the front of the car.
-
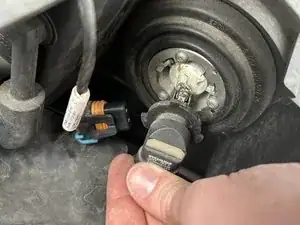
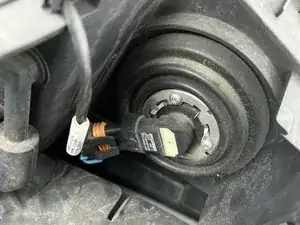
Once the housing has been moved, find the headlight terminal on the back of the housing.
-
-
-
Disconnect the quick snap power conduit by pulling up and back on the two retention tabs.
-
Rotate the headlight counterclockwise to loosen it.
-
Disconnect the cable.
-
-
-
Tighten the headlight by turning it clockwise until it stops.
-
Push the quick snap power conduit back into the headlight socket to reattach.
-
-
-
Push the headlight housing back into place.
-
Replace the headlight housing bolts and tighten them using an 11 mm socket wrench.
-


To reassemble your device, follow these instructions in reverse order.