Introduction
Have you ever wanted to improve your 68cc gas bike's performance? This FastFix will help you improve your bikes performance and speed.
-
-
Clean the compression head with an alcohol based cleaner to ensure a perfect fit on the engine.
-
-
-
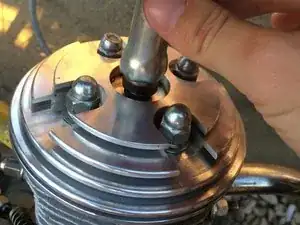
Place the spark plug tool on the spark plug and twist it counter clockwise to loosen it.
-
After loosening the spark plug all the way, remove it by lifting up.
-
-
-
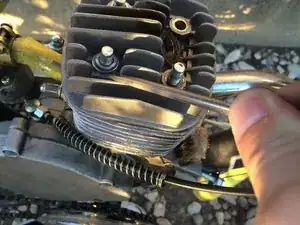
Place your 3/8" wrench on any of the four top cap nuts on the compression head currently on the bike.
-
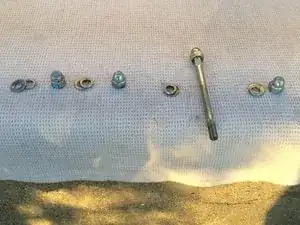
Turn the wrench counter clock wise to loosen the cap nut and remove it. Then remove the washer and the locking washer. Repeat this for all cap nuts.
-
Keep the washers and lock washers with the cap nut they were with on the compression head, it is not recommended to mix them up.
-
-
-
Remove the compression head by lifting up.
-
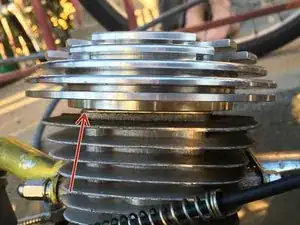
Remove the head gasket from the engine. Sometimes the head gasket gets stuck to the compression, remove the head gasket if it is stuck to the compression head.
-
Clean metal head gasket with the rubbing alcohol.
-
Reinstall metal head gasket on the engine after cleaning.
-
-
-
Place the new compression head on the engine.
-
Place the washers and locking washers back in their respective places and place the cap nuts on top. Hand tighten the bolts.
-
-
-
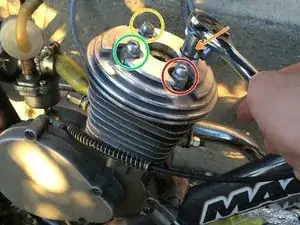
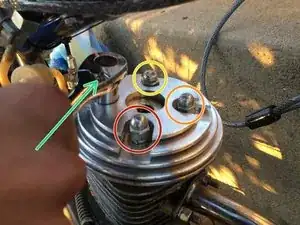
This is nut #1, the one on the right closest to the camera.
-
This is nut #2, the one on the right farthest from the camera.
-
This is nut #3, the one on the right farthest from the camera.
-
This is nut #4, the one on the left closest to the camera.
-
Pay close attention to the relation of the nuts to the carburetor and the exhaust.
-
-
-
Using your 3/8” wrench, place it on the first cap nut labeled in the picture above. This is the cap nut in the red circle. Tighten it 2 full turns clock wise.
-
Next, place the wrench on cap screw three and tighten it 2 full turns clock wise. Cap screw three is the one labeled with by yellow arrows or circles.
-
-
-
Place the wrench on cap screw two and tighten it 2 full turns clock wise. Cap screw three is the one labeled with by orange arrows or circles.
-
Place the wrench on cap screw four and tighten for 2 turns. Cap screw four is labeled in green.
-
-
-
Repeat the tightening pattern two more times to make sure that all screws have the same amount of tightness one them.
-
-
-
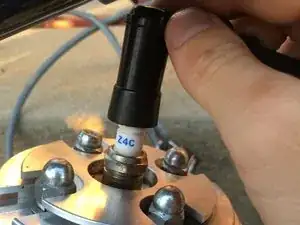
Use the spark plug tool to reinstall the spark plug by screwing it in clock wise.
-
Reattach the rubber CDI to the spark plug.
-
Make a quick visual inspection to make sure nothing looks out of the ordinary.
-
You have now installed a new compression head on your 68cc gas bike!
-