Introduction

  1. K6RKLsWPTSYCq2ON
    K6RKLsWPTSYCq2ON
    l3OyTBwhYygaAHQg
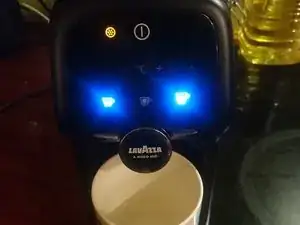
    • This guide is about taking apart this coffee maker. In my case the water flow stopped after running dry and a refill. After opening it up, water flow miraculously started to work again.

    • Taking it apart is fun, but not needed. You can just wait 30 min, and it will work again. (Maybe some thermal fuse is reset then).

  2. iUQ2yvpJj6kZlgnb
    iUQ2yvpJj6kZlgnb
    eYaD5PVVHl3bS4qj
    EioEtStMH5Grh6hl
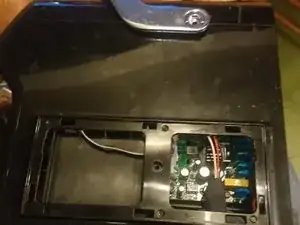
    • The machine mainly hangs together with plastic clips. There are 5 screws:

    • 1. Right under the powercable guide on the bottom.

    • 2+3 Under the Lavazza brand plates on either side.

    • 4+5 On the handle, under the plastic cover caps.

    To remove the two Lavazza branded metal plates. Lever top edge off first - there are three clips along the top edge.

    To remove the other white plastic covers and chrome handle once the screws are removed:

    1. Remove top white cover:

    lever back edge, then sides, then finally the front edge by sliding backwards

    2. Remove the chrome handle:

    place it the fully closed position, it should lift off vertically if the screws have been removed

    3. Remove white plastic surround from below water tank by lifting /levering it upwards.

    4. Remove white plastic back plate (need to release one clip on each side under the white side panels to get this off)

    5. Remove two white side panels (lots of plastic clips)

    Mark Chopping -

    Can someone explain step 3 - the model I have is all black plastic (no metal on the outside) and it’s not clear where one piece ends and the next begins - I managed to get the top off (step 1) and the handle (step 2) but can’t get anything else off.

    Andrew Brown -

  3. YEQ4WxkTqlK1Isjb
    • Top picture: valve and water pump below that.

  4. IBwiId6SZRrsf5dd
    IBwiId6SZRrsf5dd
    FJLoYuimDT4u2IkK
    • Heating element

    • PCB has useful labels .

Conclusion

To reassemble your device, follow these instructions in reverse order.

Mark

Member since: 05/09/18

465 Reputation

5 comments

Hi does anyone knows where is the thermoblock and if its easy to buy one on Modo Mio LM7000S-U (95007437700), Sometimes all lights flashing. I have to turn machine off and on again and if I am lucky it will work. AEG asked for £165 to repair it. Well I can buy a new one with thar money.

Manos -

Hi Manos, did find a solution to your problem? I have the same issue and have bought a new machine but hoping to bring the old one back alive one day.

My understanding is that the thermoblock comes as part of the 'Brewing Unit' spare part purchasable from Electrolux, however it is listed as £133

martin riddell -

Hi Manos,

How do you know it is the thermoblock.

Just thinking aloud: a thermoblock does not like something that sometimes works and sometimes doesn't.

Mark -

My machine leaks water how do I get into it and is it an easy repair it the LM7000-U MODEL

Shaun -

Is there a problem with newer batches of pods? I am seeing an increasing number where the coloured side of the pods is bending in so the machine can’t make proper holes - the resulting increased pressure makes its own hole, on the edge of the surface where the large holes should be, and coffee and grounds pour through this new hole.

Is it possible to post a picture on here?

Andrew Brown -