Introduction
If the display is malfunctioning on your Acer Aspire V5-122P-0468 laptop follow this guide to replace it yourself.
-
-
Remove the nine 4mm screws with a PH0 screwdriver.
-
Remove the two 6mm screws with a PH0 screwdriver.
-
-
-
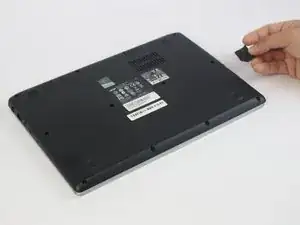
Remove the black rubber tab on the back of the computer
-
Remove the 4mm screw hidden underneath the black tab with a PH0 screwdriver.
-
-
-
Orient the computer upside down, with the hinges facing away from you.
-
Find the black plastic piece in the SD card slot on the right side of the computer.
-
Remove the plastic piece by sliding it out of the SD card slot.
-
-
-
Insert a spudger at these eight locations to disengage the plastic tabs from the housing cover, and pry apart.
-
Continue around the entire perimeter of the cover with the spudger.
-
-
-
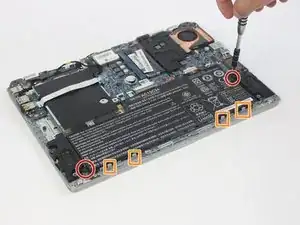
Remove the two 4mm screws using a PH0 screwdriver.
-
Depress the tabs holding the battery with a spudger.
-
Disconnect the battery connector from the motherboard using a spudger.
-
Pull the battery up and away from the laptop to remove.
-
-
-
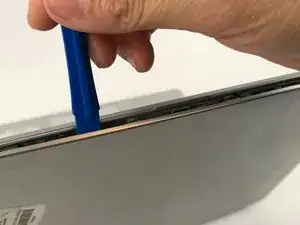
Wedge a spudger in between the plastic bezel frame and back cover to create a gap.
-
Then insert a plastic opening tool to pry apart the bezel from the back cover.
-
Work your way around the perimeter of the cover with the plastic opening tool.
-
-
-
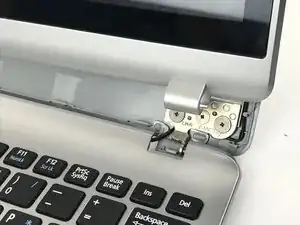
Open up the laptop to unsnap the hinges from the back of the computer.
-
Slide the pin connector and cable through the hinge that connects the display to the rest of the laptop.
-
-
-
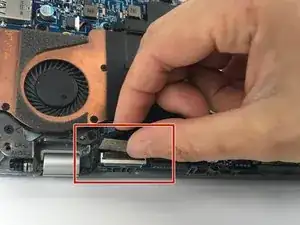
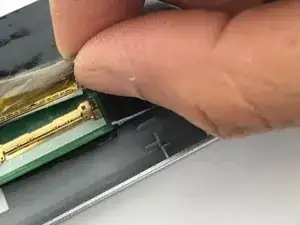
Remove the transparent tape covering the pin connector.
-
Unplug the pin connector from the display.
-
-
-
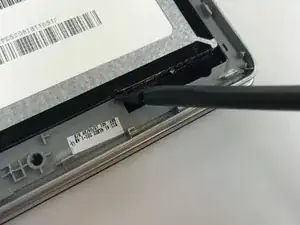
Cut the tape between the display and the plastic frame using the flat end of a spudger.
-
Work the spudger around the perimeter of the display to separate it from the bezel.
-


To reassemble your device, follow these instructions in reverse order.