Introduction

Use this replacement guide if the speakers of the Amazon Echo Show 8 are not functioning or you are experiencing crunchy or distorted audio audio. The speaker is important to the device so you can hear music and movies that are streaming on your device. Before continuing with this replacement guide, go to the troubleshooting guide and ensure you have completed the troubleshooting steps. This guide will walk you through the process of replacing the speaker. Make sure the device is disconnected from the power before proceeding with the guide.

  1. A42yxFCW6uxivLsY
    A42yxFCW6uxivLsY
    KRmCe1bblmcDgUWF
    hvs2ngiPZM4kt3te
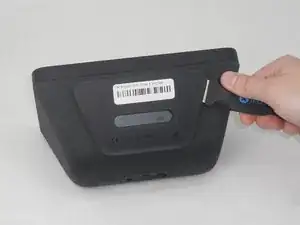
    • Flip the device so that the rubber foot is facing up.

    • Insert a Jimmy between the rubber foot and chassis, then slide it around the perimeter until the rubber foot releases.

    • The adhesive that holds the rubber mat on may require some force to sever.

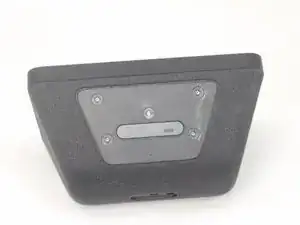
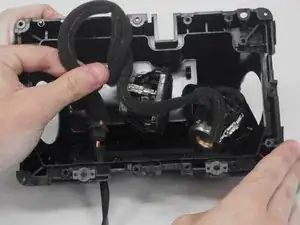
    • Remove the rubber foot.

  2. 1NZcPJovanrBsxJe
    1NZcPJovanrBsxJe
    XfOSddypHvhEnaxT
    QgNNaGaplikWD3bF
    • Use a T6 Torx screwdriver to remove the five 4.5 mm screws from the base of the device.

  3. WNGnZE3i6boSViMF
    WNGnZE3i6boSViMF
    JfFxUiJDEG3QEwjo
    5jlgwtRryFgA41PF
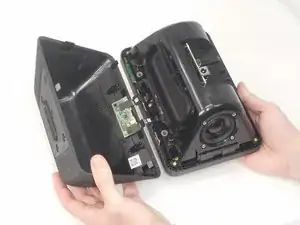
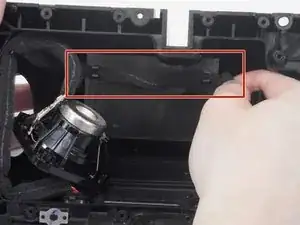
    • Insert a Jimmy in the gap between the front and rear case.

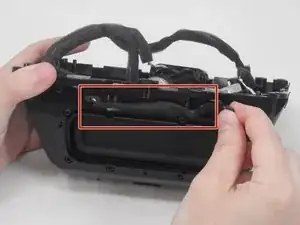
    • Work the Jimmy around the perimeter to gently detach the rear case from the front case.

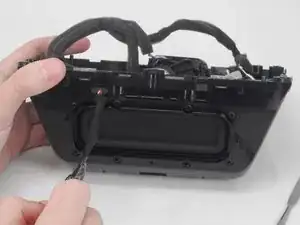
    • Separate the rear case from the front case.

    • There are 2 thin ribbon cables connecting the microphone board to the back cover. Take care not to tear or strain them as you separate the cases.

  4. MyoNisvZHigXJjxX
    MyoNisvZHigXJjxX
    a1shI2TVGhyXQpQ5
    PgQXEYAGBTGAWXTd
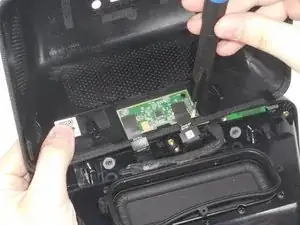
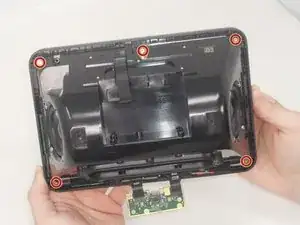
    • Use a T6 Torx screwdriver to remove the four 5.25 mm screws that secure the microphone board to the rear case.

  5. tkIP41SBAAHyFNPv
    tkIP41SBAAHyFNPv
    kGOvk1xRAaMsnuuc
    QCMcFiegJwgnNgAT
    • Use a T6 Torx screwdriver to remove the five 5.25 mm screws that secure the power board.

  6. 5OPenhOU2qaZbIPm
    5OPenhOU2qaZbIPm
    DNtyMMRgvOsadFMB
    JJIGlrYlLawKYNsS
    • Use a T6 Torx screwdriver to remove the six 7.6 mm screws that secure the speaker housing to the display assembly.

    • There is a sixth screw at the bottom between the two outside screws not shown in this image.

  7. BwaXPDEgW2mkNIru
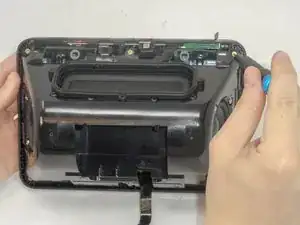
    • Gently separate the speaker housing from the front section like opening a book.

    • Lay the display assembly face down.

    • Take care when separating the two sections to avoid straining or damaging the speaker connector.

  8. svs2wXEyRwC2jWSl
    svs2wXEyRwC2jWSl
    UkdxqHXKKdMTpPoJ
    • Use a spudger to gently push the speaker connector directly out of its port.

    • Make sure not to apply excessive force as doing so will damage the female connector

  9. m3kQDKsFdYSkhCca
    m3kQDKsFdYSkhCca
    yvJkofugQFFQgwkS
    SJbhIQNOPAu4IY2c
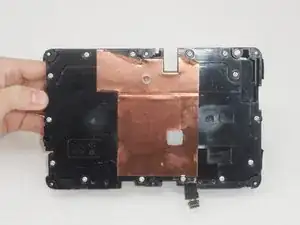
    • Use metal spudger to gently peel back part of the copper heat shield to reveal two 9 mm Phillips screws.

  10. VXeeo1qpsBMKOLZi
    VXeeo1qpsBMKOLZi
    QRWMTbMsBAaavqsP
    LkbPeQQ4qsAPJNXf
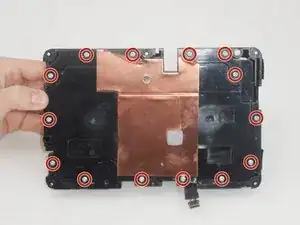
    • Use a Philips screwdriver to remove the fourteen 9 mm screws from the speaker housing cover.

    • Remove the speaker housing cover.

  11. WwAUqQ6sQHYxdcRu
    WwAUqQ6sQHYxdcRu
    o42NUYDdtxgVAHjR
    • Use a Phillips screwdriver to remove the four 9 mm screws that secure the driver.

    • Repeat this step for the driver on the opposite side.

  12. u5qCCuvBLTSKKsGh
    u5qCCuvBLTSKKsGh
    XAfEHxAN1ZKkCnct
    • Insert a spudger between the driver and the housing and gently pry it away.

    • A considerable amount of force may be required at this step due to the adhesive holding the speaker to the housing.

  13. CGDdwpHb4NbGOBJY
    • Lift the driver cable out from the retention clips.

  14. jOOuYTeLLPZRNg41
    jOOuYTeLLPZRNg41
    PhptCMmCymdV24fb
    • Gently peel the motherboard connector away from the speaker housing.

    • The cable is held down with adhesive. Be gentle when lifting it to avoid damage.

  15. XOEcx6RdZ2XP2Eig
    • Push the speaker connector through the speaker housing.

    • The rubber gromet that holds the cable may be difficult to remove. Use a gentle pushing and pulling motion to easily remove it.

  16. TH3KIhIP2XNlCMIO
    TH3KIhIP2XNlCMIO
    bTBqDkgDnu5fTZA2
    • Remove the drivers.

Conclusion

To reassemble your device, follow these instructions in reverse order.

Brian Le

Member since: 14/02/24

675 Reputation

0 comments