Introduction
This guide is the detailed process of how to remove broken or damaged buttons on the Benoncool Gamepad for Nintendo Switch.
The Benoncool Gamepad has many buttons that all operate in the same manner. The most common buttons that break on these types of controllers are the action buttons as they seem to be the most frequently used buttons in gameplay. A broken or malfunctioning button is rather easy to identify when not getting the correct response or no response at all when pressing the button in a game. Replacing the button or the effected rubber conductive pad will likely fix the issue.
-
-
Use the plastic opening tool to remove the blue plastic grips from the sides of the controller.
-
-
-
Use the Phillips #0 screwdriver to remove the seven 5mm screws from the back of the controller.
-
-
-
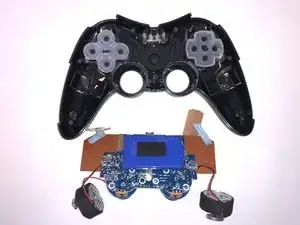
Gently separate the two halves of the controller.
-
Be sure to slide the small circuit boards out of the covers to be able to separate the two halves
-
-
-
Use the Phillips #0 screwdriver to remove the two 3.5mm screws holding the circuit board in place.
-
-
-
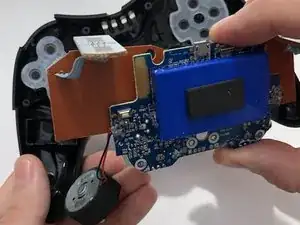
Lift the motherboard from the back case with the vibration motors and button boards attached.
-
-
-
After both the rubber conductor pad and the button is removed, it is crucial that an inspection be done of both components to confirm the issue.
-
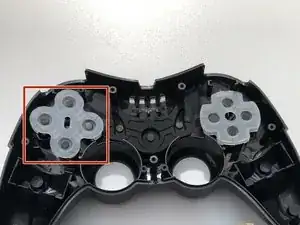
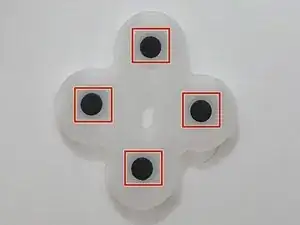
The rubber conductive pad should be inspected for rips, tears, or loss of the black conductive material in the 4 locations the buttons would press them to the circuit board
-
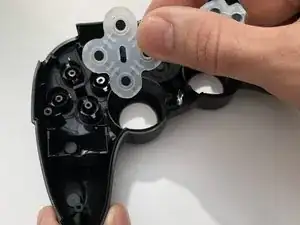
The troubled button should be removed and inspected for damage, It should be noted each button has 4 plastic splines that guide it into place in the controllers cover.
-
The button has a cylindrical piece in the center that presses against the rubber conductive pad.
-
After identifying and replacing the damaged component remember to confirm the button layout prior to reassembly.
-
-
-
The final check is to inspect the components on the action button circuitry. The right side of the controller has the four circular components for the action buttons. Ensure the circuitry is not damaged.
-


To reassemble your device, follow these instructions in reverse order.
This sentence in intro is awkward and should be revised: “When the battery is no longer able to be recharged this does not mean that the the controller itself is bad, it simply means that a new, fresh battery is needed. “
John Lamothe -