Introduction
Use this guide to replace the front or top body panels of your EOS 6D or to access damaged internal components.
-
-
Open the battery door on the bottom of the camera.
-
Use your thumb to slide the small black tab on the inside of the battery door up and pull the door off the camera.
-
-
-
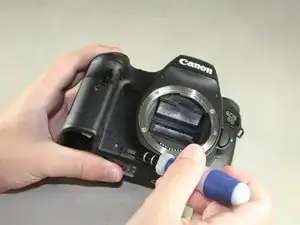
Slide your fingernail or the flat end of the spudger underneath the rubber covering and gently peel it off all sides of the camera.
-
-
-
Open the covers to the HDMI/AV/MIC ports on the side of the camera by gently pulling outward on the bottom of the covers.
-
Rotate the covers to the side so that you can see the connection ports inside.
-
Remove the following screws:
-
Two silver 5mm Phillips #00
-
One black 6mm Phillips #00
-
-
-
Remove the cover to the HDMI/AV/MIC ports by gently lifting the tab on the bottom edge of the camera.
-
-
-
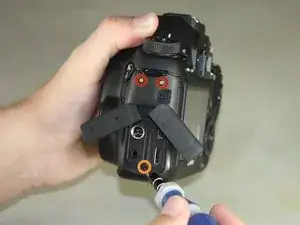
Rotate your camera so the bottom side is facing you.
-
Remove the following screws:
-
One 6mm Phillips #00
-
Two 3mm Phillips #00
-
-
-
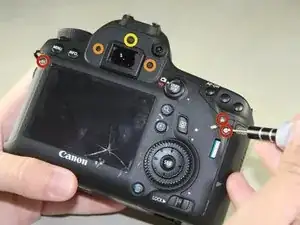
Rotate your camera so the back is facing you.
-
Remove the following screws:
-
Three silver 5mm Phillips #00
-
Two black 6mm Phillips #00
-
One black 4mm Phillips #00
-
-
-
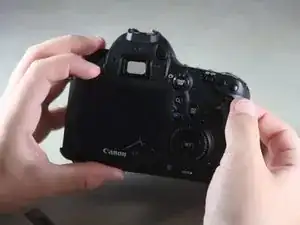
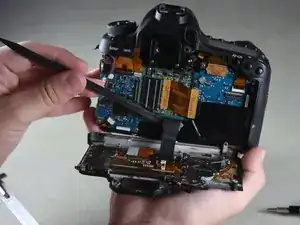
Carefully use your fingers to tilt the back panel downward to about a 90 degree angle.
-
Use the flat end of the spudger to gently pry off the ribbon wire from the inside of the camera.
-
-
-
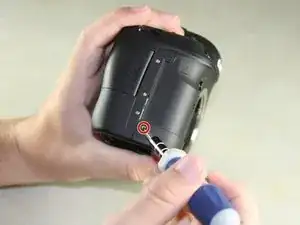
Rotate the camera so the side with the SD card slot is facing you.
-
Remove the 4mm Phillips #00 screw from the bottom edge of this side.
-
-
-
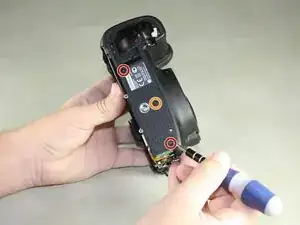
Rotate the camera so the bottom is facing you.
-
Remove the following screws:
-
Two 8mm Phillips #00
-
One 4mm Phillips #00
-
-
-
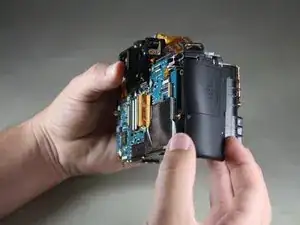
Remove the bottom panel from the camera by using your fingers to pull outward on the tab inside the battery compartment.
-
-
-
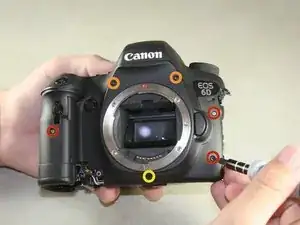
Rotate the camera so the front is facing you.
-
Remove the following screws:
-
Three 5mm Phillips #00
-
Two 6mm Phillips #00
-
One 4mm Phillips #00
-
-
-
Rotate the camera so the side with the SD card slot is facing you.
-
Remove the following screws:
-
One 4mm fine-thread Phillips #00
-
Two 4mm coarse-thread Phillips #00
-
-
-
Slowly fold the front panel to the right without pulling it away from the right edge of the camera.
-
-
-
Remove the 4mm Phillips #00 screw on the inside of the front panel to separate the panel from the speaker wire.
-
-
-
Remove the 4mm Phillips #00 screw from the inside of the top panel, below the shutter button.
-
-
-
Rotate the camera so the top is facing you.
-
Remove the 6mm Phillips #00 screw from next to the analog screen.
-
-
-
Rotate the camera so the back is facing you.
-
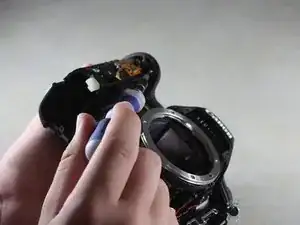
Remove the Phillips #00 screw from the viewfinder focus.
-
-
-
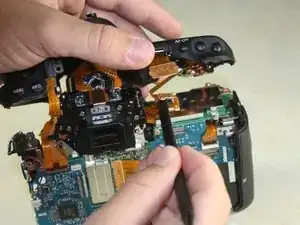
Slowly lift the top panel to about an inch above the body of the camera.
-
Carefully use the flat end of the spudger to detach the ribbon wire from the top of the camera.
-


To reassemble your device, follow these instructions in reverse order.
7 comments
Actually, it would be perfect to note the color of the screws throughout the manual. This would help to get it right!
But thanks anyway, you saved me!!
mrbakin -
In step 11 one of the red circles marks incorrect screw - should point the one near plate not the one in battery compartment (compare to step 6)
Agreed.
But thanks, apart from this minor error it was a great help and really clear. Cleaned the gunge out of the menu button and it now releases perfectly.
I found getting the ribbon cable back in (step 21) a bit difficult, combo wiggled and pushed it back in. Might recommend doing that one before the right one, and maybe before finally mounting the top cover.
Blakey -
My DSLR don't want to start after remount :(
dlirsoon -