
Introduction
This guide is designed to help you replace or upgrade the NVMe SSD in your Dell Inspirion 7586 2 in 1 laptop.
CPU: Intel Core i7-8565U 1.80 GHz
Chipset: Whiskey Lake
RAM: DDR4-16GB-2666MHz
SSD: SK hynix PCIe NVMe 512GB
GPU: NVIDIA GeForce MX150
OS: Windows 10 Pro
Before you begin this repair, turn off your laptop and unplug it from the charger.
Parts
-
-
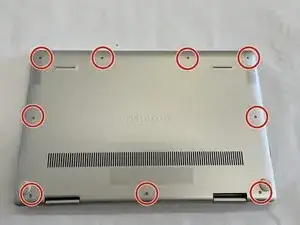
Flip the laptop over so the bottom is facing up.
-
Use a Phillips #00 screwdriver to remove nine screws from the back case.
-
Insert an opening tool or spudger in the seam between the back case and the body of the laptop.
-
Work your way around the perimeter of the laptop and release the clips that secure the back case.
-
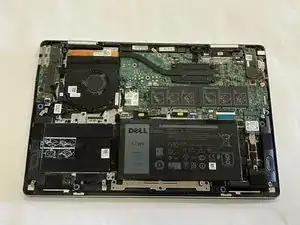
Remove the back case.
-
-
-
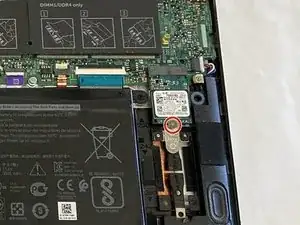
Align the tooth edge of the SSD with the indents on the drive socket and gently insert the replacement SSD.
-
Press down on the SSD so the screw hole and drive align.
-
Use a Phillips #00 screwdriver to replace the screw.
-


To reassemble your device, follow these instructions in reverse order.