Introduction

If the keyboard for your Dell Latitude 3189 is unresponsive or has broken keys, you may want to replace the keyboard.

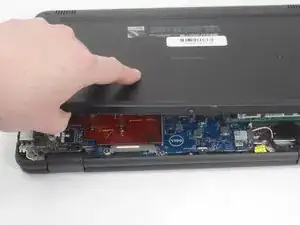
Before replacing the keyboard you will need to remove the base cover in order to access the push holes inside of the laptop.

The ribbon keyboard connector can damage easily, be careful when removing the ribbon cable as to not break the connector socket.

  1. JcYAqGXmrj5dIJLt
    JcYAqGXmrj5dIJLt
    QNnfKxAke6ZOaALy
    • Before beginning, power off and unplug the device.

    • Use a Phillips #0 screwdriver to loosen the seven captive screws that secure the lower case.

  2. dPphbD3G1ce2aVYc
    dPphbD3G1ce2aVYc
    FPFC2o41N1Pl6421
    qFBtPEYj4ClwOFgs
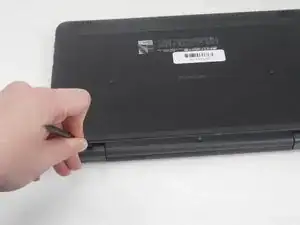
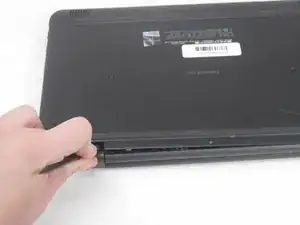
    • Insert a nylon spudger between the lower case and chassis at the two hinge spaces on the back side of the laptop and pry up the lower case.

    • Do not use metal items to pry the base cover off, like a screwdriver, as it could slip and damage internal components.

    • Avoid prying at the ports which could damage the ports.

  3. pobDUDqaJWFAt1SH
    pobDUDqaJWFAt1SH
    pcPorEVyIAFZEERI
    • Grip and pull the lower case up and away.

    • If you feel any significant resistance, double check that all of the screws are loosened.

  4. lFvtJ4vDOnjHT6Ph
    lFvtJ4vDOnjHT6Ph
    CCBg6y2YwGpmpMOj
    ZLetm4DOJDm2sBaJ
    • Before performing any operations within the laptop, unplug the battery.

    • Using the pull tab on the connector, pull the connector directly out of its motherboard port.

  5. RvNpdYQnFYkkqoLy
    RvNpdYQnFYkkqoLy
    uGYmewOnpoGMeJVc
    ZbMgOc2FpqCwPqlg
    • Flip up the black lock bar on the ZIF connector with a plastic spudger.

    • Make sure to only lift the flap and not the connector socket because the socket easily breaks off.

    • Gently pull the ribbon cable directly out of its socket.

    • This should require almost no force.

  6. yjFAg3u4ZRUSTUVc
    yjFAg3u4ZRUSTUVc
    XTRyLEhAblJHBnLS
    • Use a blunt tool to push through the two highlighted holes labeled "KB." This will dislodge the keyboard.

    • The keyboard will be removed from the opposite side.

  7. NSrTPLKgdNMyrWCI
    • From the front side of the laptop, pull the keyboard up and away.

    • Pulling the keyboard away will be undoing plastic clips and maybe require more force than you initially think. Slide opening picks around the perimeter to help disconnect the plastic clips.

Conclusion

To reassemble your device, follow these instructions in reverse order.

Bryan Pratt

Member since: 14/02/24

601 Reputation

0 comments