
Introduction
You can rely on this detailed manual as your go-to resource for comprehensive instructions on how to replace the fan in your laptop. Have you ever found yourself in an uncomfortable situation where your laptop seemed to transform into a veritable oven, emitting scorching heat that made it unbearable to touch as you diligently worked on your tasks? If you have endured the frustration of your laptop heating up to alarming levels, causing discomfort, and potentially affecting its performance, then you are not alone. Excessive heat can lead to a range of issues, from reduced processing speed to potential hardware damage.
By following the steps in this manual, you can proactively address this heat-related concern by replacing the fan in your laptop. A well-functioning fan is crucial for effective heat dissipation, ensuring that your laptop remains cool and comfortable to use even during extended work or gaming sessions. Moreover, it can help prolong the lifespan of your laptop by preventing overheating-related damage. So, with the help of this manual, you can regain control over your laptop's temperature and enjoy a more efficient and comfortable computing experience.
Tools
Parts
-
-
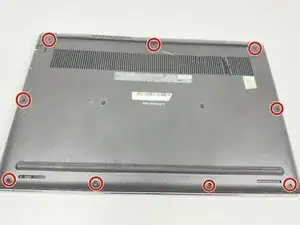
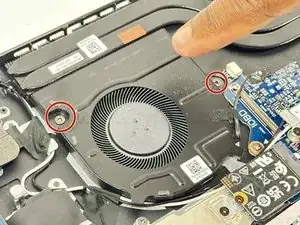
Loosen the nine screws 2mm Phillips #0 that secure the base cover to the assembly.
-
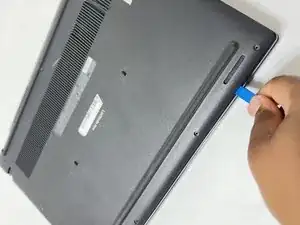
Using a plastic scribe, pry open the base cover starting from the recesses located in the indents near the hinges at the top edge of the base cover.
-
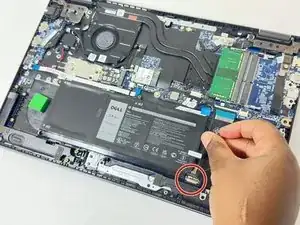
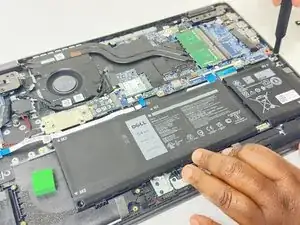
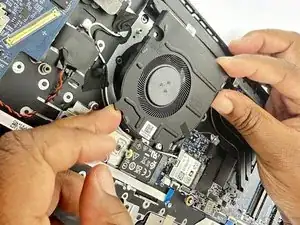
Carefully lift and remove the base cover.
-


To reassemble your device, follow these instructions in reverse order.