Introduction

Is your controller aiming moving on its own? Did your character start to run in other directions when you tries to run straight? You may be having analog stick drift on your PS5 controller.

This guide details how to repair the stick drift issue in a DualSense PlayStation 5 controller.

Like all controllers, PS5 controller drifting issues are caused by physical damage, simple wear, tear due to regular use, and gunk or grease (Yes, your sweaty hands), This guide details how to fix the PlayStation 5 DualSense Controller V2 stick drift. This guide only applies to controllers with gunk or grease that causes stick drift.

Yes, opening up a controller sounds like a drag, and it is much easier when you get a new one. However, repairing your controller not only saves you $70+ bucks but also reduces E-waste. Besides you don't need lots of knowledge to fix stick drift, my guide provided a step-by-step repair. Just follow my guide and your favorite controller can last a couple more years.

  1. CCGIPfwFsePnGXlx
    • This controller is the black version, but this guide applies to every CFI-ZCT1W model.

  2. Here is a video demonstrating how bad the controller stick drift was before the fix.
    • Here is a video demonstrating how bad the controller stick drift was before the fix.

  3. sPAgfLps1EpUFDZF
    sPAgfLps1EpUFDZF
    UOYAID5l63qbZBRq
    ZFwPRFawppvmdKL6
    • Disconnect and power down your controller before you begin.

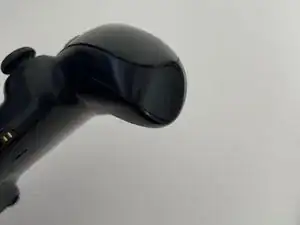
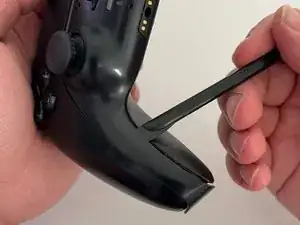
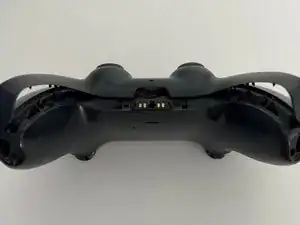
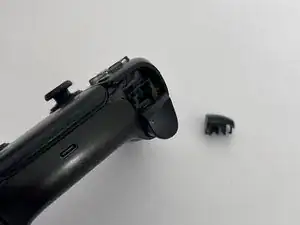
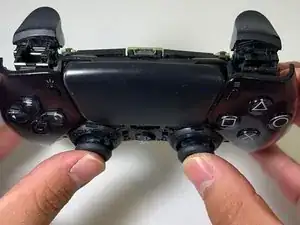
    • Insert an opening pick underneath the middle trim at the right bottom of the controller and pry it up to release the clips that secure it.

  4. FgYyItDEFKsrUa3k
    FgYyItDEFKsrUa3k
    6QgUFvwGIYHgK2xq
    • Slide a pick along the edge to release the clips securing it to the case.

  5. CDqOJuxhowc4LIVW
    CDqOJuxhowc4LIVW
    EWDKPSLiZLJX4F2T
    • Slide the pick along the lower-left edge release the clips.

  6. 1eshxEb6PmFvI4Dt
    • This is how the controller looks when all the clips are released.

  7. CRoShI5CPrUAKdtL
    CRoShI5CPrUAKdtL
    Hrjax1uZMpFJTloY
    je6VRilHMJYRNC66
    • Use your fingers to lift up the bottom edge of the middle trim.

    • Watch out for the two pieces that are hidden underneath the touchpad.

  8. e6iIELx2DPFPCmvA
    e6iIELx2DPFPCmvA
    TbdOjONsIgTWGH1x
    wPhsEWBTOSQprSlN
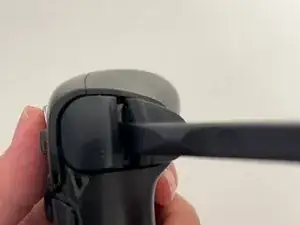
    • Insert the flat end of a spudger into the gap between L1 and L2.

    • Pry upward against L1 to remove the L1 button.

  9. Au2cDRORSc5cJ1BM
    Au2cDRORSc5cJ1BM
    ldfnOpcZmIFRmrZQ
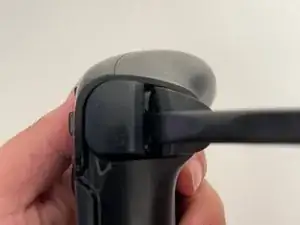
    • Insert the flat end of a spudger into the gap between R1 and R2.

    • Pry upward against the R1 to remove the R1 button.

  10. 6wI12HURrFSJWXYr
    6wI12HURrFSJWXYr
    mcOGMORS1VWXFtkT
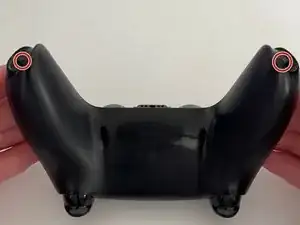
    • Use a Phillips screwdriver to remove the two 6.4 mm screws behind the L1 and R1 buttons, as well as the two 6.4 mm screws that secure the bottom corners of the lower case.

    • You will have a total of four 6.4 mm Phillips screws. Make sure not to lose any of them.

  11. KONclXZObrs3dmZN
    KONclXZObrs3dmZN
    ADmYN6AoaXpCDkKi
    43SHIpVXOLpvsnkN
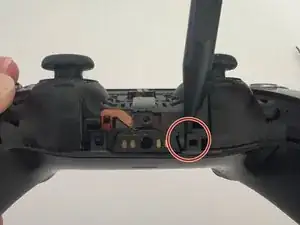
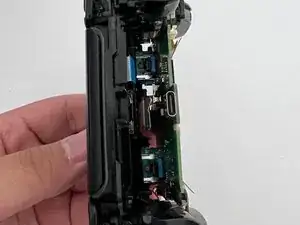
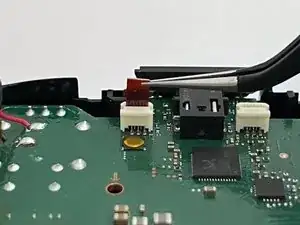
    • Use the pointed edge of a spudger to unclip the two clips on either side of the headset jack.

  12. 2ldAoDtIopBDe1qA
    2ldAoDtIopBDe1qA
    P1uJiKgErrIXoFxA
    • Slide the spudger along the edge to release the clips that secure the rear case.

  13. DJKCAviN2HPm3bSZ
    DJKCAviN2HPm3bSZ
    qGvLeNk2sZDHGmQN
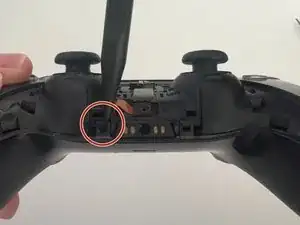
    • Same as the other side, slide the spudger along the edge to release the clips that secure the rear case.

  14. 2kFFTAgxGKoIOYYh
    • Remove the rear case.

  15. IUZ6IcsaVHbnYyR4
    IUZ6IcsaVHbnYyR4
    COoLdVMufsrhMsUP
    2qsgGDqObrpYcLS1
    • Use tweezers or your fingers to disconnect the battery from the motherboard.

    • To prevent damaging the wire, grip the white connector, not the wires.

  16. P2rbXONTUXtsATpj
    • Use tweezers to disconnect the upper and lower microphone cables.

    • Use the pull tabs to disconnect the cables. Don't pull on the cables themselves.

  17. PqBB6A4uVQwpkhF2
    PqBB6A4uVQwpkhF2
    5wLmsjCG6YWm6WMI
    FOnXNaABFGciD36O
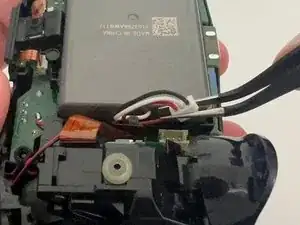
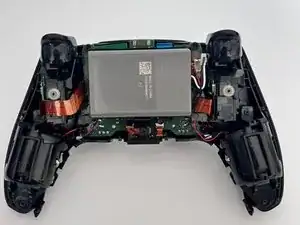
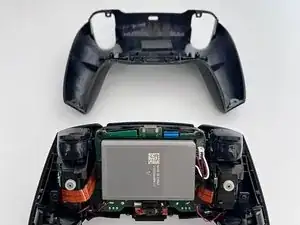
    • Use a Phillips screwdriver to remove the single 6.4 mm screw that secures the battery bracket.

    • Remove the battery bracket.

    • At this point, you will have a total of five 6.4 mm Phillips screws.

  18. 4rXgbbFxZItK1A2c
    4rXgbbFxZItK1A2c
    bpT5shPTqYNBSDYU
    fp3Y13XIFGrt6EBa
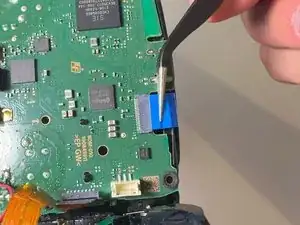
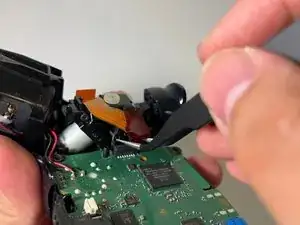
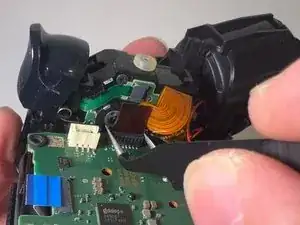
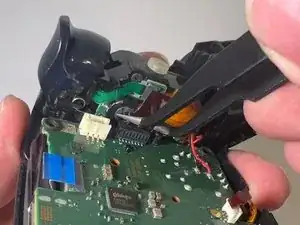
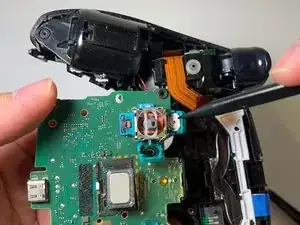
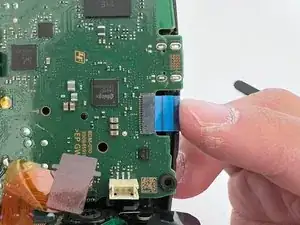
    • Use a pair of tweezers to grip the touchpad ribbon cable, and pull it out of the motherboard.

    • Use the pull tabs to disconnect the cables. Don't pull on the cables themselves.

  19. 5eu5KAZgSYc3EJiS
    5eu5KAZgSYc3EJiS
    pkypclnK64NULmJI
    5VWmEAFyNgllmPIx
    • Use a pair of tweezers to disconnect the right trigger ribbon cable.

    • Use the pull tab to disconnect the cable. Don't pull on the cable itself.

  20. 3UFnWSxcsuMRL1AN
    3UFnWSxcsuMRL1AN
    VHD2FFfrDrd5NFDa
    IJ5ymyL1bHssug4n
    • Use a pair of tweezers to disconnect the left trigger ribbon cable from the motherboard.

    • Use the pull tab to disconnect the cable. Don't pull on the cable itself.

  21. sBQk3RpTYPIkIQea
    • Make sure you have disconnected the four ribbon cables from the motherboard before moving on to the next step.

  22. pmFDJOSaPVW6Wt3M
    pmFDJOSaPVW6Wt3M
    LnaMO2nsGIkO2xIy
    THTV22DeYnlXsBSQ
    • Gently push the joysticks to separate the motherboard from the case.

    • The motherboard and the case are still connected through 4 soldered wires. Take care not to strain them.

  23. wPqHCkZOoUUvUFht
    wPqHCkZOoUUvUFht
    uUl2p6HIVmrPLgaN
    • Use your fingers to pull the joystick covers straight up and off.

  24. MAHHhPlGPv5stHb4
    MAHHhPlGPv5stHb4
    5IWIBQtFQhqE3aTF
    • Use a spudger to pry the drifting joystick potentiometer slots open.

    • Pry open the potentiometer slot gently or you will damage the slot.

  25. Zq2mXLmqNmtSchsb
    Zq2mXLmqNmtSchsb
    K3TylWMlftKKHX61
    • Use tweezers to remove the wiper.

    • Try to keep the slots down to about only 60o, completely prying it open will damage the slots and they will not be able to close.

  26. mjCCljBQKvsIvNjT
    mjCCljBQKvsIvNjT
    qbZ1sj2osmSX1XtM
    LJxrkly2ELBhmpsR
    • Repeat the previous step for the other potentiometer.

    • Try to keep the slots down to about only 60o, completely prying it open will damage the slots and they will not be able to close.

  27. thGLWJhs2UOUJgP1
    thGLWJhs2UOUJgP1
    IXpoIC6DXV11QPjO
    • Use a pair of tweezers to remove the wiper.

  28. IHOCpgHRTdPWPSwW
    IHOCpgHRTdPWPSwW
    PQYXgg6c1BJUaIAS
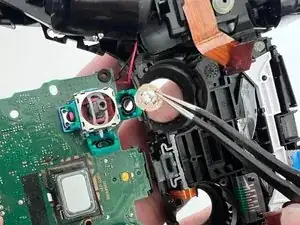
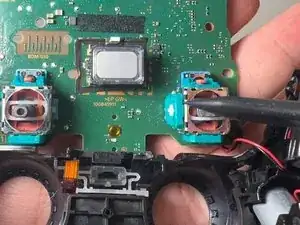
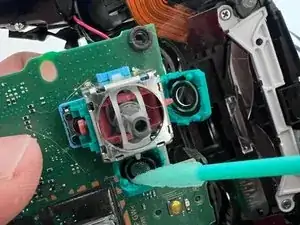
    • Dampen a cotton swab with high-concentration isopropyl alcohol.

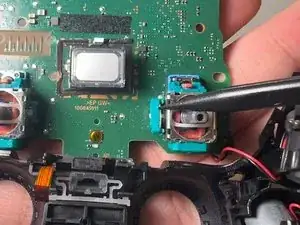
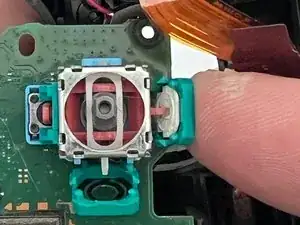
    • Flip the wiper to the other side and use the damp cotton swab to rub off any gunk or grease.

    • Repeat this step for the other wiper.

  29. fDG2YdUbqCXy2Kvo
    fDG2YdUbqCXy2Kvo
    L52iLt1qjj4rMjHo
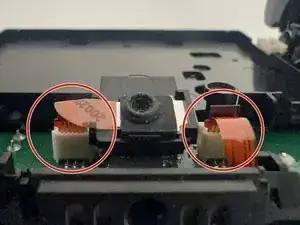
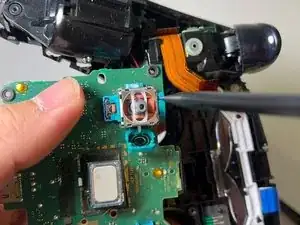
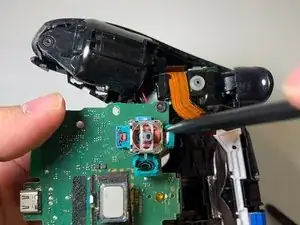
    • Use a cotton swab damp with high-concentration isopropyl alcohol clean the inside of both of the potentiometer slots.

  30. hsQPMq3YY3FvMaPQ
    hsQPMq3YY3FvMaPQ
    JCR4F6MIRFh5ZweP
    cYG4vZhdekmxZ25o
    • Put the cleaned wipers back into their respective potentiometer slots.

    • When reinstalling the wiper, make sure the curved prongs is at the top.

  31. x2BBApnVAgkKMWot
    x2BBApnVAgkKMWot
    OWMLaDnL3qhQPnns
    NLbNXmRuQCM2hkoC
    • The remainder of the guide details reassembly.

    • Use your finger to push and close each slot.

    • Make sure you hear a "click" when you close it.

  32. 2ElXnMTuRUZ5rfki
    2ElXnMTuRUZ5rfki
    OPeJxgaUv4UwH1jF
    • Reinstall the joystick covers.

  33. pSCIXUKpCWTvaDWY
    pSCIXUKpCWTvaDWY
    NUfMTM43QwjT2uTR
    F5NMfjSdBcKlOhEO
    • Put the motherboard back into the case.

    • Make sure these 4 cable are on top of the motherboard.

  34. OjabaeSY2KZKQLIL
    OjabaeSY2KZKQLIL
    mHcLBAHKe13YOGTi
    TWyiHDYEQdHjvjkm
    • Use tweezers to set the touchpad cable in the slot.

    • Use your finger to push it back in.

    • Push gently to prevent breaking the ribbon cable.

  35. xqmSFTeHARgMUmvK
    xqmSFTeHARgMUmvK
    IIVXJkuHPr1Arrbs
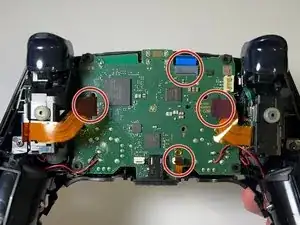
    • Use tweezers to put the trigger cable in the slot, then place the tweezer on top of the side of the cable and push it down.

  36. VQrT5EZYwG5NesTf
    VQrT5EZYwG5NesTf
    UpBfVNKgbCgVDInv
    • Use tweezers to put the other trigger cable in the slot, then place the tweezer on top of the cable and push it down

  37. s1HQGtqWFmmDAhhW
    s1HQGtqWFmmDAhhW
    onJWUyBnFIvDRYLm
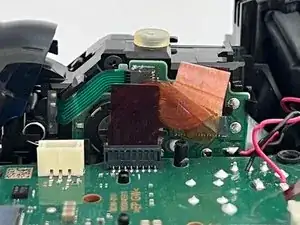
    • Use a pair of tweezer to insert the lower microphone cable the cable into its slot.

    • Push the cable down.

  38. InhNNVnIboxjfDyT
    InhNNVnIboxjfDyT
    ovAZJLgGJiP4NVa3
    • Use a Phillips screwdriver to reinstall the 6.4 mm screw that secures the battery bracket.

  39. 1BPBZH5J2SkUsSOP
    • Insert the upper microphone cable.

  40. 6lYLNXPgofsUqBee
    6lYLNXPgofsUqBee
    XcXdUGY1ZiY3wTNk
    • Plug in the battery cable.

  41. IYG1XNlpSOXPhaS2
    IYG1XNlpSOXPhaS2
    W2VXX6ZW411SViEe
    LLV4aRvpYDVgwkSS
    • Assemble the rear case.

  42. qF3e6rCaLCymReZN
    qF3e6rCaLCymReZN
    2qfNtmUpqwXCDJOJ
    • Use a Phillips screwdriver to install the two 6.4 mm screws behind the L1 and R1 buttons, as well as the two 6.4 mm screws that secure the bottom corners of the lower case.

  43. syWUAG3xHTQ564jF
    syWUAG3xHTQ564jF
    rkts1eF1XXLwxg3A
    • Put the L1 button cover back in.

    • Press it down and until you hear a *click*.

  44. hmbTByGDLWrnFgNO
    hmbTByGDLWrnFgNO
    EGpH1gtOnHBIetpL
    • Put the R1 button cover back in.

    • Press it down and until you hear a *click*.

  45. UJUIPWBWjcBKDBsH
    UJUIPWBWjcBKDBsH
    Tp43vvnoWGJVG2Kd
    • Reinstall the middle trim.

    • These two highlighted piecse need to go under the touchpad.

  46. Here's the testing again; see the difference?
    • Here's the testing again; see the difference?

Conclusion

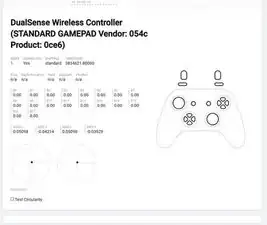
If you are still having problems after following all the steps in this guide, your controller probably has another issue.

Please check out other iFixit repair guides, such as replacing the entire Joystick.

Hope you find this guide helpful and may your controllers last forever!

Alvin2325

Member since: 20/03/24

613 Reputation

0 comments