Introduction

Use this guide to remove and replace the battery in a Google Pixel 5a. If you are experiencing a reduced battery life on your Google Pixel 5a you may need to replace the battery. The battery in this budget smartphone may need to be replaced after extended use. Please properly dispose of the old battery.

Before starting the guide turn off your device.


  1. KNB2YOIMP4O1XEMo
    KNB2YOIMP4O1XEMo
    LRIMXKA2Ms6qu1Gb
    IcRxLgADgPoEsiKl
    • Shut down the device before starting screen removal.

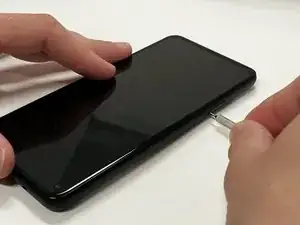
    • Insert a paper clip or SIM card removal tool into the SIM card tray hole.

    • Apply a small amount of pressure until the tray pops out.

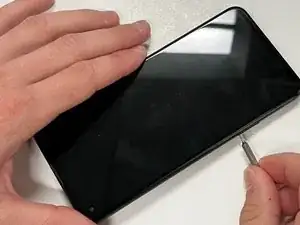
    • Slide the SIM card tray out of your Google Pixel 5a.

  2. XdD2UH4ceEjCrAmM
    XdD2UH4ceEjCrAmM
    xmPj2ImqlOQWLmOy
    • Pry the screen off of your device using an opening tool around all four sides.

  3. d3HASI1tTITcZR2i
    d3HASI1tTITcZR2i
    QT3mbuM2Lq6G3ooQ
    2a4wUkMIIDJNkNjp
    • Remove the 4 mm screw using a T4 Torx screwdriver.

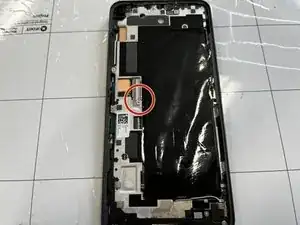
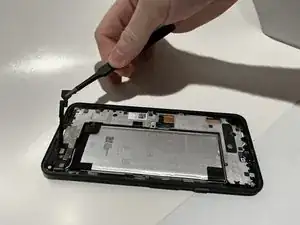
    • Disconnect the ribbon cable holding the screen in place.

    • Remove the screen from the rest of the phone.

  4. DZZ4NmpjLWBRJkCN
    DZZ4NmpjLWBRJkCN
    yOAXElSbkqSnNEZZ
    u6Js52klXo3kxqLW
    • Peel back the black plastic film covering the battery.

  5. C2CAlgNJSReEDuvw
    C2CAlgNJSReEDuvw
    N5PbtxunRTFSvsTo
    • Use a pair of tweezers to remove the black plastic cover.

  6. aInKjCUdcCgTHyOH
    aInKjCUdcCgTHyOH
    5jdLekpmVZyZRgPu
    fUAELCOMILvlOEv1
    • Use a spudger to peel back the protective tape covering two screws.

  7. LbgwVeC51EhP26Qy
    LbgwVeC51EhP26Qy
    dxWW3SFJxhgy3yRN
    A1WTEEvC12tu6l1V
    • Using a T4 screwdriver, remove the six 4 mm screws.

    • Using a T4 screwdriver, remove the two 3 mm screws.

    • Using a T4 screwdriver, remove the 5 mm screw.

  8. rmIcms4V3LLoTul5
    • Using a T4 screwdriver, remove the single 1 mm screw.

  9. AJ3vmiTjIJ3GiexS
    AJ3vmiTjIJ3GiexS
    A1W3mSjEALkIJLYw
    • Place a spudger under the metal bracket that covers the charging port.

    • Pry the metal bracket upwards, and remove it from the phone.

  10. IG4pKcT2Swlf3xgs
    IG4pKcT2Swlf3xgs
    eeCtDKdUMCUj5IIx
    ReGKOwfmbsjoZOIB
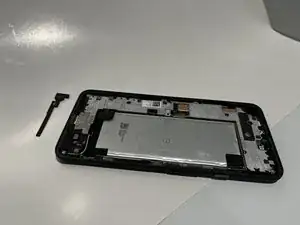
    • Place an opening tool under the midframe.

    • Pry the midframe up, and remove it from the phone.

  11. tdsPJipbimSFJoZn
    tdsPJipbimSFJoZn
    AN4ETcoDc5ZGGLbw
    cnc5JPtqTRgpFOnY
    • Place a spudger under the battery connector and pry upward.

  12. LemvWWrV3qCUSAoT
    LemvWWrV3qCUSAoT
    BBlKwOAEDT1IeGMW
    fykAW5NwFFpbljwP
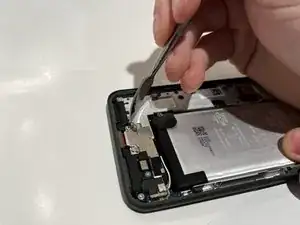
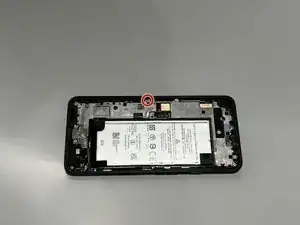
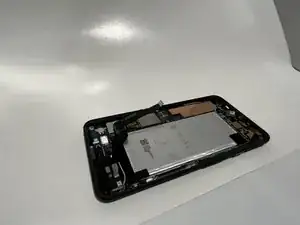
    • Carefully place a spudger under the battery and slowly pry upward.

    • Never use a metal spudger to remove a battery. Metal spudgers can puncture a battery, potentially causing a fire. Use an ESD-safe tool instead, such as an opening tool or nylon spudger.

    • Slowly work the spudger around the battery until loose.

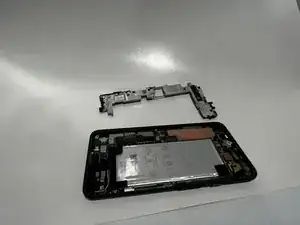
    • Remove the battery from the phone.

Conclusion

To reassemble your device, follow these instructions in reverse order.

Parker Woods

Member since: 08/02/22

562 Reputation

0 comments