
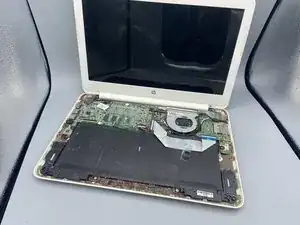
Introduction
The motherboard acts as the main circuit board of the device. Without it, the Chromebook will not function at all. For this guide, ensure that you have powered off the device beforehand. Additionally ensure you are working on a flat, dry surface as the components of the device are fragile and could short-circuit.
-
-
Begin by turning the Chromebook onto its back.
-
Remove the 15 screws with a Phillips #0 screwdriver.
-
-
-
Remove the keyboard from the base plate with an opening pick to pry it open from both sides of the keyboard.
-
-
-
Gently disconnect the battery's motherboard connection by pinching the white attachment and pulling the plug directly out of the port.
-
-
-
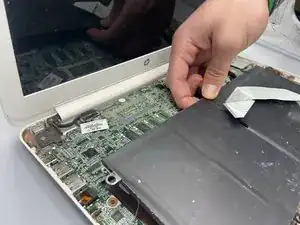
Before removing the battery, gently lift the white ribbon cable taped to the battery.
-
Gently pull up from the back of the battery to remove it.
-
-
-
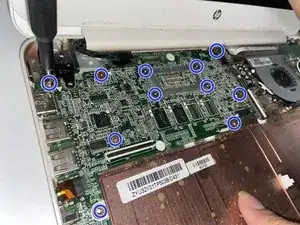
Remove the five screws attached to the connector plate.
-
Remove the monitor connector by lifting it gently upward.
-
-
-
Remove the antenna cables on the right side of the motherboard.
-
Carefully lift the motherboard up to remove it. Use a spudger for ease.
-


To reassemble your device, follow these instructions in reverse order.