Introduction

Before beginning, make sure you discharge any static electricity stored in your hands by either touching a metal object (preferably grounded) or using the anti-static wrist strap.

  1. Yo3raqaABcuBwMeA
    Yo3raqaABcuBwMeA
    Ng5wDBXKL14likWP
    • Make sure the tablet is powered off before beginning.

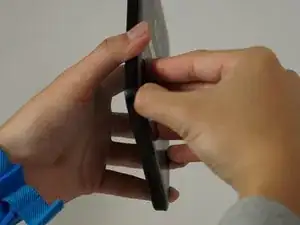
    • Gently run the plastic opening tool or your fingernails around the tablet to pry the Back Cover from the tablet.

  2. ZHFvwcWOKcuXJ23P
    ZHFvwcWOKcuXJ23P
    OwHPrss1d3KJ5GIQ
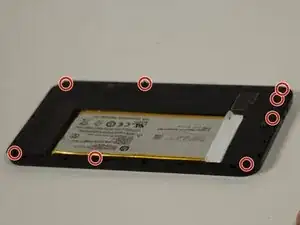
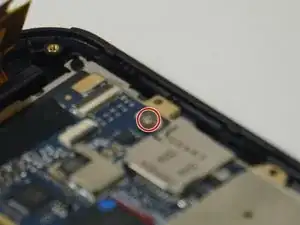
    • Remove the eight 5 mm Phillips 000 screws.

    • Gently run the plastic opening tool around the seam to pry the mid back cover from the tablet.

  3. 4CvsYcdeeiiEKFrs
    4CvsYcdeeiiEKFrs
    EkTLMd4jEMERthRI
    • Using tweezers, gently pull the battery connector towards the battery to remove it from the System Board.

    • Pull the blue tabs (Not Shown) out from the tablet at an angle to remove the tape underneath the Battery.

    • If you broke both tabs, scrape the tape and Battery off.

    • Scraping off the Battery will damage it. If you are replacing another part, leave the Battery on the display panel.

    Bonjour,

    j'ai suivi la procédure pour remplacer la batterie, sans problème.

    Cependant, la nouvelle batterie ne se recharge pas. J'ai changé de câble et de chargeur au cas où le problème viendrait de là mais sans succès. De plus, quand je branche la tablette sur le chargeur, elle indique bien être connectée au secteur mais sans charge de la batterie.

    Quand je consulte le Bios, je vois que le numéro de série de batterie affiché est celui de l'ancienne batterie.

    Y aurait-il une action à entreprendre à ce niveau ?

    En vous remerciant par avance pour l'aide que vous pourriez m'apporter

    Philippe

    Jacquemin Philippe -

  4. BARXGquWEDvmxjDX
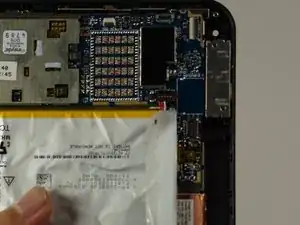
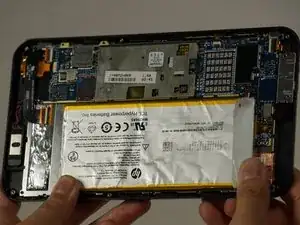
    • Disconnect the battery from the motherboard, but leave the battery on the display panel (unless you have already taken it off).

    • Disconnect the motherboard from the rear-facing camera, the front-facing camera, the antenna, the power button board, the screen, and the display panel using your spudger.

    • The cable connected to the display is adhered to the panel, so be careful when removing the cable (like most things here).

    • If you are inexperienced with disconnecting everything, "Recognizing and Disconnecting Cable Connectors" is a helpful ifixit guide.

  5. vE4o6XKOr1arWONt
    vE4o6XKOr1arWONt
    oOGSbJKVmJg55pN1
    • Remove the two 2 mm Phillips 000 screws from the motherboard.

  6. 6CVrJeXYrwVGlFXJ
    6CVrJeXYrwVGlFXJ
    qagNtLcx1aqRIFV2
    • Once unscrewed, the motherboard separates from the rest of the device.

    • The speaker is soldered to the motherboard, but it comes off easily.

    • Forced separation may result in a damaged motherboard and/or personal injury.

Conclusion

To reassemble your device, follow these instructions in reverse order.

Justin Schnorf

Member since: 03/10/16

252 Reputation

0 comments