Introduction

Use this guide when your PlayStation Dual Sense V1 Controller experiences stick drift. Stick drift is when an in-game character or object makes an involuntary move on the screen even when the joysticks are not moved. This can disrupt games and cause frustration for users.

For more information on what causes stick drift in PlayStation Dual Sense V1 Controllers, read this tech news article that discusses the causes.

Note that this guide details only how to fix stick drift for the PlayStation Dual Sense V1 Controller for PlayStation 5. This is not to be confused with the Dualshock 4 Controller for PlayStation 4.

Before starting, make sure that your controller is powered off completely.

This guide will give instructions to users on how to properly access the inside of their controller. This is used to locate the areas of the joysticks that are covered and use 99.8% isopropyl alcohol to clean around these dirty areas. The alcohol works to break down any materials that are causing the joysticks to make unwanted movements.

This guide does not instruct users on how to fix other issues that cause stick drift such as internal issues and broken joysticks. For other information on repairs that may potentially fix stick drift in your Dual Sense V1 Controller, see the DualSense Controller V1 Repair and DualSense Joystick Replacement pages.

  1. 6AGjlQlMrKhLdEYG
    6AGjlQlMrKhLdEYG
    G1JYAROMtqAIUVC5
    kG5k2IbrSdW1DYaC
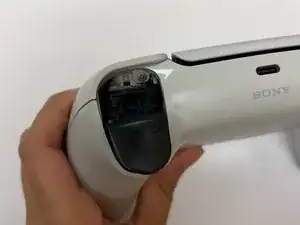
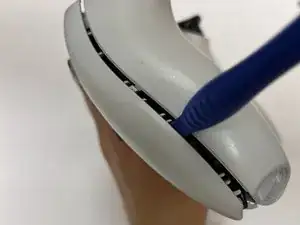
    • Insert an opening tool into the bottom right corner of the controller.

    • Lift upwards with the opening tool.

    • Continue using the opening tool to pry up the inner sides of the black rim.

    • Repeat on the opposite side.

  2. IUZWqnKRWrt3EyAb
    IUZWqnKRWrt3EyAb
    jScJx4Oqekw1MuxD
    RfFHRVP2mij6B6wS
    • Lift the black cover upwards to remove.

  3. 4v6FW1yS4F5Taaac
    4v6FW1yS4F5Taaac
    4MnsW53uTEOMV6FO
    • Insert the opening tool below the L1 button and pry the button away from the controller.

  4. SiNhmVYNGRMCwrGf
    SiNhmVYNGRMCwrGf
    cOqaYO6xZPSVMZQu
    • Insert the opening tool below the R1 button and pry the button away from the controller.

  5. XOQysw54fVeXNXtZ
    XOQysw54fVeXNXtZ
    GFcAk2YLKa2YDPcY
    • Detach the two middle clips using the opening tool or your fingers.

  6. DrxygS6AtQWAandw
    DrxygS6AtQWAandw
    lTJuebyjNWIAncZx
    • Remove the top right and left 6.4 mm screws using a Phillips #00 screwdriver.

  7. jdDNFfNSMbGKZUqS
    jdDNFfNSMbGKZUqS
    x14MOsYvcpRNAdTQ
    • Remove the bottom right and left 6.4 mm screws using a Phillips #00 screwdriver.

  8. lXQlxvE3ZFFe1S5H
    lXQlxvE3ZFFe1S5H
    cYWVuCRKHHnTfP6g
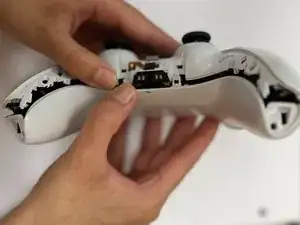
    • Insert the opening tool in between the sides to open the case.

  9. CJiTfmGZJuGoAeiW
    CJiTfmGZJuGoAeiW
    WOYTYGdCpEaWGVZl
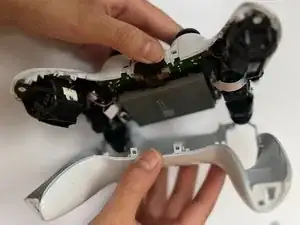
    • With both hands, pull apart the white bottom case to remove.

  10. 1o4SqKEbeu3ZL1HX
    1o4SqKEbeu3ZL1HX
    HhEKnhVs32djJ5uV
    RHp6sBTQR4tcligd
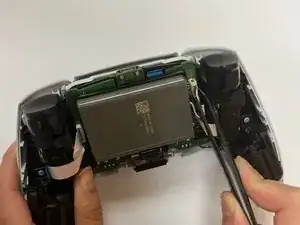
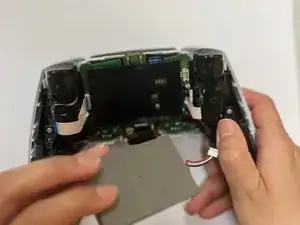
    • Using a pair of tweezers or your fingers, disconnect the battery from the motherboard.

  11. PykajZ3kTPBFHeX2
    PykajZ3kTPBFHeX2
    6IIulMhIQXAQA2XC
    EZnEwbPbhrRFbWHx
    • Use tweezers or your fingers to pull the orange ribbon.

    • Remove the 6.4 mm screw using a Phillips #00 screwdriver.

    • Lift the battery bracket.

  12. OmhuX3FOb2qKFeSe
    OmhuX3FOb2qKFeSe
    VsPL4pKXMTEVRXQh
    Wn33BbAOK4TwgkrG
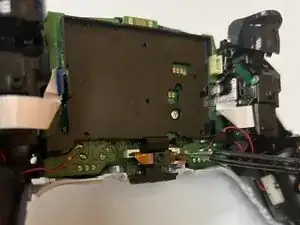
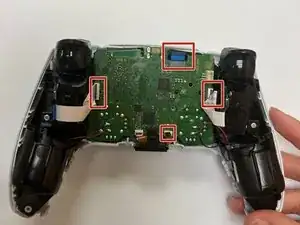
    • Use tweezers or your fingers to detach the four ribbons from the motherboard.

    Be ultra careful with this. The pins underneath the the right connect are extremely thin, like hairs. It is all too easy to completely demolish them with just a modest amount of pressure.

    Giorgio -

  13. TQvUavKQN66LOwKu
    TQvUavKQN66LOwKu
    LP21tEmrcQHf4cTV
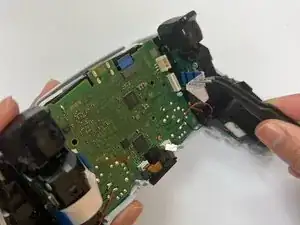
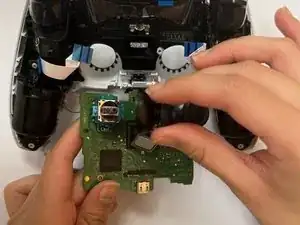
    • Guide the joysticks through the front case and lift the motherboard.

  14. CmvhvsAUM51nVBTG
    CmvhvsAUM51nVBTG
    tsxqJB21OQkiewBA
    XNw5Agh43LG5Po5l
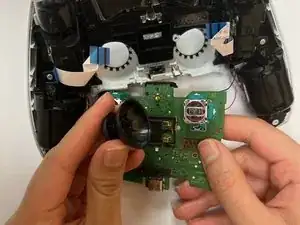
    • Remove the joystick covers by pulling straight off.

  15. 2nLyRX4HO1YOnGaX
    2nLyRX4HO1YOnGaX
    3p1tPgACQARICljp
    w6dUKtKCAJY2gDqn
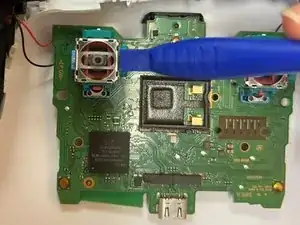
    • Use the opening tool to snap open the green tabs.

  16. h4kyaOIvgkTdlBKT
    h4kyaOIvgkTdlBKT
    hiXfdhbWWkXcJkMb
    raISIeT5ukREbgR5
    • Use tweezers to remove the wiper disks.

  17. fbpNAZEiQVWtsZYK
    fbpNAZEiQVWtsZYK
    3r1iBRCIJUWFvPJB
    • Using a cotton tip with 99.8% isopropyl alcohol, clean around the black rims of the green tabs and the wiper disks.

Conclusion

To reassemble your device, follow these instructions in reverse order.

Yadsari

Member since: 01/11/23

650 Reputation

6 comments

Just cleaning the carbon track on the potentiometer is not really a long term fix for stick drift. Better fixes would be to either replace the photometers or to replace the complete stick with a hall-effect joy stick.

David Fear -

Do you have a link?

Nora -

I did it, sadly cleaning wasn't enough. So I guess I'll have to replace something.

Riedweg Guillaume -

There is now a real fix for this, hall effect mod by Jun Zheng. About $25 per pair of mods. Check out the guys YouTube, link to his AliExpress store in his video description. Just use the guide here for disassembly. https://youtube.com/@junZeng-520?si=UYbf...

Alex Lao -

Upon reassembly I get the three orange blinks error. Research says there’s a ribbon connection error, is that right? I went through steps again and checked all connections, but no change. Have I short circuited something? Would replacing the potentiometer even fix it at this point? Have I damaged a ribbon? (There is no visible damage).

joe lewis -

I would be super careful when trying this I did it and ended up making the stick drift way worse. I'm almost certain it's my own stupidity but regardless I would look towards different options than to take apart the joystick.

MiniStab311 -