Introduction
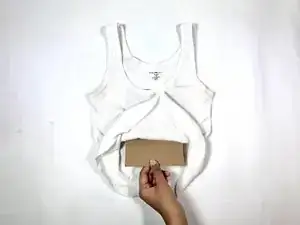
This guide will show the steps of sewing a sew-on patch onto a cotton tank-top. This process can also apply to t-shirts, sweatshirts, pants, and jackets of different materials.
If an iron patch is used, you can iron on the patch to hold the placement before sewing (Step 3).
For information on how to iron on a patch, click here.
Beginner ability to hand sew is required. For tips on threading a needle, click here.
For more information on how to sew the stitches used in this guide, click here.
Tools
-
-
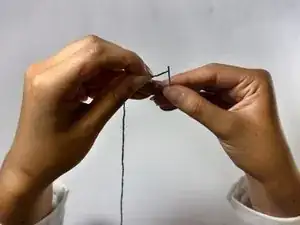
Push the thread through the eye of the needle.
-
To prevent fraying, twist the ends of the thread to tighten it.
-
-
-
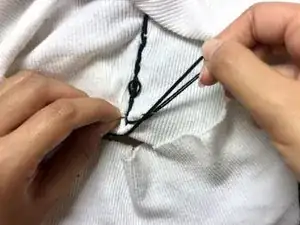
Insert the needle through the backside of the shirt and patch.
-
Pull the needle until the thread is taut.
-
Insert the needle through the outside of the shirt and patch, at the length you’d like your stitch to be.
-
Pull the needle again until the thread is taut.
-
-
-
On the backside, insert the needle at a similar distance to the previous stitch, away from the previous stitch.
-
Pull the needle until the thread is taut.
-
Insert the needle at the end of the previous stitch; this will be stitching backwards.
-
Pull the needle again until the thread is taut.
-
-
-
Lace the needle through the extra fabric of the shirt that is covered by the patch.
-
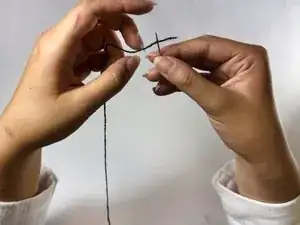
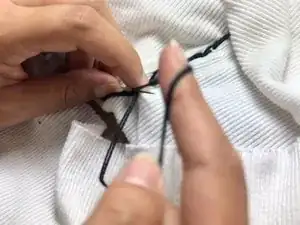
Hold both ends of your thread and rotate it around the needle twice.
-
Create a loop using the thread and pull your needle through the loop.
-
Pull until the knot has formed (no extra thread is leftover).
-
Cut the thread with 1-2 inches to spare.
-