Introduction

It happens to all of us- you walk a little too close to a desk corner, or maybe you snag your clothes on a tree branch, and you’ve torn your shirt or pants. Don’t fret; there is a way to fix this! This document will offer step-by-step instructions on how to hand-sew a patch onto your clothes using recycled fabric.

  1. xAmtiO1YbGSTYgFG
    xAmtiO1YbGSTYgFG
    McBnRIPlrVCYwELW
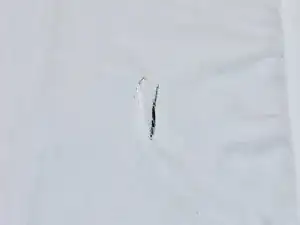
    • Use your scissors to cut just outside the perimeter of the hole to clean the edges.

    • Handle scissors safely, as they can be very sharp.

  2. M1OxNXnugkEpV3AU
    M1OxNXnugkEpV3AU
    PfYP2nGdCUiTvDPq
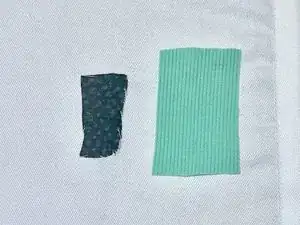
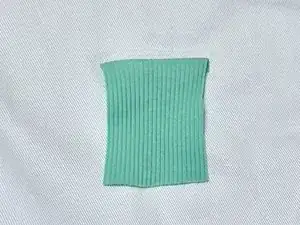
    • Decide what recycled fabric you would like to use as a patch and cut a rectangle just larger than the hole in your clothes.

    • If your hole is not a rectangle, design your patch accordingly to best fit your hole's shape. Generally, a non-stretch fabric will work the best for this project.

    • Lay your patch over the hole to cover it entirely and ensure that the patch covers all sides with seam allowance.

  3. 4nGcVPWFOSDicjxN
    4nGcVPWFOSDicjxN
    yCbVt6UuwTaVqIp5
    • Thread your needle by pulling one end of the thread through the eyes of the needle.

    • Pull your needle along the thread to the center and pull the thread straight so that the ends align.

  4. UjLRmZ4uSjGYNjlk
    UjLRmZ4uSjGYNjlk
    1cC5XDLBfcZUtBpO
    • Tie your thread at the end to secure your needle.

    • To tie a knot, make a loop with the thread, then wrap the under-thread over around the outside and pull it down through the center. Pull both ends tight.

  5. TgXSFqPZ3YCYnePT
    TgXSFqPZ3YCYnePT
    nc1c36lSSGwTB3HJ
    • Center and place the patch over the hole.

    • Secure the top edge of your patch using straight stitch, ensuring to pull any access thread through along with the needle.

    • A straight stitch is the most common sewing stitch. To preform a straight stitch, hold the fabric flat and insert the needle though the front side to the back side. Continue to your next stitch and insert it back through to the front side of the fabric following the straight progression of the line.

    • Make as many stitches as you need to reach the end of your patch, with your final needle position on the backside of your fabric.

  6. FGSvKvXLyDSNkyAH
    FGSvKvXLyDSNkyAH
    cG2IXIjAgmH6Jer3
    y1olDN6idQOXCxgK
    • Cut excess thread using your scissors, leaving plenty of room for a knot.

    • Securing your stitches with a knot anchors the thread so that the stitches cannot pull through.

    • Tie a double-knot in your thread.

    • Be careful not to tie it too tight or the fabric will bunch.

  7. KjLoEgtWBhKQ5ZQt
    KjLoEgtWBhKQ5ZQt
    SLl15dvJxYPJ5uJ6
    XxnPEwgMNGWEIYgg
    • Repeat the previous steps to secure the remaining edges of your patch.

    • Do not forget to tie each edge.

  8. jaNvG3Xcw2Ng6InF
    • Your final result should show all four sides of your patch sewn into your original fabric, with a seam allowance.

Conclusion

You're all finished! To remove a patch, carefully use scissors or a seam ripper to cut only the thread used to secure the patch to the base fabric. Be cautious not to cut the fabric.

Eli Hardy

Member since: 01/05/24

157 Reputation

0 comments