Introduction
This repair guide was authored by the iFixit staff and hasn’t been endorsed by Google. Learn more about our repair guides here.
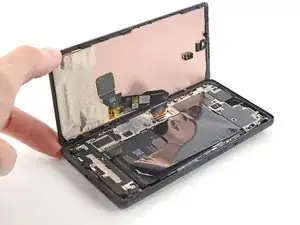
Use this guide to apply new adhesive in your Google Pixel 6a following a repair. Your Pixel's screen should be removed before following this procedure. Follow this guide to remove the screen if you haven't done so already.
Tools
Parts
-
-
Use the flat end of your spudger to scrape off as much adhesive from the frame as you can.
-
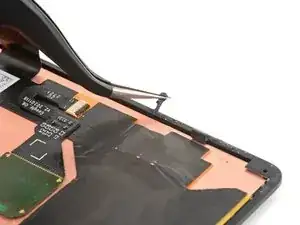
Use tweezers or your fingers to peel and remove any remaining adhesive.
-
Clean the perimeter of the frame with a small amount of highly-concentrated isopropyl alcohol (over 90%) and a lint-free or microfiber cloth.
-
-
-
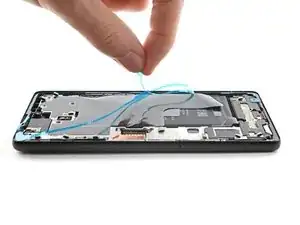
Before removing any liners, position the adhesive with the clear liner facing down over the frame to find the proper orientation.
-
-
-
Lay the adhesive onto the frame, starting with the bottom or top edge. Make small corrections as you go.
-
-
-
Use a spudger or your fingers to press along the perimeter of the adhesive and adhere it to the frame.
-
-
-
Check the front-facing camera hole on the replacement screen and remove any remaining protective liners in it.
-
Check the sensor cutout on the replacement screen and remove any remaining protector liners in it.
-
-
-
Return to your phone's guide and continue reassembly.
-
Finish this guide when your screen is installed and you're ready to seal the phone up.
-
-
-
Flip the screen over and lay it onto the frame.
-
Press along the perimeter of the screen to secure it.
-
12 comments
Yup. That worked, Don't rush it, and get a proper suction cup, but i have a perfectly repaired 6a, very happy, and thank you
Great advice, but there must be something I'm missing. Now my phone can't show the screen
Will this provide the same water resistance as the original screen?
Depends on how well you seat the adhesive, but generally speaking, it's very hard to get to the same level of water resistance. It will probably be somewhat resistant.
Water resistance should be treated as an additional protection, not as a feature. Do not submerge your electronic device in water by purpose. (even if it's factory new)


When I cleaned my frame I noticed I had dented 2 corners. I did not have my small file set so I had to improvise. I have a small set of electrical pliers with flat, ribbed sides and a 90 degree bend. I carefully ran these around the corners to get rid of the dents and used the ribbed edge to file them smooth. Would suggest getting a jewelers loop and a set of fine files if you at all suspect the frame/case may have a dent in the corner. Kind of obvious in hindsight - after all I dropped the thing and broke the glass, which got me here making this repair! My only other observation is to use plenty of alcohol - it only temporarily removes the stickiness of the adhesive so as it dries the adhesive re-sticks to the frame.
mark schneider -
fwiw - I found getting the original adhesive off the frame to be near impossible. But I pulled off any clumped up bits. Applying the new liner with adhesive went fine, as did placing the new glass and pressing around the edges to seal it. The seam looks as if brand new (i.e., it's not bigger or open because of too much adhesive). The phone is now in a case and it's not like I'm going swimming with it, so I'm confident the seal is adequate. Of course, YMMV.
Steve -
I found the adhesive very hard to remove. Tried Acertone, Methylated Spitits and Isopropyl Alcohol. I found the Metylated spirits worked best but it still took about 40 minutes to remove all of the adhesive.
Aaran Stent -
I couldn't remove all the adhesive, so just removed as much as I could. Placed the new adhesive on top and phone still seems to hold up well.
Leon -
Work one edge at a time.
Tilt phone so working edge is lowest.
Wet adhesive channel with isopropyl 90%. Tilt will keep it in channel. Wet, not soak.*
While wet, spudge from inner to outer edge, i.e. perpendicular to channel. Adhesive will pill up.
Repeat until adhesive pills are large enough to remove with tweezers or spudger.
When channel is mostly clean, finish by scraping spudger sideways into channel.
Repeat for all sides.
*Idea is that wetting will make adhesive less tacky on surface but remain tacky to the inside. Resulting pills are easier to remove because of the resulting structure
Andrew Olney -
I found tearing a little bit of the alcohol wipe, rolling it into a ball and using the pin head tweezers to rub it along the glue line quite vigorously helped break up the adhesive up.
Richard Collins -