Introduction

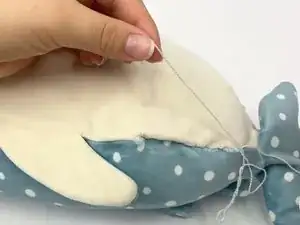
If your plushie or stuffed animal is looking a little floppy or lopsided it may be due to loss of stuffing from repetitive usage. Use this guide to replace the stuffing and get your plushie friend looking good as new. This procedure will work for most stuffed animals and plushies.

Stuffing is an important aspect of a plushie or stuffed animal as it helps maintain its shape and design. It also brings life and character into the toy.

Before using this guide, make sure your plushie doesn't need a quick re-fluffing. Quite often a plushie might fall flat due to normal use but can easily be fluffed back to its normal state without needing to replace its stuffing.

Steps 2, 7, and 9 require the handling of sharp objects. Please ensure proper handling of these objects to ensure no injuries.

  1. DaYe2aSV1bfxOexv
    • Choose an area to open the seam of the plushie.

    • Choose an area where the new stitches will not be as noticeable, such as on an underside or another area that will not be seen.

  2. Rd4Fm1MGD11vgDCd
    Rd4Fm1MGD11vgDCd
    dvuEvuwROvA4flFw
    EuTdFVWrRTSYJUNU
    • Partially unpick the seam using a seam ripper or pair of scissors (about 2 inches).

    • Be sure to place hands carefully and away from the path of the seam ripper to ensure no injures.

  3. QmMOLRRR1YJXLIdw
    QmMOLRRR1YJXLIdw
    rJtcveO1JsTjCbwV
    • Remove all of the old stuffing from the plushie.

  4. xvlyg2jXWjKxThi2
    xvlyg2jXWjKxThi2
    CwXGRVBBMXN3J2BE
    MiTAjY4TDwv5JWHI
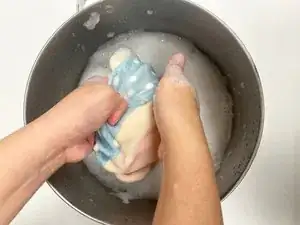
    • Fill a sink or bowl with warm water and light detergent.

    • Gently hand wash your plushie.

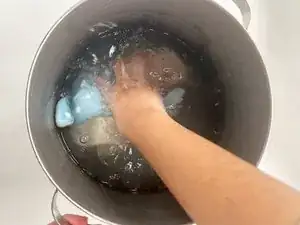
    • Drain and replace the container with clean and warm water.

    • Rinse off the plushie and wring it until it is no longer dripping.

  5. xPHGDVBwUKkTgJVv
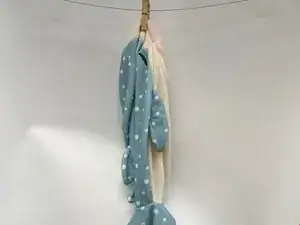
    • Hang dry the plushie using a hanger or clothesline until completely dry.

    • Machine drying can damage or burn the fabric of the plushie

  6. FUvRpKhwpY4OoFs5
    FUvRpKhwpY4OoFs5
    uVp62BjoKqQHyfAq
    LEhVuHUyYGJY4PfL
    • Once dry, fill the plushie with new stuffing.

    • Stuffing the plushie little by little ensures the whole plushie gets re-stuffed properly and evenly.

  7. rTB2WWPe1vCZUPto
    rTB2WWPe1vCZUPto
    EGXPNoaXMTbZ3AUG
    HSiN5gHP3CVKD15g
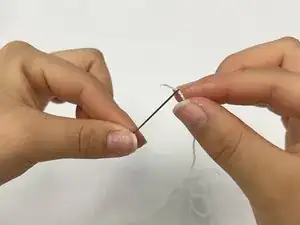
    • Pull the thread through the eye of the needle.

    • Create a knot at the end of the thread.

  8. Pco1NCVbhjSBrPvd
    • Fold the fabric of the opening (about 1 cm) inward to create two folds.

  9. CqWkiKvILSXpaCGg
    CqWkiKvILSXpaCGg
    fkFKUfhQXAIWdo5m
    bKcyQK3FSLYwOruF
    • Insert the needle through the inside edge of the folded fabric

    • Make a stitch in the inside fold and pull the thread through.

    • Insert the needle on the other fold and make a stitch

    • Pull the thread through and alternate stitches until you reach the other side of the opening.

    • Take your time and carefully place your hands in a safe position when inserting the needle into the fabric. This can prevent injures.

  10. 4BdDRJGUxdlHWkId
    4BdDRJGUxdlHWkId
    ENlDMnuwbFOMXK63
    11En2twRoKBYHcbP
    • Thread the needle through the inside stitches to loop and knot the end of the thread.

    • Repeat several times to secure the stitch.

  11. WFiYoSOQqViDmemS
    WFiYoSOQqViDmemS
    eIXPoVHoxdoeRpTW
    • Cut the excess thread with scissors.

  12. h2FA1BklQZtOMrvB
    • Enjoy your renewed plushie!

Conclusion

Your plushie is now looking almost brand new!

Sally Lee

Member since: 01/02/24

205 Reputation

0 comments