Introduction
In this guide, you will learn how to remove and replace a hard drive for an IBM ThinkPad T30 laptop. The laptop comes with an IDE / PATA Hard disk drive that is either 20/40/60GB and is easy to remove only using a few tools
-
-
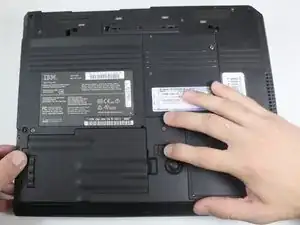
Flip the ThinkPad upside down with the bottom facing you.
-
Slide the latch to the right into the unlock position.
-
While holding the latch in the unlock position, lift the battery out with your other hand.
-
-
-
Flip to the back of the Thinkpad.
-
Remove the single 11 mm screw using the Phillips #0 screwdriver.
-
-
-
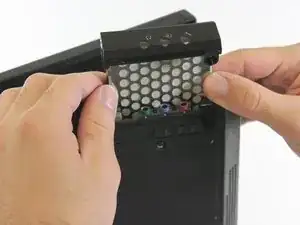
Flip the Thinkpad on its side to get a better view of the hard drive.
-
Push on the lower edge of the hard drive cover to detach the hard drive from the Thinkpad.
-
Once you have detached the hard drive from the Thinkpad, slide the hard drive out of the device.
-
-
-
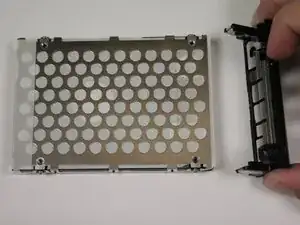
Using the plastic tool, remove the black plastic cover from the main body of the hard drive.
-
Place the plastic tool at the ends of the plastic cover to detach it from the hard drive.
-
-
-
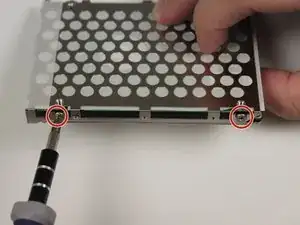
Remove the four 2.8 mm screws from the mounting bracket using a Phillips #0 screwdriver.
-
Pull the mounting bracket off of the hard drive.
-


To reassemble your device with a new hard drive, follow these instructions in reverse order with a new hard drive replacing the old one.
One comment
good description and photos..thanks :]
David -