Introduction

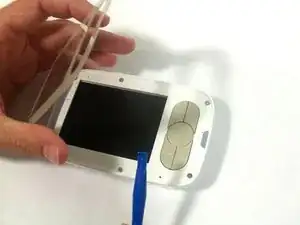
The disassembling of the monitor is so to be able to change the screen or replace other components of the monitor.

  1. 4YK4KjQaZqiM1dil
    • Start by gently inserting the plastic opening tool between the led and casing.

  2. UZcISq2NymG6SRnE
    • Slowly pry the cover away from the bottom using the plastic opening tool.

  3. AkRDe2NNJOFXJnFf
    • Glide the tool around the entire cover to reveal the screws, which are 5.0 mm.

    This photo is a little blurry

    Patty Remmell -

  4. 2gRXtNkdViBlgECf
    • Remove the cover and set it aside.

  5. MIyD5SQx6wrMdFvw
    MIyD5SQx6wrMdFvw
    2Fke5xgtuSkOfoi2
    • Remove the four corner screws, 5.0 mm, using a J1 bit.

    • Lift the top away from the bottom using the metal spudger. Be careful not to rip the antenna wire.

    Lift it how? With a tool? With fingers?

    Patty Remmell -

Conclusion

To reassemble your device, follow these instructions in reverse order.

Larsha Johnson

Member since: 27/08/15

526 Reputation

2 comments

What is the part number for the LCD?

jstarion -

From the pictures LQ035NC111 seem to be the part number.

Michael C -