Introduction

Screens are always prone to breaking or cracking. If you need help replacing your LG Enact screen, this guide will help you replace it.

Be sure your device is powered off fully and be sure to follow all steps carefully. Also, make sure that you are safe when handling a potentially shattered glass screen as you may be vulnerable to injuring yourself.

  1. w4VgyvRMwJyjwTJG
    w4VgyvRMwJyjwTJG
    R2WlxEmAVoJriDfH
    eCtGZq1wOAJBOYGf
    • Open the back cover by prying into the bottom tab with an iFixit opening tool.

  2. oXfvPVPC3JIQcuky
    oXfvPVPC3JIQcuky
    vYQEbnmft3NZXrew
    HPJHvf4KLUXZM2Gc
    • Use an iFixit opening tool to remove the battery.

  3. AIwxVEA2V1B4MXh5
    • Remove the three 1.2 mm screws from the speaker using a Phillips #00 screwdriver.

  4. Ep4LEoLq5y4PxvXq
    Ep4LEoLq5y4PxvXq
    ttuOuHSnuUZFXpmQ
    • Use an iFixit opening pick to pop out the speaker.

  5. UTB3gnWPPDmuKu2s
    UTB3gnWPPDmuKu2s
    PAhWo5uwu2JEcYVs
    • Remove the nine 1.2 mm screws from the midframe using a Phillips #00 screwdriver.

  6. VnLJWXuFF4kJBMF1
    • Use the iFixit opening pick to pry out the midframe.

  7. 5JBUgCEFnEGXsMFr
    5JBUgCEFnEGXsMFr
    kSeZ21MnlT3OeqwD
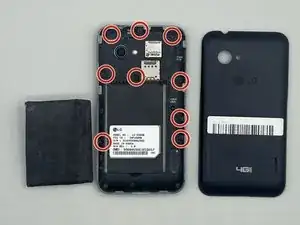
    • Unplug the four ports connected to the motherboard.

    • Disconnect the two wires on top of the battery.

    • Disconnect the two wires under the battery.

  8. G1XUPgbIGIc1j6yF
    G1XUPgbIGIc1j6yF
    arKtSDDMWpVIZ4TG
    • Slowly pry out the motherboard using an iFixit opening pick.

  9. AEdxojQCkFXKupQi
    AEdxojQCkFXKupQi
    23BLgY13YEIDsA5k
    • Gently peel off the orange strip attached to the charging port using an iFixit opening pick.

  10. ffKY6UIBkOgMFtNL
    ffKY6UIBkOgMFtNL
    dnYrAAGoviYANQcG
    PORLGmIUeJufQJWG
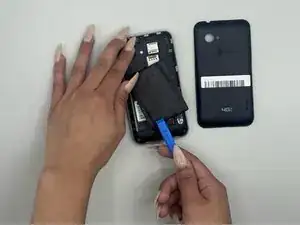
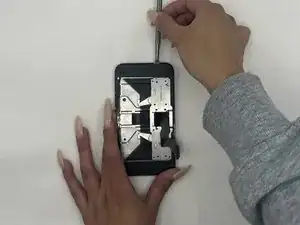
    • Gently remove the blue metal plate using an iFixit opening pick.

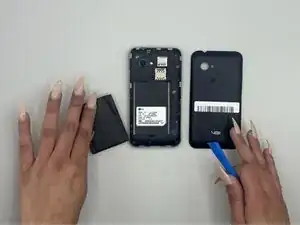
    • Gently remove the black plastic from inside the battery compartment.

  11. rXXOvnRhUowB5SL6
    • Remove seven 1.2 mm screws with a Phillips #00 screwdriver.

  12. JQaZUaZu2aMrtVyL
    • Remove the ribbon cable from the battery compartment.

  13. D5ljTRb4GSIMKTlU
    D5ljTRb4GSIMKTlU
    5GtPF424CCO2mSMs
    KOte4XJdPUADZnSF
    • Remove the plastic half containing the keyboard.

  14. W3AoZYwP2PTSp6ik
    • Remove the four 1.2 mm screws from the corners using a Phillips #00 screwdriver.

  15. VPjJaBHqapluu5OS
    VPjJaBHqapluu5OS
    EFPdcubamjCGTgt2
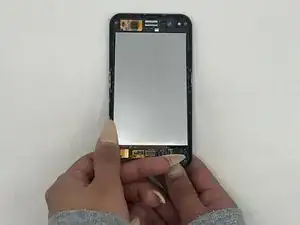
    • Gently pry the screen open with a nylon spudger, making sure you’re not damaging the LCD or the plastic.

  16. VTL4PIMrqKTWFqEM
    VTL4PIMrqKTWFqEM
    2vL15EYtdpovUEYy
    • Detach the two connectors from the screen and pop the screen open using a spudger.

  17. oAGsPAhecljKXZOV
    • Disconnect the touch button sensors using a spudger.

  18. 4JqQbsReGQAlMmCn
    • Gently disconnect and remove the LCD using a spudger.

Conclusion

To reassemble your device, follow these instructions in reverse order.

pranay_munikuntla

Member since: 12/09/23

621 Reputation

0 comments