
Introduction
If you need to replace or upgrade the RAM of your Lenovo ThinkPad T480 laptop, this guide will help.
The RAM or random access memory serves as temporary storage and working space for the laptop’s operating system and applications. It is much faster for reading and writing than other storage mediums such as a hard drive or an SSD. However, the data stored in RAM will disappear as soon as the RAM does not receive power, whether that is due to a power outage or a dead battery.
If your RAM is faulty, you might experience random crashes or reboots. You could also experience distorted graphics, failure to boot or repeated long beeping sounds.
If you would like to upgrade the RAM on your ThinkPad T480, you can use up to 32GB max / 2400MHz DDR4. It is dual-channel capable and has two DDR4 SO-DIMM sockets.
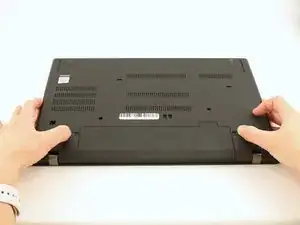
Prior to beginning this repair, be sure to disable the internal battery, shut down the laptop and disconnect from the external power source.
-
-
Using your fingers, slide the lock on each side of the battery to the unlocked position.
-
Remove the battery from the slot.
-
-
-
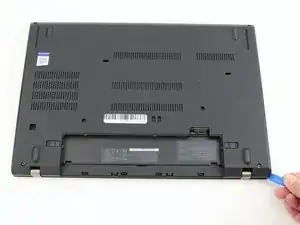
Insert the blue plastic opening tool into the space between the lower case and the chassis.
-
Slide the opening tool around the perimeter of the case to release the clips holding the case and the chassis together.
-
Remove the back case.
-
-
-
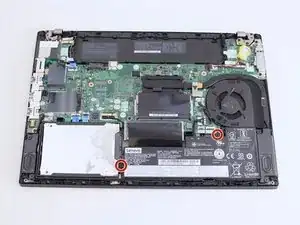
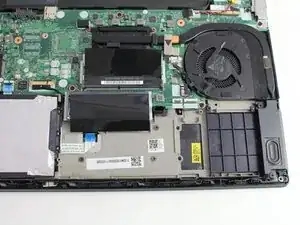
Using the Phillips #1 screwdriver, remove the two 4.6 mm screws securing the internal battery to the frame.
-
-
-
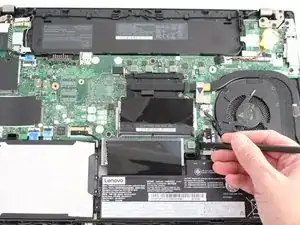
Use the spudger to slide the battery socket connector parallel to the motherboard and out of its socket on the motherboard.
-
-
-
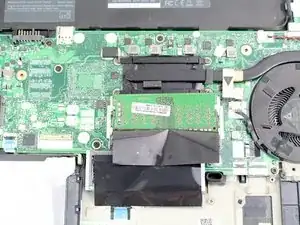
Pull the black plastic sheet back to reveal the RAM stick.
-
Using your fingers, pull the metal arms (located on both sides of the RAM stick) slightly away from it .
-


To reassemble your device, follow the above steps in reverse order.
Take your e-waste to an R2 or e-Stewards certified recycler.
Repair didn’t go as planned? Try some basic troubleshooting, or ask our Answers community for help.

8 comments
Nice one Sarah! Straightforward install of additional RAM following these instructions - one thing I noted is that I don't have an internal battery, it's just a placeholder, so I left it out, thanks again ;)
Raj -
Hi @raj61669 I know your comment is over a year old but thank you for the feedback! I'm glad the guide was helpful : )
Great guide! Just update T480 from original 8GB to 32GB!
One thing to point out is that on my T480, after loosening all of the screws there was an area of the back cover the was in the middle, in the rear next to the battery compartment that required an uncomfortable amount of pull to ultimately disconnect and remove the back cover from the chassis of the T480... So be careful but forceful! Thanks! :-)
MyFixIt -
Hi @myfixit63593 Sorry it took me so long to reply. Thanks for your feedback and the tip! This is an important warning for other fixers : )
Kann ich den RAM auch mit mehr MHZ ersetzen? Ich habe eine Lenovo Thinkpad mit aktuell 2x 8GB 800MHZ. Von einem anderem Laptop habe ich 2x8GB mit 3200MHZ ausgebaut. Was passiert, wenn ich diesen in den Thinkpad einbaue,, weil vorher nur 800MHZ drin waren?
Hi, @deichkind,
I consulted a co-worker and they provided this information: RAM speeds are backwards compatible within the same generation (DDR1-DDR4). If the 8GB 800MHZ was DDR3 and the replacement 3200 MHZ is DDR3, the new RAM will run at the fastest speed the motherboard can support. But, if the 800MHZ was DDR2 and the replacement is DDR3, it may not work.
I hope this helps. If it doesn't answer your question, please let me know and I can direct it to our answers forum. Also, I apologize that this is in English but I don't speak German.
Da solltest du denke ich nachschauen ob das Motherboard das unterstützt. Der Unterschied zwischen 800 und 3200 scheint mir aber sehr groß, insofern bezweifele ich dass das funktionieren wird...
Kev -
Please avoid attempting anything that makes you uncomfortable or seems incompatible with your device. I gathered this information from the Lenovo Forum and discussions on the subreddit r/thinkpad, leading me to believe that this could be a viable option for the T480.