
Introduction
A simple guide on how to replace your Lenovo T530/T530i's WAN card.
-
-
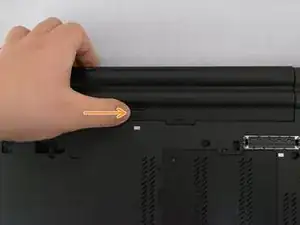
Locate the latch located on the battery near the top of the laptop.
-
Using your finger, slide the latch to the right-most (Unlocked) position.
-
-
-
You can now pull the battery away from the laptop. When pulling the battery out, ensure to pull it out straight.
-
-
-
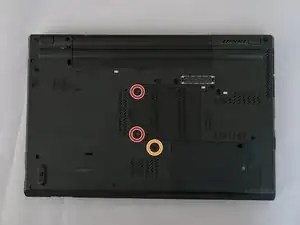
Using a Phillips #00 screwdriver, unscrew the following screws, and then remove the cover.
-
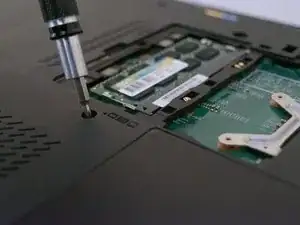
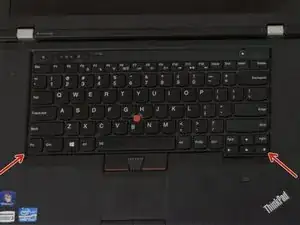
Using a Phillips #00 screwdriver, remove the screw. This is one of the two screws that are holding in the keyboard.
-
-
-
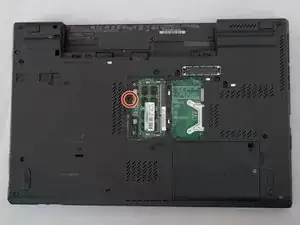
Using a Phillips #00 screwdriver, unscrew the highlighted screw. This is the last screw securing the keyboard to the laptop.
-
-
-
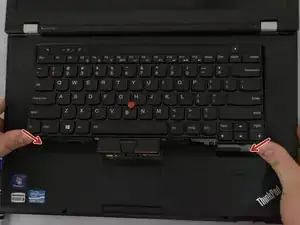
Place each of your two thumbs on the bottom-left and right most corners of the keyboard (towards the arrow keys, and the Fn (Function) key).
-
Gentilly and slowly push the keyboard up (towards the display)
-
Lift the two corners of the keyboard up enough to see the ribbon cable below.
-
-
-
Angle the keyboard upwards, at a 90° angle.
-
Keep one finger holding the keyboard up, while using the other to disconnect the ribbon cable. To disconnect the ribbon cable, lift it up by the highlighted yellow end.
-
-
-
Reinsert the bottom memory cover, ensuring all clips are in place.
-
Using a Phillips #00 tighten the two highlighted screws.
-
-
-
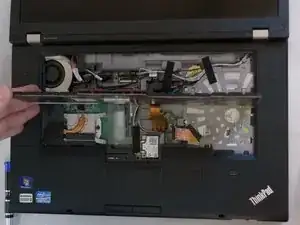
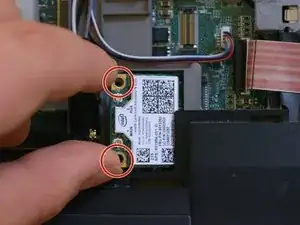
Locate the WAN Card highlighted in red.
-
Lift up the two antenna's from the WAN Card gentilly, you can use a flathead screwdriver to assist you.
-
Using a Phillips #00 screwdriver, remove the two screws from the WAN Card.
-
-
-
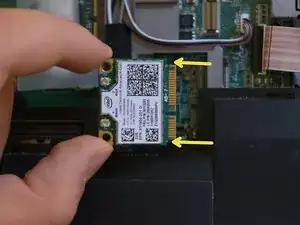
Grab the WAN Card from it's corners.
-
Lift up the WAN Card at a 30° angle.
-
Pull the WAN Card out from the slot.
-


To reassemble your device, follow these instructions in reverse order.