Introduction
If the Milwaukee 2605-20 Drill is not allowing orientation switching, follow this guide to inspect and replace the forward/reverse shuttle.
The screws on this device are not easily removed.
-
-
Remove four matte 24 mm screws on the crankcase at the rear cover of the drill (connecting the chuck to the handle) using a Torx T3 screwdriver.
-
-
-
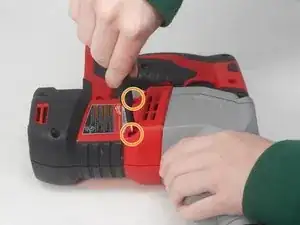
Remove two 24 mm screws on the housing cover beneath the ventilation slots. These screws point into the drill.
-
-
-
Using a Torx T5 screwdriver bit, remove two 26.8 mm screws on each side of the drill housing cover, located beneath the ventilation slots. These screws point upwards.
-
-
-
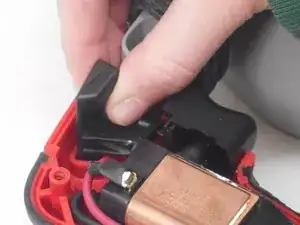
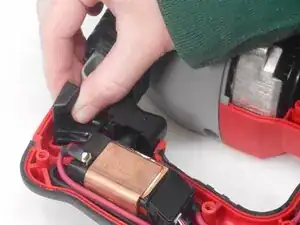
Locate the forward/reverse shuttle on the drill, just behind the drill trigger mechanism.
-
Gently pull the trigger down and remove the damaged fwd/rev shuttle.
-


To reassemble your device, follow these instructions in reverse order.