Introduction

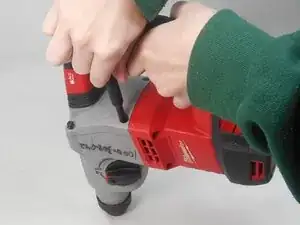
For any electrical issues with the Milwaukee Rotary Hammer 260520 D14A 2016, such as a stuck trigger switch or inconsistent speeds, please refer to this guide for instructions on replacing the housing assembly for the drill.

The housing switch assembly is the part of the device that controls the device's electrical flow, and can connect and break electrical circuitry.

  1. aPPSuIEiWIYIqtR3
    • Remove the battery by sliding it from the base.

  2. QhKBsfrBheSU4TWL
    • Remove two 20.3 mm screws at the right side of the drill base using a Torx T3 screwdriver.

  3. sTngW2eqpvYcFA3G
    sTngW2eqpvYcFA3G
    QSuYvKZEQvhFTZHD
    UEDqCvwLprHXwnR6
    • Remove five 20.3 mm screws on the right side of the handle using a Torx T3 screwdriver.

  4. 5yasRnqJFKkvnILx
    5yasRnqJFKkvnILx
    XSDEVHXf64pauMZj
    • Remove four matte 24 mm screws on the crankcase at the rear cover of the drill (connecting the chuck to the handle) using a Torx T3 screwdriver.

  5. WrUTN4Te1MthQnaO
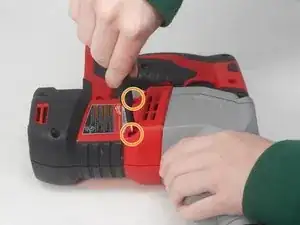
    • Remove two 24 mm screws on the housing cover beneath the ventilation slots. These screws point into the drill.

  6. bEPpPB55Fo3mse1s
    bEPpPB55Fo3mse1s
    EIDgoXB1S3QQyXAe
    • Using a Torx T5 screwdriver bit, remove two 26.8 mm screws on each side of the drill housing cover, located beneath the ventilation slots. These screws point upwards.

  7. BtEHrsARYKQw3hOm
    • Gently pry apart the covers for the drill handle.

  8. ENyOuEUqQN4rnjA4
    ENyOuEUqQN4rnjA4
    oSNPrgdstVywKjSb
    • Gently remove the housing switch assembly near the drill trigger from the handle.

  9. BQYjIwFHIj5G3HUY
    • Insert the replacement housing assembly.

    • Carefully insert the terminal block spring with the block assembly.

Conclusion

To reassemble your device, follow these instructions in reverse order.

Sophie Nieder

Member since: 14/02/24

796 Reputation

0 comments