
Introduction
For any damage requiring replacement of the side handle case for the Milwaukee Rotary Hammer 260520 D14A 2016, refer to this replacement guide for instructions.
This guide also serves as a disassembly guide for taking apart the drill casing. Some of these screws may be stuck, especially if this is the first time the drill casing is being taken apart, so be prepared to apply some considerable amount of torque if necessary.
-
-
Remove four matte 24 mm screws on the crankcase at the rear cover of the drill (connecting the chuck to the handle) using a Torx T3 screwdriver.
-
-
-
Remove two 24 mm screws on the housing cover beneath the ventilation slots. These screws point into the drill.
-
-
-
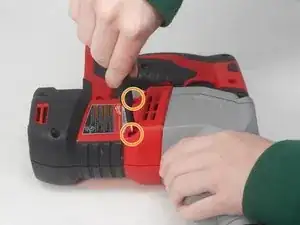
Using a Torx T5 screwdriver bit, remove two 26.8 mm screws on each side of the drill housing cover, located beneath the ventilation slots. These screws point upwards.
-


To reassemble your device, follow these instructions in reverse order.