
Introduction
This guide shows how to remove and replace a battery for the Moto X4.
Before you begin, download the Rescue and Smart Assistant app to backup your device and diagnose whether your problem is software or hardware related.
If your battery is swollen, take appropriate precautions.
For your safety, discharge your battery below 25% before disassembling your phone. This reduces the risk of a dangerous thermal event if the battery is accidentally damaged during the repair. If your battery is swollen, take appropriate precautions.
-
-
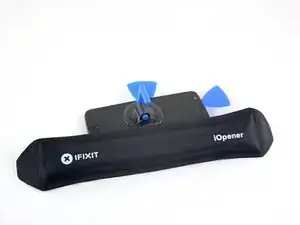
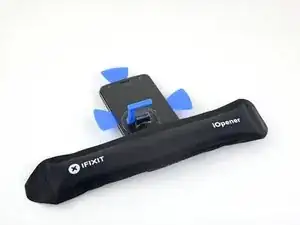
Heat an iOpener and apply it to the left edge of the phone for two minutes.
-
As you wait, take note of the the following areas:
-
Display cable—be careful not to slice too deeply near the edge here, or you may damage the display cable.
-
Fingerprint sensor cable—be careful not to slice too deeply near the edge here, or you may damage the fingerprint sensor cable.
-
-
-
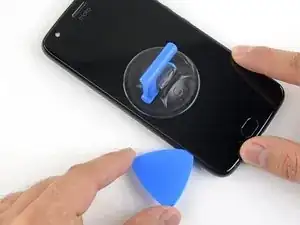
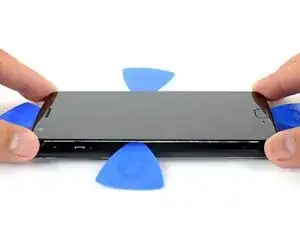
Apply a suction cup to the screen, as close to the heated edge as possible.
-
Pull on the suction cup with strong, steady force to create a gap in the seam.
-
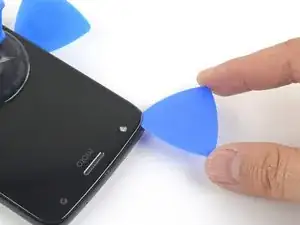
Insert the point of an opening pick into the gap.
-
-
-
Slide the opening pick along the edge to slice through the adhesive.
-
Leave an opening pick in the seam to prevent the adhesive from re-sealing.
-
-
-
Heat the top edge of the phone with an iOpener.
-
Carefully slice around the corner and through the top edge to separate the adhesive.
-
-
-
Heat the screen's right edge with an iOpener.
-
Be careful not to slice too deeply near the cables to avoid damaging them.
-
Use an opening pick to slice along the right edge to separate the adhesive.
-
-
-
Carefully lift up the left edge of the screen and cut away remaining adhesives with an opening pick.
-
-
-
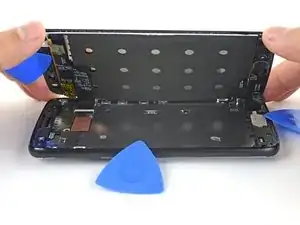
Swing open the screen and prop it up with a small box as you work on disconnecting the flex cables.
-
-
-
Slide the point of a spudger underneath the fingerprint sensor cable and gently pry up to loosen the cable from the phone.
-
-
-
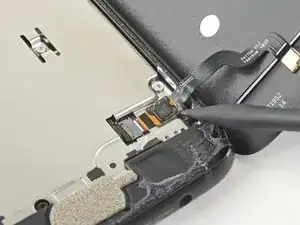
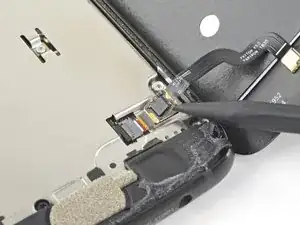
Use an opening tool to flip up the wide lock bar on the display cable's ZIF socket, near the top right of the phone.
-
Use tweezers to carefully slide the display cable out of the ZIF socket.
-
-
-
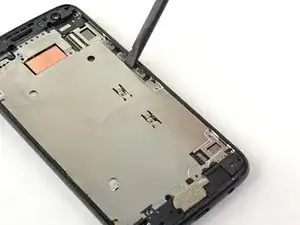
Remove the following twenty screws securing the midframe:
-
Eleven silver 2.7 mm-long T3 screws
-
Nine black 3.6 mm-long T4 screws
-
The midframe is still held in place by clips.
-
-
-
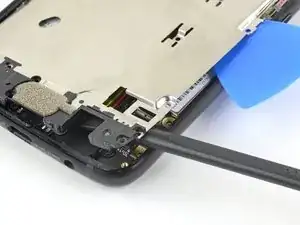
Insert the flat end of a spudger under the right edge of the metal midframe and pry up to loosen the midframe.
-
Insert an opening pick in the edge to hold the midframe in place.
-
-
-
Insert the flat end of a spudger under the lower right edge of the midframe and pry up to release the midframe clip.
-
-
-
Grasp the lower edge of the midframe and pull the edge slightly to the right, to clear the metal midframe clip.
-
-
-
Insert the point of an opening pick under the top left corner of the midframe and twist slightly to release the top clip.
-
-
-
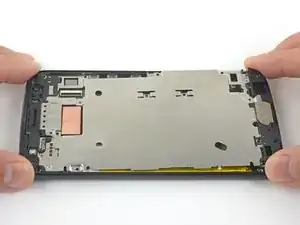
Remove the midframe.
-
Align the the midframe's top edge to the phone and press it into position.
-
Shift the bottom edge slightly to the left, to maneuver the left metal midframe clip underneath the phone edge.
-
Press the midframe's bottom edge into position.
-
-
-
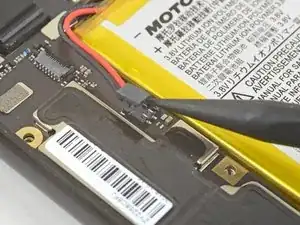
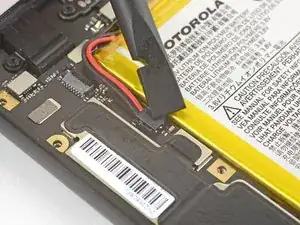
Insert the point of a spudger underneath the top edge of the battery connector.
-
Gently pry up the connector to disconnect the battery.
-
-
-
The battery is held in place by two thin strips of adhesive on the underside of the battery.
-
-
-
Slide the tip of an opening pick under the lower edge of the battery
-
Slowly push the pick in halfway to loosen the adhesive.
-
Insert another opening pick alongside the first pick, and slowly press it in until the adhesive releases the battery.
-
-
-
Remove the battery.
-
Remove all traces of adhesive from the battery well.
-
Apply stretch release adhesive strips, double-sided tape, or pre-cut adhesive strips.
-
Press the battery firmly in place for thirty seconds.
-


To reassemble your device, follow these instructions in reverse order.
After completing this guide, calibrate your newly-installed battery.
Repair didn’t go as planned? Try some basic troubleshooting, or ask our Motorola Moto X4 Answers community for help.

5 comments
I want to change my motorola x4 mobile's battery. Where should I go to get the better service (means the original battery and the best service centre)?
My battery keeps overheating and drains quickly. I did everything to close background apps to no avail. Does that mean I need new battery?
Hi Traude,
It may be that your battery is damaged and is has a minor internal short. This can cause the battery to drain and overheat. Replacing the battery would be the first thing I’d try. However, it may also be a motherboard problem.
Replaced my moto x4 battery last night as a father daughter project. It was brilliant fun, thank you.