
Introduction
Tools
-
-
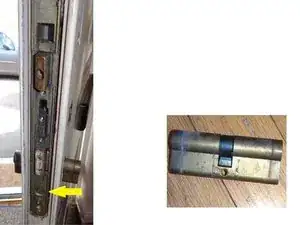
This door and it's lock is probably abou 22 years old. It's the type where you have to lift the handle to engage the 3 point locking mechanism. Recently this lifting started to get more difficult sometimes sticking and requiring several attempts to make work.
-
Note: The removal/replacement process may have to be done twice. First time to identify the problem and the make/model to order.
-
Subsequent to doing this I came across these youtube video guides for uPVC door lock replacement which it would be useful to view before doing this. https://www.youtube.com/watch?v=usEivKYL... https://www.youtube.com/watch?v=nEDbRB27...
-
-
-
Remove door edge cover. Keep the screws somewhere safe in the order they are fitted so you know where to put them back.
-
Sorry about photos, getting a clear edge on photo isn't easy.
-
-
-
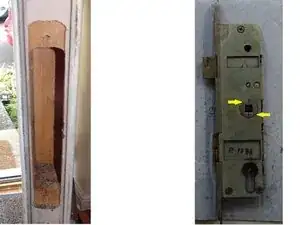
Remove the retaining screws from the moving part of the locking mechanism again making sure you know where they came from. There were only 2 on mine.
-
Take care as the parts become loose as the top and bottom catches are only held in place by the cover , you may want help here. Remove and place out of the way.
-
-
-
Remove handle retaining screws and then carefully take handles off from both side taking care not to lose the operating shaft and any other parts.
-
Remove cylinder lock retaining screw and then remove lock making a note of which end is outside.
-
-
-
Gearbox can now be removed. First time around this may simply to be to identify the problem and/or identify the make/model for replacement.
-
In this particular case there was cracking around the 'barrel' that takes the handle shaft which was causing the sticking.
-
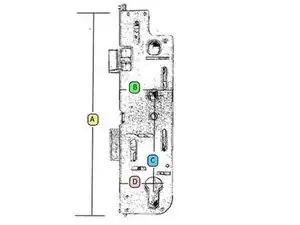
To identify the make/model required for replacement I spent ages on Google. You need several key measurements and by studying various lock supplier websites I found it was almost the same as an older model Fullex type A.
-
Close study of the pictures on the websites seemed to show that the very top and bottom mounting points may be slighter thicker than mine. But I thought it to be a low risk as the door is wood cored I could chisel a bit out if neccessary.
-
-
-
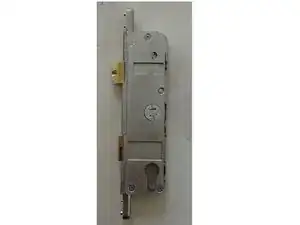
When the new gearbox arrived there were a couple of plastic inserts that had to be removed. Don't forget to do that before installing (unlike me!).
-
Also note the latch came fitted the wrong way round but was easily rotated using it's screw.
-
A quick bit of chiselling allowed the new gearbox to fit.
-
As a precaution I greased what I thought would be key points of wear.
-
All that is left is reassembly by reversing the steps taken.
-


To reassemble your device, follow these instructions in reverse order.