Introduction

This is a guide on how to replace the trigger buttons from inside the NexiGo NS32. There are 10 specific steps in this guide that describe how to take the trigger buttons out of the controller. Be careful not to damage any of the internal components.

  1. 6vrwWBMKi2tEbUdZ
    • Orient the controller so that it is face down.

  2. BxwnnVkJVcyAvJVm
    BxwnnVkJVcyAvJVm
    MCypkOT2tNO3sg2Q
    • Remove the eight 9 mm Phillips screws that secure the rear case.

  3. qAvLOi5hM6GiBVZa
    • Lift the rear case up and off.

    • You may need to use an opening tool to help release the rear case, but avoid using excessive force so you don't damage the controller.

  4. WShgeGYIXoucl1ur
    WShgeGYIXoucl1ur
    Hp5mcAYhUDStDKLn
    • Grip the white battery connector and pull it directly out of its motherboard socket.

    • This may require some force, as the connectors are secured with a bit of adhesive. If you're having trouble with disconnection, apply some high-concentration isopropyl alcohol to the adhesive to loosen it.

    • Do not pull on the wires.

    How should I disconnect it?

    Alex Watkins -

  5. VgxbgRKjs1kS3Lfd
    VgxbgRKjs1kS3Lfd
    jNCSbYKwuT4uYTMJ
    5gZyK2atFyQo6B34
    • Lift the battery up and out.

    • Take care not to bend or puncture the battery as you remove it.

  6. 5gIFh24HMe2DXsll
    5gIFh24HMe2DXsll
    E1SjWtRxUfGbqmvh
    • Remove the three 9 mm Phillips screws that secure the joystick PCB.

    Capitalization on Phillips and screw measurement edit

    Alex Watkins -

  7. mCCNghLwHE4OyGqw
    mCCNghLwHE4OyGqw
    dSFYVXWdBifKLvjT
    • Flip up the black ZIF connector locking flap on the left side of the PCB.

    • Pull the ribbon cable directly out of its socket.

    Show how to remove all the ribbon connectors.

    Alex Watkins -

  8. 2mGSOkKpXaykLXRD
    2mGSOkKpXaykLXRD
    rdLaX5stPPDUbAZn
    GhGayUA4aGwcCbJB
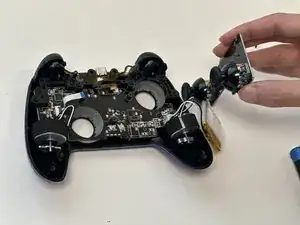
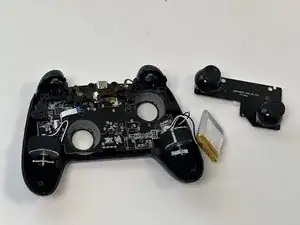
    • Lift out the joystick PCB.

  9. m4Ubp33M1eq2rR5q
    • Flip up the black ZIF locking flap that secures the trigger assembly ribbon cable.

    • Disconnect the ribbon cable.

  10. cU24BIGviAa4U5Ou
    cU24BIGviAa4U5Ou
    XKfYHSjMIH3QLoCi
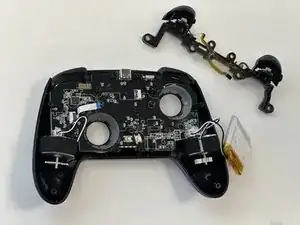
    • Gently lift out the trigger assembly.

Conclusion

To reassemble your device, follow these instructions in reverse order.

Gage_Atx

Member since: 29/01/24

85 Reputation

0 comments