Introduction
The whole purpose of the portable Nintendo console 3Ds is to read game cards and be able to have the enjoyment of playing wherever you are but if the 3Ds lose its main function of emulating games then what's the point of it? That is why we will be showing you a step-by-step guide on how to replace the game card/ cartridge reader so you can get back to enjoying playing those nostalgic games on the go.
-
-
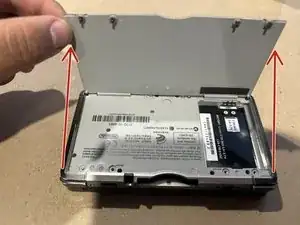
Carefully remove the 5 screws highlighted in the first photos using the 00 Philips screwdriver
-
carefully lift up the backplate upwards from the card slot as to not break the plastic clips
-
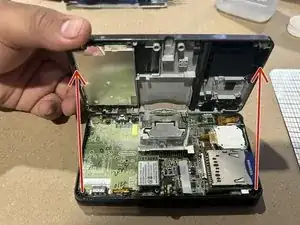
now that the second layer is exposed remove the battery as to not accidentally turn on the device or get a static shock
-
-
-
remove all 10 screws inorder to access the third layer and the motherboard of the 3DS ( don't forget the one near the game card slot !)
-
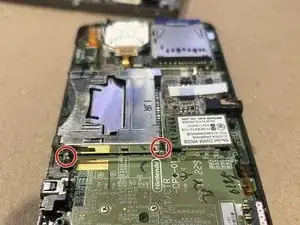
carefully open up the next layer of the 3ds as to not rip any of the ribbon wires
-
-
-
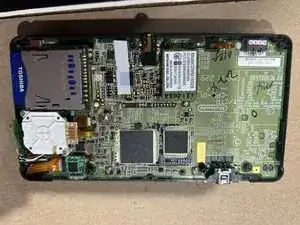
now that the game cartridge reader is out of the way lets get the new one in and line it up with the previous one and re-solder it using a soldering wire
-
-
-
Before closing off the device you will now use Isopropyl alcohol and a cue tip and clean the surrounding area so there is a good current and grip
-
-
-
remember to use the correct screws when closing the back plate of the device. if you use the wrong one then it can screw all the way into the motherboard
-
don't forget about the tiny silver screw near the game card slot.
-
-
-
make sure to close the back plate. if the back plate is not secures correctly and properly then it can cause any liquid or even dirt to enter and cause the battery to get ruined and the other inner components.
-


there are many steps that you will need to do carefully as well as tools that can cause harm but we hope that this guide has helped you get your device up and running. thank you for trusting in us.