Introduction

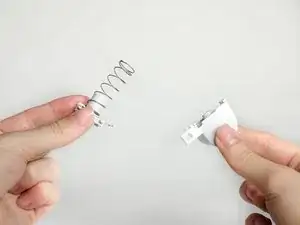
The Left and Right triggers are located on the back side of the controller near the cord. The triggers are spring loaded.

  1. dcSYZ1UnVsl6SqWL
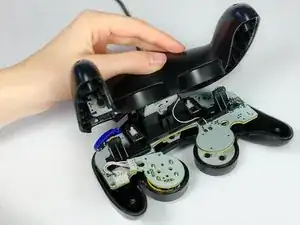
    • Place the controller (buttons down) on a solid surface.

    • Remove the six 9.2mm Tri-wing Y0 screws that hold the back panel in place.

  2. SubSoUIKRilFSPLf
    • Gently lift the back panel up, separating it from the front panel.

    • Some of the buttons may fall out if they are knocked around.

    For some reason, it was simpler to take the top half off, although it could be because it is most probably refurbished before

    Rukir Gaming -

  3. BQUirnGSsufXkwwG
    BQUirnGSsufXkwwG
    AdvobFhUkQhZLVSu
    • Grab the Z-button by the peg with tweezers and lift it out of the controller.

    • During re-assembly, make sure the plastic rim and spring fit into the slot provided, or else the case will not shut.

    So how do you put it back in like the replacement because I have a controller I'm working a junker my Friend gave me and I'm trying to fix it the z button doesn't work here it's a pelican wireless controller it's actually not to bad bulky but not bad

    Justin Sebastian -

  4. oywDlnUm2aXc3Se4
    • Carefully unhook the cable that is looped around the peg.

    Um can soneone explain the peg and cable part? I dont understand it...

    Tyler Goamez -

    I would say that the cable is somehow "hooked" to the case and you have to get the cable away from the case so that you can pull out the board

    My1 -

  5. NYSTuZVnjIra26fC
    • Lift the circuit board out of the controller.

    • Do not grab the rumble motor to lift the circuit board as shown in the picture. It will in many cases just remove the rumble motor. Instead, grab the edges of the board.

  6. Tqf3tZtRbFVVYEa6
    • Remove the two 8.9mm Phillips Head #0 screws.

  7. SWS1iub6EWrb6IZA
    • Remove black cover.

  8. INUlZ2HFIZT4mklK
    INUlZ2HFIZT4mklK
    M3TgAWkdIWoVZYyJ
    2oL2cGIplKNVHWHQ
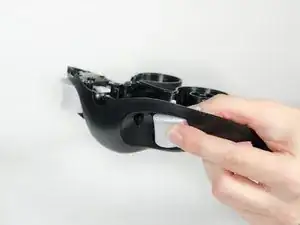
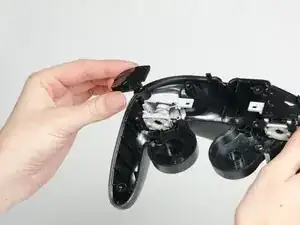
    • To remove the trigger assembly, depress the trigger with your index finger as if you are using the controller normally.

    • Hold the grey square bracket onside of the controller with your thumb.

    • Keep your fingers in the same place while rotating upwards towards you to remove trigger assembly.

  9. h1o2HmdjYOjFnlVg
    • Pull the metal clip from the trigger.

Conclusion

In order to remove the other trigger, simply repeat Steps 6 through Step 9 on the right side.

To reassemble your device, follow these instructions in reverse order.

Sean Michel

Member since: 14/01/13

2496 Reputation

2 comments

Don't forget to aline the trigger slider holes and the slider pins on the board when putting it all back together.

buttpug -

Hallo ich habe da mal eine Frage. Ist es möglich die Empfindlichkeit der Trigger zu beeinflussen ? Leider reagieren sie erst sehr spät da mann den Knopf sehr weit hereindrücken muss.

danke schon mal

Otti

Ottitrotti -