Introduction

This guide shows the disassembly of the volume knob of a Razer BlackWidow Elite keyboard. The volume knob of this particular model is notorious for being iffy. Many hacks on the internet have been proposed to fix the problem, but they're usually ineffective. Hopefully, this guide helps with diagnosing the problem with it.

  1. yZwGTUfuDMXNrhRJ
    yZwGTUfuDMXNrhRJ
    1I1nSVaFqMideKP4
    • Before disassembling, make sure that the keyboard is unplugged.

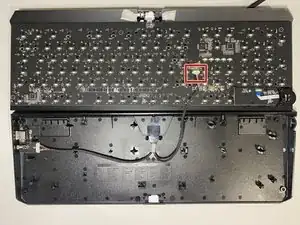
    • Turn the keyboard over so the backside is exposed.

    • Remove the top rubber feet to reveal the hidden screws.

  2. mQkeonKTeIJgu4Fw
    mQkeonKTeIJgu4Fw
    HjUqcYIDYLyTqBUr
    • Using a Phillips #0 screwdriver, remove the two crews.

    • The two screws differ in size (10 mm & 6 mm), so keep track of which hole they go.

  3. xLIpNCZCoaHrhsZE
    xLIpNCZCoaHrhsZE
    3ITbeoH6kxgi23xb
    EOWOg4QXQlZwZhQ2
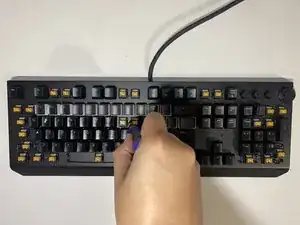
    • Turn the keyboard back so that the keys are facing up.

    • Using a keycap remover, remove the keys hiding the screws.

    • The keycaps removed are shown in the 3rd picture.

    • The bigger keys, such as the spacebar or shift, have stabilizers. To remove them, carefully loosen the stabilizer until the keycap unhooks.

  4. vCSRwaiTRPbMOeos
    vCSRwaiTRPbMOeos
    IKpGhUgAoSVLKqFD
    • Using Phillips #0 screwdriver, remove the 14 (8 mm) screws exposed after removing the keycaps.

  5. rsfkviXUm2PHRekZ
    • After the screws are removed, carefully lift the keyboard to open it up.

  6. JG1ReKpUo1XFm4Tg
    JG1ReKpUo1XFm4Tg
    2If33AEjWGQQEUST
    eBJVtYLXJKq644rg
    • Detach the cable from the circuit board

  7. v3H5G2iiUFhhjs2x
    v3H5G2iiUFhhjs2x
    YTAZrPEAJQbcOxNI
    NLVvnSw5KKnlMWy1
    • Use a tool to remove the latch from the flex cable and carefully pull out the flex cable.

  8. etVrZPuJ2DsMjfHJ
    etVrZPuJ2DsMjfHJ
    lGskDUBqx3INIMRp
    • Use a Phillips #0 screwdriver to remove the two (6 mm) screws securing the volume knob.

    • After removing the screws, you can now easily pull out the volume knob.

  9. 6JxJNjVt3Ooltuwi
    6JxJNjVt3Ooltuwi
    IJUm6dn6Xk1Z5bPG
    • Using a Phillips #0 screwdriver, unscrew the 6 mm screws securing the knob to the bracket.

  10. tGCqZZY4XJiLSXPg
    tGCqZZY4XJiLSXPg
    vunrGGJAEaDMqZwX
    • After unscrewing the bracket, the button of the volume knob should come right off.

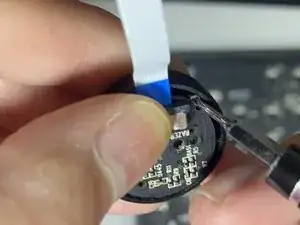
    • On the main component of the volume knob, the circuit board should be rotatable. Rotate the circuit board so that the cutout aligns with the hidden screw.

    • There should be 2 (3mm) screws. Use a Phillips #000 screwdriver to remove them.

  11. YbKqHc5XcMrW4BNG
    YbKqHc5XcMrW4BNG
    oxHnEPOXYsaG5XrI
    • The circuit board should be attached to a ring component. Using your fingers, carefully separate them.

  12. IIatJPa4ZHYcYSeu
    IIatJPa4ZHYcYSeu
    5GEf3qtFAdVsUUKv
    BaRvjI3nGs42YD1j
    • After detaching the ring from the volume knob's circuit board, you can screw the ring component to the volume knob casing for easier re-assembly.

    • Align the screw holes between the two components. Using the 2 (3mm) screws from step 10, screw them together, as shown in the 2nd picture.

    • Simply align the snap-fit joints back together to reassemble the main volume knob component.

    • The snap-fit joints are highlighted in the 3rd picture.

Conclusion

To reassemble your device, follow these instructions in reverse order.

Dennis Raphael Martinez

Member since: 25/10/23

259 Reputation

0 comments