
Introduction
This guide is to replace the button mechanism for your Ricoh YF-20 Super. If the mechanism becomes faulty, this guide will show you how to replace the part and fix the mechanism.
Before we start, know that inside your camera, there's a special part that makes the buttons work. Over time, this part can get old or broken, making the buttons act funny. Keep in mind that this will require careful disassembly.
To get to this part, we need to take off the camera's outer covers. This means unscrewing some screws and gently separating the covers. Inside, we'll find the button part, usually near the top or front of the camera.
Watch out for any extra screws or clips holding the button part in place. We'll need to remove these before we can switch out the part.
Good luck with replacing the button mechanism on your Ricoh YF-20 Super! This guide aims to replace the button mechanism efficiently.
Tools
-
-
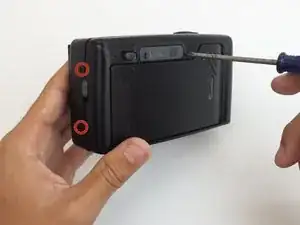
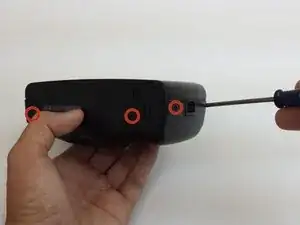
Use the screwdriver to unscrew the indicated screws from the left, right, bottom, and back sides of the camera.
-
-
-
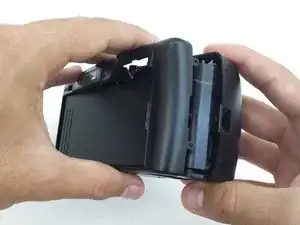
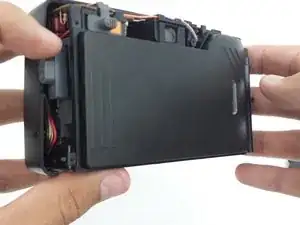
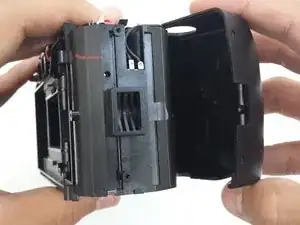
Loosen the back cover from both the left and the right sides of the camera. Take off the back cover.
-
-
-
Open the film compartment.
-
Press your finger on top of the grey latch on the left side of the camera.
-
-
-
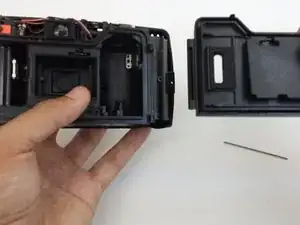
Use a thin object like a toothpick or a small screwdriver to push down on the metal pin holding the film compartment door in place.
-
Use your fingers to completely remove the metal pin.
-
Remove the film compartment door.
-
-
-
Use a thin shaft screwdriver and unscrew the two indicated screws within the film compartment.
-
-
-
Loosen the front cover from the left and right sides of the camera.
-
Take off the front cover.
-
-
-
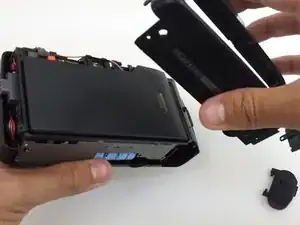
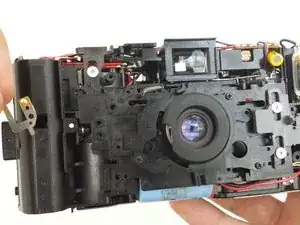
Remove and set the front and back covers aside
-
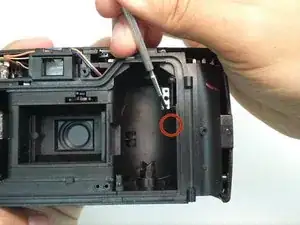
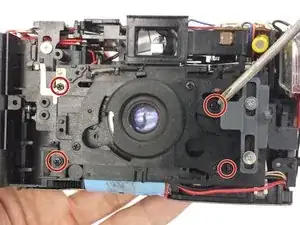
Unscrew the screw that holds the front plate brace in place.
-
Take out the brace.
-
-
-
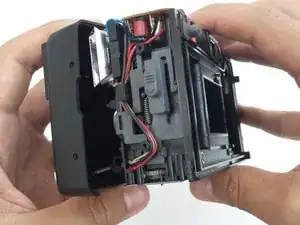
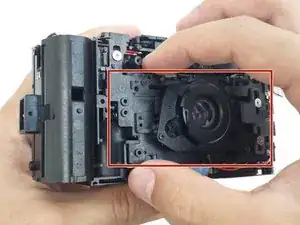
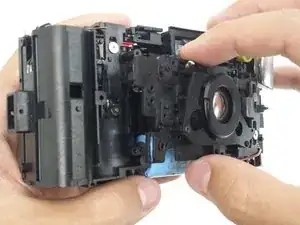
Unscrew the two screws that hold the button mechanism in place.
-
Press down on button mechanism to unlatch it from the camera body. When pressed down, the bottom of the mechanism should push outward.
-
-
-
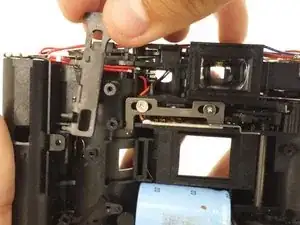
Lift the button mechanism up carefully, removing the spring at the top of the mechanism from where it is attached to the camera body.
-
Take out the button mechanism.
-


To reassemble your device, follow these instructions in reverse order.