Introduction

LiDAR (Light Detection and Ranging) sensors are essential for navigation and obstacle avoidance. If the sensor is not functioning properly, it may affect the robot vacuum's ability to navigate and avoid obstacles. It can result in inaccurate data readings and navigation problems if the calibration is off or misaligned.

Regular cleaning may help, but in some cases, replacement might be necessary. It is recommended to troubleshoot the issue to ensure the problem is indeed with the sensor.

  1. 1AHOROoelcWA2xcm
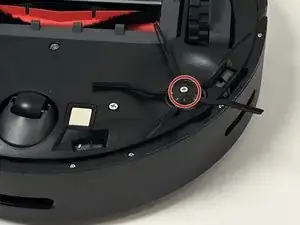
    • Power off your Roborock and place the device on a flat surface with the wheels facing up.

    • Position the robot so the five-pronged side brush is on the bottom right side.

  2. 53AkC4xjTRN4mY2c
    53AkC4xjTRN4mY2c
    MsVyCUQpBDWFVr1e
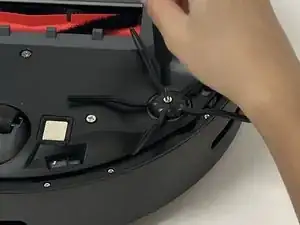
    • Use a Phillips #2 screwdriver to loosen the single side brush screw.

    • The screw is attached to the side brush so they cannot be separated.

  3. JSIJDU5SsJVOKqnb
    JSIJDU5SsJVOKqnb
    6PMqrKrluxUPqYK3
    • Lift the side brush up and off.

  4. ZESbORNY5kLuVJhB
    ZESbORNY5kLuVJhB
    DpgplPSC2AokhK2J
    DSrHtD2he2H2inBQ
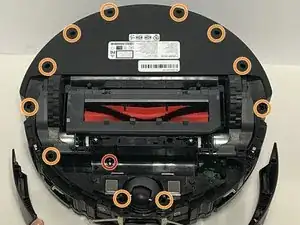
    • Use a Phillips screwdriver to remove the seven 15 mm screws from the bottom panel.

  5. HJItcUcCsUIcBLQ3
    HJItcUcCsUIcBLQ3
    WjxcPXJJrhymNBU5
    JIBrMRWUN5rCvQEP
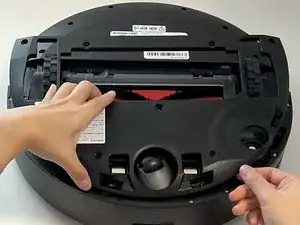
    • Gently lift off the bottom panel cover.

    • If the bottom panel is stuck, use a plastic spudger along the edges to gently lift it out of place, then remove it by hand.

  6. rSBaPISvXbSUyFJu
    rSBaPISvXbSUyFJu
    paTcw2YMkCvnGbRO
    LIDgYQTbbNCTFP2R
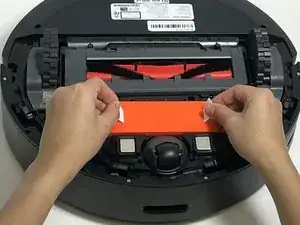
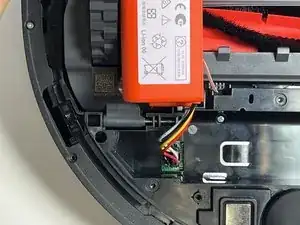
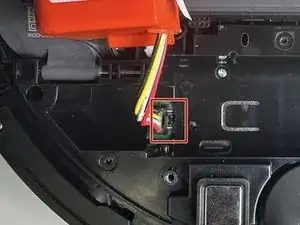
    • Use the two white straps to lift the battery out slightly to reveal the battery connector.

    • The battery is still connected to the robot vacuum. Take care not to strain the battery cable.

  7. ydoJRLEXQ5eaQAlp
    ydoJRLEXQ5eaQAlp
    kdtcTdcZ4eSrRMjg
    KeUXfPtqCBomi5Bk
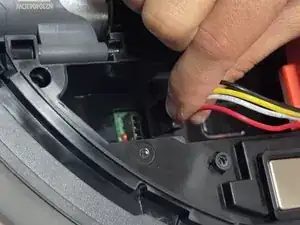
    • Using moderate pressure, squeeze and pull on the four-wire connector to disconnect the battery from the robot vacuum.

    Add a picture of the battery removed

    Alex Watkins -

  8. MpIusBKxekDCCmcI
    MpIusBKxekDCCmcI
    rOfxkF4ZteUS6QRC
    rrTwxCM1ZaKhHOAh
    • Remove the three 10 mm Phillips screws that secure the side brush motor.

    • Lift the side brush motor up and out of its housing.

  9. dFvFfJxEnaJRCWGW
    dFvFfJxEnaJRCWGW
    ERg6lq4GTigQgBT5
    • Use a Phillips #1 screwdriver to remove the eight 11 mm screws from the front sensor panel cover.

  10. 4IZKngRUxevPbFsU
    4IZKngRUxevPbFsU
    e2L1FNWHJdFVtcGO
    • Gently lift and remove he thin black sensor housing bracket.

    • Pull the front sensor panel cover away from the robot.

  11. jFYMwc65FLU2kFMx
    • Use a Phillips screwdriver to remove one 14 mm Phillips screw from the battery housing.

    • Use a Phillips screwdriver to remove the eleven deep-set 14 mm Phillips screws from the bottom panel.

  12. tdcKintVTOfJiEG1
    tdcKintVTOfJiEG1
    McFGKgmR3jkCOENf
    • Carefully flip the device and set it down.

    • Pinch together the two dustbin tabs and pull up on the dustbin to remove it.

  13. FrMJpua2fVGZQMdl
    FrMJpua2fVGZQMdl
    bJPXEYrkQkfoWJ3C
    • Use a Phillips #2 screwdriver to remove two 15 mm Phillips screws from the front panel cover.

  14. YZVH64cHtYaanRyw
    YZVH64cHtYaanRyw
    EsaifAJ2shVvnPK4
    GNHYUFpfHDNTaFVE
    • Gently lift and remove the top cover off of the robot vacuum.

    • If the top panel is stuck, use a plastic spudger along the edges to gently lift it out of place, then remove it by hand.

  15. lcgSMQTckUCxYyWF
    lcgSMQTckUCxYyWF
    MutZeEDxODvZDqgx
    xyaIxcf1yLZWqWxq
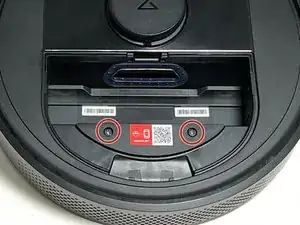
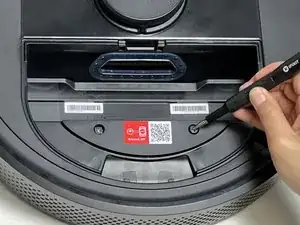
    • Use a Phillips #1 screwdriver to remove the two 10 mm screws from the LiDar sensor cover.

    • Gently lift off the sensor cover.

  16. nAjsNbEOVMcYnEVN
    nAjsNbEOVMcYnEVN
    itux2kVhv1iSpEKQ
    kDjcjnVcHgBYPFpS
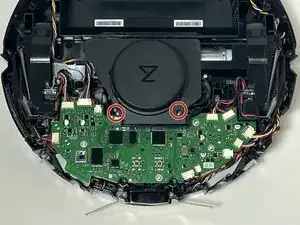
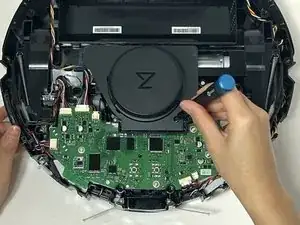
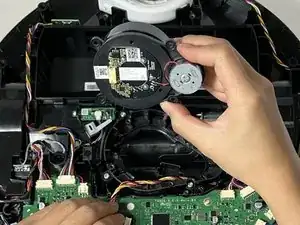
    • Use a Phillips #1 screwdriver to remove the four 9 mm screws that secure the LiDar sensor.

    • Lift the sensor from the vacuum.

  17. cfSlir4GVDqJpuHK
    cfSlir4GVDqJpuHK
    uYLD2GtYUE2f6rFs
    HvYYW3JOCM3shMll
    • Grip and the white LiDar sensor cable connector and pull it directly out of its socket.

    • Remove the LiDar sensor.

Conclusion

To reassemble your device, follow these instructions in reverse order.

Joyce T

Member since: 29/01/24

289 Reputation

0 comments