
Introduction
This guide is for replacing the buttons in your Sega Genesis Flashback controller. If your buttons are no longer functioning then this guide will show the process to replace them.
Before using this guide find any buttons on your controller that seem stuck or damaged. This will help you see which parts of the controller you need to take apart. In step 1 it is likely that the parts of the controller will become loose when unscrewing the bottom plate. Be sure to keep both plates of the controller facing downward so no inner parts of the controller fall out.
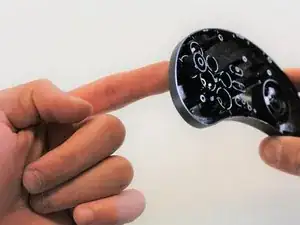
Be very careful when removing the rubber membranes shown in step 2. If you are not gentle when removing this part you could damage it and will no longer be usable.
Good luck with your replacing your buttons for your Sega Genesis Flashback controller! This guide aims to replace the parts and re-assemble the controller efficiently.
-
-
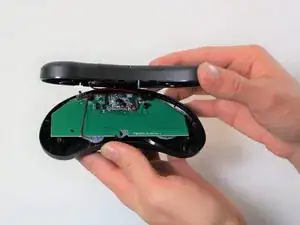
Hold the controller with the bottom plate facing up, and gently remove the top plate that is connected to the motherboard of the controller. Set the top plate aside.
-
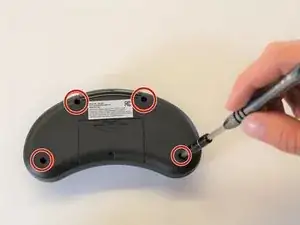
Remove the screws on the back of the controller with the Phillips #000 screwdriver.
-
-
-
Pop the button out from the front side of the controller.
-
Pull the button out from the backside using the other hand.
-


After completing step 4 you will need to re-assemble your controller. Do this by starting from step 2 and work backwards.