Introduction

  1. 3gCHYH22YxQ1l3RI
    • Like most Samsung phones, we will apply heat to the back glass and remove it to access the internals.

  2. I5MFY25sM5jBKSUu
    • Remove these 9 Phillips screws.

  3. ChrHOjuY2xQXI6N1
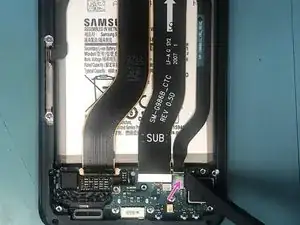
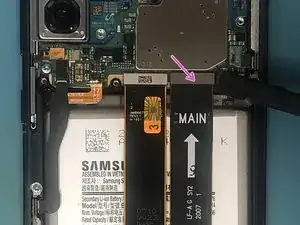
    • Fold the metal shield that's connected to the wireless charging coil back, and disconnect the battery connector underneath.

  4. MChhNS61nolcLVas
    • Disconnect the wireless charging coil.

  5. Gy1ow2oqlxibGKfR
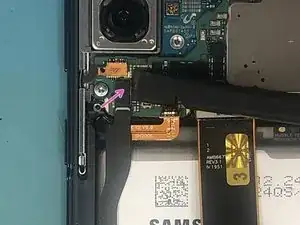
    • Remove the wireless charging coil, which is lightly adhered to the bottom part of the battery.

  6. qVpBOZCnfcstHDW6
    • Gently pry here on the upper section of the midframe to pop it out.

  7. abxkgKQBCVqSoCSN
    • Remove the top section of the midframe.

  8. kvPGHwto5cmURVah
    • Remove these 5 Phillips screws.

  9. XJJwdHA14Kjc2l4B
    • Gently pry here to loosen the bottom portion of the midframe, then remove it.

  10. Z2PIsJH2LMwRUtFg
    • Carefully disconnect the bottom side of this flex cable.

  11. 6wXMMBdyri2rsCxO
    • Then disconnect the top connector and remove the flex cable.

  12. ToR226YOChDHcpCt
    • Next, repeat the same procedure for the main flex cable. Disconnect the bottom connector.

  13. Vr2CroISqP3fRYao
    • Then disconnect the top connector and remove the flex cable.

  14. Vk3QotkssvddTLHG
    • Carefully disconnect the display connector.

  15. DoI5ZJqYKlokoZSf
    • Disconnect the left side antenna.

  16. OvTiysBYG2kEefbf
    • Disconnect the volume/power button assembly.

Conclusion

To reassemble your device, follow these instructions in reverse order.

Thomas Jones

Member since: 24/09/20

253 Reputation

0 comments