Introduction

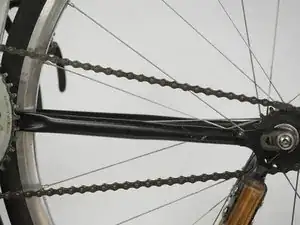
This guide demonstrates how to replace the single-speed chain on the Bambike Mira Nila Bolt, which is famous among users for its comfort and looks.

Since this bike model can't switch gears, the chain is considered a single-speed chain. This chain makes it possible for the pedals to move the bike wheels.

Replacing the chain is important because a worn-out chain can cause damage to other vital parts of the bike. A chain can even fall off if it isn't replaced in time. If you replace your chain, you not only prolong the life of your bike, but you also ensure your safety while riding.

Please note that this repair can become messy when touching various bike parts.

  1. tUr1X6uCsgj4gWww
    tUr1X6uCsgj4gWww
    Gq3GGnc4umZ5jb6J
    • Flip the bike upside down for easy access to the rear wheel and chain.

  2. NFEsOGSN1HdlAjod
    NFEsOGSN1HdlAjod
    5IbxeW5HZXos3KhM
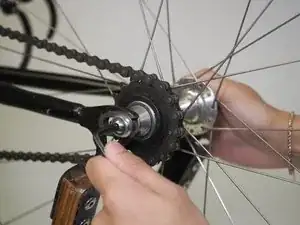
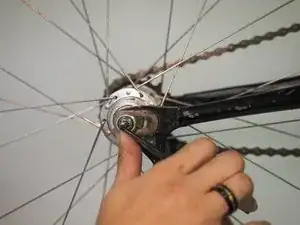
    • Use either an Allen or crescent wrench to loosen the nuts of the rear wheel of the bike. Make sure to do this on both sides of the wheel.

    • This step will require a 5mm Allen wrench or a crescent wrench, depending on the type of wheels you have.

  3. elKiHD52YMVjovXv
    elKiHD52YMVjovXv
    B2DZFIOVUURA3EuV
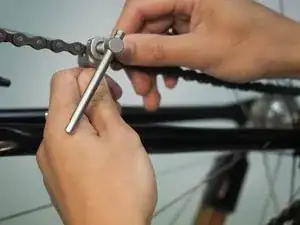
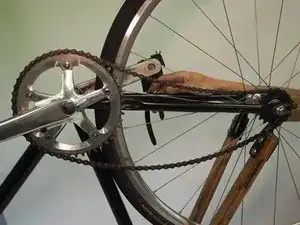
    • Place the chain breaker tool over the old chain.

    • Insert a link of the old chain into the chain breaker tool.

  4. UqdPIHsRXSkOv5Yw
    UqdPIHsRXSkOv5Yw
    Ct2ajDsRfTvCIMtG
    yvyVGmJZiMaA3xS1
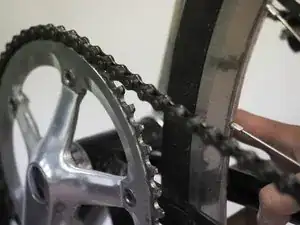
    • Turn the knob on the chain breaker tool until the pin within the chain has popped out.

    • Remove the old chain.

    • This step may take some finesse to ensure that the pin falls out.

  5. bc4xtTIIWhjZ6etC
    bc4xtTIIWhjZ6etC
    SaOCslnNfoNLqpDs
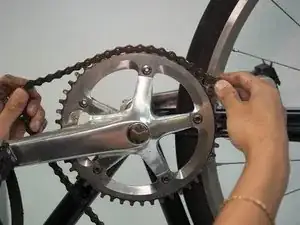
    • Unbox the new chain and place it on the chain ring.

    • Align the rings with the gears to ensure a proper fit.

  6. NYWFbGRy4IOHLZEV
    NYWFbGRy4IOHLZEV
    tpYhdNGU1g6FCX12
    i6AEv2rsbrHGWbeR
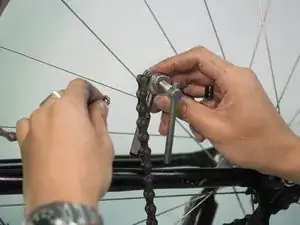
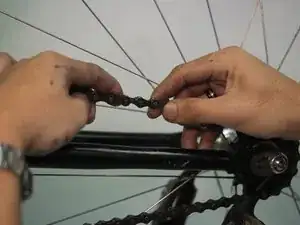
    • Wrap the chain around the cog of the rear wheel and bring the two ends of the chain together.

    • The chain should be long enough so that it can move up and down ~1/2 inch when secured.

    • Remove the excess chain using the chain breaker tool. Refer to steps 3 and 4 for how to use the chain breaker tool.

  7. dt3JKQd6ZAOmGMCW
    dt3JKQd6ZAOmGMCW
    WokCnKGO6BF4EUAZ
    nOV42toEoM2mqRjA
    • Locate the master link of the chain.

    • A master link is a single removable link segment on a bike chain. It connects the two ends of the chain together.

    • Insert the link pins into the two ends of the chain.

  8. ZQVL1kmUTiyHXxIp
    ZQVL1kmUTiyHXxIp
    mMNrNFUeeioAKlfE
    • Place the link face onto the link pins.

    • The chain is now secured.

  9. dpEDoVTgWZBj3wyk
    dpEDoVTgWZBj3wyk
    QoXJNwDppwaMjxSU
    OjbRNLT55QHHP4mK
    • Once the chain is on, pull the rear wheel back.

    • Tighten the nut on the drive side (right side) of the rear wheel.

    • The drive side of a bike is the side with the gears. This is usually on the right side, as seen in this model.

  10. cA1aAcAMWPEuJCdb
    cA1aAcAMWPEuJCdb
    EWWAqZXL1ZGvfYpo
    • Push the front end of the rear wheel to the non-drive side (left side) of the wheel. This pulls on the chain, creating tension.

    • Tighten the nut on the non-drive side (left side) of the wheel.

  11. rNJELMUQgLlnAFwo
    • Repeat the previous step with the drive side (right side) until the wheel is tightened.

    • Ensure that both nuts are tightened evenly.

  12. rP1MSKdPDdGiQrKP
    rP1MSKdPDdGiQrKP
    KRZgEpUaymOyw6Dc
    JGmMKJ1kDmGSdgjK
    • Check the tension in the gear.

    • It is good to have about half an inch of play in the chain in both directions.

Conclusion

To reassemble your device, follow these instructions in reverse order.
SaniaHey

Member since: 01/02/24

205 Reputation

0 comments