Introduction

You will need a 001 screw driver and a pry stick for this repair.

  1. MnVvE2NRIcSXjoFw
    MnVvE2NRIcSXjoFw
    ehiXx6FD1hFPVAYS
    163QFVSG6F1viQht
    • Remove all screws on the outside of the camera. A total of 6 screws will be removed.

    • Use a 0001 screw. Note: That the first two screws are in the first circle.

  2. BnpcSWAKJjurgEVT
    BnpcSWAKJjurgEVT
    Kt34wlKb3RdDyjVn
    QZToOWfZDKABiGcQ
    • Once all screws are removed slide open the battery cover.

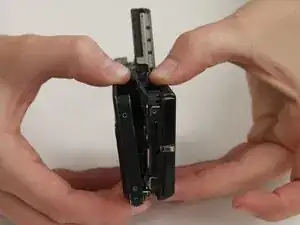
    • Pop off the front plate of the camera by moving the two pieces away from each other.

    • The front plate will partially be attached to the body of the camera by a ribbon. Detach with caution.

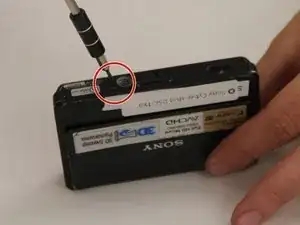
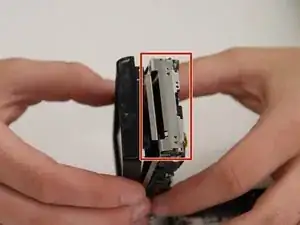
    • Next, remove the two silver screws on the inside of the camera.

  3. ZHdJDstaPyNjApwd
    ZHdJDstaPyNjApwd
    MMKTgsWPmMDxeEml
    • Pop off the back plate of the camera by gently pulling the inner plate out.

    • After the back plate is removed, the camera should appear like the second picture. The LED screen should be free and accessible to replace.

  4. sKB1YmIlKOQWS4DL
    • Use a pry stick to pop out the connector ribbon attached to the LCD screen.

    • A pair of tweezers may be needed to pull back a black slit to access the ribbon connector.

  5. ReqVkWLuQZGXaZBb
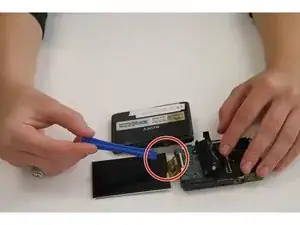
    • Attach the new LCD screen.

    • Follow the previous steps in reverse to put the camera back together.

Conclusion

To reassemble your device, follow these instructions in reverse order.

Melissa Pavelka

Member since: 24/09/15

131 Reputation

0 comments