Introduction

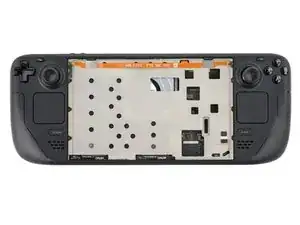
Use this guide to replace the screen (or display) on your Steam Deck OLED.

Remember to follow general electrostatic discharge (ESD) safety procedures while repairing your device.

You'll need replacement screen adhesive to complete this repair.

  1. wg1CPbiBgYbiTVlf
    wg1CPbiBgYbiTVlf
    mLdVpQ6WWvINGWuE
    • Turn on your Steam Deck and allow the battery to discharge below 25% before starting your repairs, as a charged lithium-ion polymer battery can be dangerous if accidentally punctured.

    • As an extra precaution, Valve recommends putting your Steam Deck into battery storage mode within the BIOS before starting any internal repairs. Read how to do that here.

    • Power down your Steam Deck and unplug any cables.

  2. 6UPwoloGBO4tmVoS
    6UPwoloGBO4tmVoS
    BmSYPJmOy6dbHipF
    3EOdQPAGOmiuhoKU
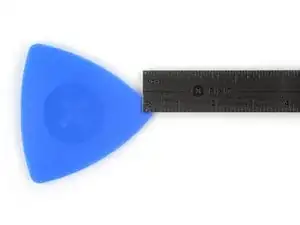
    • If inserted too far, an opening pick can damage your device. Follow this step to mark your pick and prevent damage.

    • Measure 3 mm from the tip and mark the opening pick with a permanent marker.

    • You can also mark the other corners of the pick with different measurements.

    • Alternatively, tape a coin to a pick 3 mm from the tip.

    Got to step 2 and realized the fix kit doesn't include an opening pick! Looks like a guitar pick, and I have those lying around. Is that expected? Looks like the pick is used in many steps below. There's a little blue crowbar that isn't mentioned in the instructions. Perhaps that replaces the opening pick?

    Sloan Looney -

    Hi! I can't see which guide you were using when writing this comment. Can you reply here with which guide and fix kit you used?

    Clay Eickemeyer -

    I see you posted this in Meta. I hope it's resolved soon! In the meantime, a guitar pick may work well enough for your repair.

    Clay Eickemeyer -

    what fix kit?

    Meow Purr -

    My fix kit didn't include an opening pick either

    WILLIAM HARRIS -

    Make sure you check inside the black boxes after emptying them. My pick was stuck inside one of the boxes.

    AndyF -

    My AliExpress refurbished screen came with a pick that has a coin-like circle that pops out, so no modification was necessary

    Gijs Leegwater -

    the picture shows 3 cm but the description says 3 mm's. Which one is it?

    John Pena -

    That is a misunderstanding. It is a ruler with a scale for cm, it shows 0.3 cm, i.e. 3 mm.

    VauWeh -

  3. dJpWBHw1I1FUfJUB
    • Prepare an iOpener and apply it to the top edge of the screen for one minute.

    • You may also use a hair dryer or heat gun, but be careful not to overheat the device, as the screen, battery, and plastic frame are all susceptible to heat damage.

  4. qaRKsAipAgaLOX5p
    qaRKsAipAgaLOX5p
    FGLDoFZoDKUmR1R5
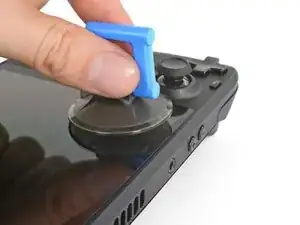
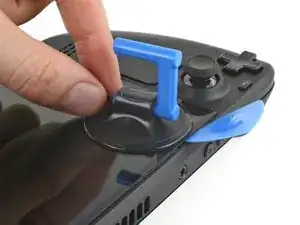
    • Apply a suction handle to the top left corner of the screen, as close to the top edge as possible.

    • If your display is badly cracked, cover it with a layer of clear packing tape to help the suction cup adhere. Alternatively, you can pull using very strong tape instead of a suction cup. If all else fails, try supergluing the suction cup to the broken screen.

  5. mILZAfdNpCd5Fuax
    mILZAfdNpCd5Fuax
    fq5leCxSZqJ6vMqv
    VJDXyaDVx3fRUL4R
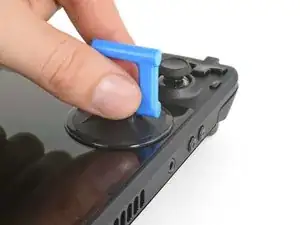
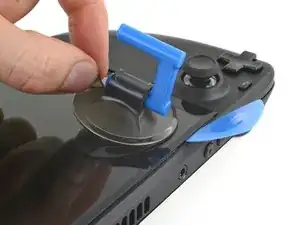
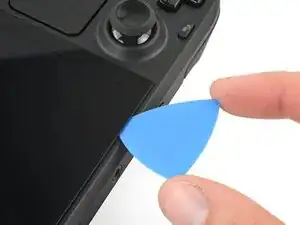
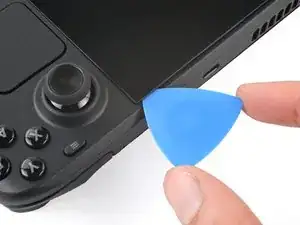
    • Pull up on the suction handle with a strong, steady force to create a gap between the screen and the frame.

    • Insert the tip of an opening pick into the gap.

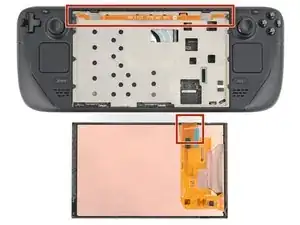
    • Don't insert your pick deeper than 3 mm (~1/8 of an inch) to avoid damaging the screen panel, ambient light sensor, or sensor cable.

  6. Y1nAxFXHVfLADfZe
    Y1nAxFXHVfLADfZe
    xnsAFtDC43q6OGpj
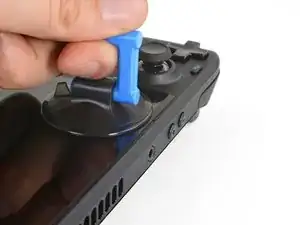
    • Pull up on the nub on the back of the suction handle to remove it from the screen.

  7. sLZJGDaxCFvnLpNB
    sLZJGDaxCFvnLpNB
    WEUnXTRrGbfK6Ywn
    rDT16ltAX4fC3qIB
    • As you slice through the adhesive securing the screen, note the following:

    • Along the top and bottom edges, don't insert your pick deeper than 3 mm (~1/8 of an inch) to avoid damaging the sensors, sensors cable, or screen cable.

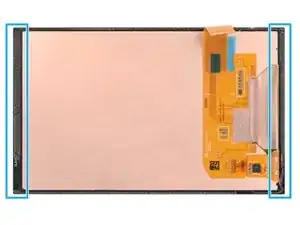
    • Along the left and right edges, don't insert your pick deeper than 5 mm (~1/5 of an inch) to avoid damaging the screen panel.

  8. SElDQGfSCdRb6jD1
    SElDQGfSCdRb6jD1
    4yx4U6PgxWmwC3Xb
    mIkAUCSJJO5NvTCd
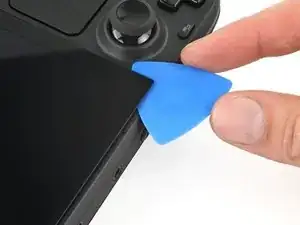
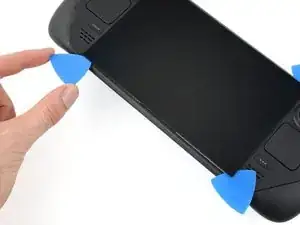
    • Rotate the pick so its flat edge is between the screen and frame.

    • Leave this pick inserted to prevent the adhesive from resealing.

  9. GRtSZHneFkcguChV
    GRtSZHneFkcguChV
    cxtT1GePM3Vtb535
    1BQm5XNMHcLF5KFI
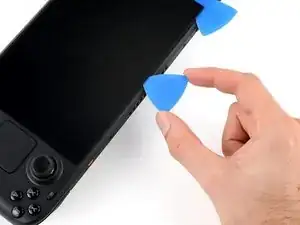
    • Don't insert your pick deeper than 3 mm (~1/8 of an inch) along the top edge.

    • Insert another pick in the top left corner.

    • Slide the pick toward the power button to separate the adhesive securing the top edge of the screen.

  10. vWsFMLEy1IHK2nWA
    vWsFMLEy1IHK2nWA
    WdbuacnwOddVAbLR
    5RWkgGZTDVKiZOWR
    • Rotate the pick so its flat edge is between the screen and frame.

    • Leave this pick inserted to prevent the adhesive from resealing.

  11. mfYiymXbEHPhiFU3
    • Heat the right edge of the screen for one minute.

  12. avs1YVKV3YP6uhGN
    avs1YVKV3YP6uhGN
    kGNOTgNgRsRSxxtN
    • Don't insert your pick deeper than 5 mm (~1/5 of an inch) along the right edge.

    • Insert another pick just below the right thumbstick.

    • Slide the pick to the bottom right corner to separate the right edge adhesive.

    • Leave the pick inserted to prevent the adhesive from resealing.

  13. ShtJebACQZ2MaMTZ
    • Heat the bottom edge of the screen for one minute.

  14. ZpRKRwyZZOYUk5As
    ZpRKRwyZZOYUk5As
    u1wKbPg4ApGOGBXq
    3H2n4WqWceUjcYdO
    • Don't insert your pick deeper than 3 mm (~1/8 of an inch) along the bottom edge.

    • Insert another pick in bottom right corner along the bottom edge.

    • Slide the pick to the bottom left corner to separate the bottom edge adhesive.

    • Leave the pick inserted to prevent the adhesive from resealing.

  15. IVcIr3VlUdxtMFet
    IVcIr3VlUdxtMFet
    vJLyi2UaNPjCXOAX
    V6EfGhVv3tP3ZIG2
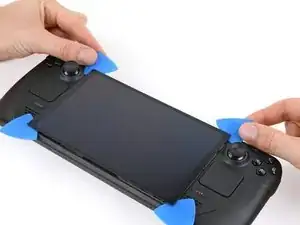
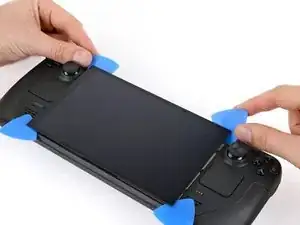
    • Grip the two picks along the top edge.

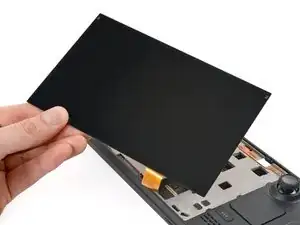
    • Pry up to lift the top edge of the screen away from the frame until you can grab it.

    • If the screen feels stuck, go back around the perimeter and check for missed sections of adhesive. If you're using a hair dryer, use it to lightly heat the stuck sections of adhesive.

  16. NXVOKhhYh2yE2Fmx
    NXVOKhhYh2yE2Fmx
    FAhorkjcSoS5tkRr
    Z4hYHBEpL2GYGBIC
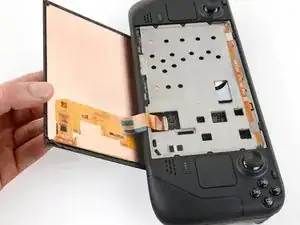
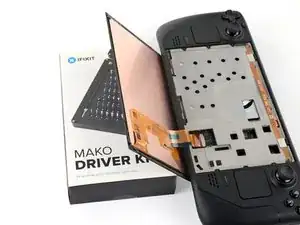
    • Be gentle with the screen, as straining its cable may damage the socket on the motherboard.

    • Flip the screen over the bottom edge of the frame.

    • Prop up the screen with a small box or book roughly 2.5 cm (~1 inch) thick.

    • If you don't have a box or book nearby, hold the screen in this position for the next two steps.

  17. AIPFmmo1RToi1WoE
    AIPFmmo1RToi1WoE
    5lApQXUowNv1jPSt
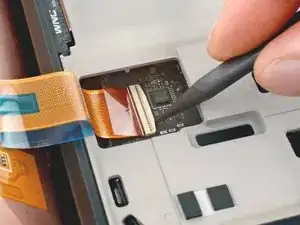
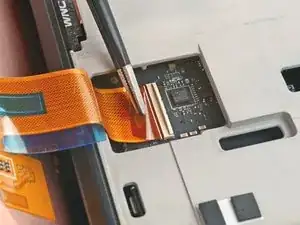
    • Use the point of a spudger or a clean fingernail to flip up the locking flap on the outside edge of the screen ZIF connector.

    • Don't touch any of the small surface-mounted components around the connector.

  18. 2h6KJfJsQxHmTMSl
    2h6KJfJsQxHmTMSl
    Y1UPr652FOrjMVd1
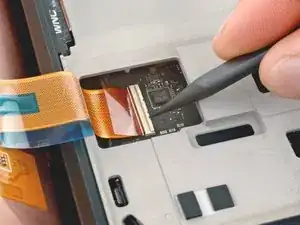
    • Use tweezers or your fingers to grip the screen cable pull tab and slide the cable straight out of its socket to disconnect it.

  19. OMp6NfZZSo2RMreA
Conclusion

To reapply adhesive and install your screen, follow this guide.

Take your e-waste to an R2 or e-Stewards certified recycler.

Repair didn’t go as planned? Try some basic troubleshooting, or ask our Steam Deck OLED answers community for help.

Clay Eickemeyer

Member since: 19/09/22

69212 Reputation

2 comments

I successfully swapped matte/glossy OLED model screens this way. First boot after swap had a frazzled screen. Hard reset fixed the problem instantly.

keyscameron -

Is this compatible with limited edition?
Joen Liwanag -