Introduction

Follow this guide to replace your power supply unit

  1. E3ZTakulSeVUHuPx
    E3ZTakulSeVUHuPx
    aUFA35cIZckJ1RtP
    BDZIoUMyvH5PRDhA
    • Lay the Surface face down on a padded surface

    • Be careful not to scratch the screen when laying it face down

    • Remove the four rubber feet at each corner concealing the Torx screws

    • Remove the four Torx screws under the rubber feet.

    • Two screws on the upper corners are longer than two screws on the lower corners.

    • Attach suction cups to the bottom cover and then pull on the suction cups to free the bottom cover.

  2. 2Gfl6gHZQVsRbTZK
    2Gfl6gHZQVsRbTZK
    HJhu143JUmFfPRd5
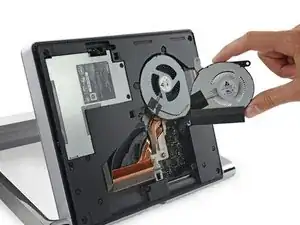
    • Remove five torx screws holding the two fans to the midframe

    • Remove the two fans

    • The fan connectors are behind the midframe and not yet accessible. Let the fans hang loosely until you can access the connectors.

    • Four large torx screws and four small torx screws hold the midframe to the upper frame.

    • Remove four large torx screws holding the midframe

    • Remove four small torx screws holding the midframe

  3. cioMZyNVI5BWIJ3x
    • Slowly remove the midframe

    • Be careful: the speaker on the midframe is still attached to the motherboard

    • Detach the connectors for the two fans and the speaker

    Help. Cannot figure out how to take the fan connectors out.

    I've removed the power supply in order to get full access around the, but still cannot figure out, with my limited vision and my smartphone camera.

    Does anybody want to add the detailed detail to this instruction, please? thanks.

    Eric Snyder -

  4. CubsUcrpXtGer6Yj
    CubsUcrpXtGer6Yj
    6bUUOtMXGLLNKCMg
    JW3OF5KRQxOGRE1q
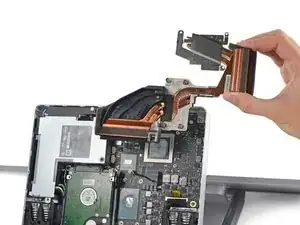
    • A screw retaining the power supply is under the hard drive so both the hard drive and the heat sink assembly must be removed

    • Remove four spring loaded torx screw labeled 1 to 4

    • Remove four torx screw labeled 5 to 7

    • Remove 5mm hex mounting post

    • Use a spudger to remove the heatsink assembly from the motherboard

  5. Ldl5UrD41ojn2iBp
    Ldl5UrD41ojn2iBp
    XitBHEv3BQqLgcB3
    • Remove three torx screws holding the hard drive brackets

    • Remove 5mm hex mounting post

    • Remove the hard drive and disconnect the SATA/SATA power cable

  6. v1HYEYsqyxIRmBYh
    v1HYEYsqyxIRmBYh
    NF1BZDNGLqRdAZTB
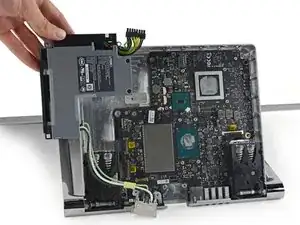
    • Remove a Phillips screw still retaining the power supply

    • Remove a torx screw retaining the power supply cable

    • Unplug the power supply from the motherboard

    • Lift the power supply up and away from the base unit

    I suggest when putting the unit back together, if you're in a position to put in a screw that "could" fall back into the case, do block the nooks and crannies with some plastic or something. You'll hate yourself if you have to take the case apart, maybe multiple times, to fish out a wayward screw.

    Okay, maybe this won't happen to you, but how much time does it take to stick some plastic or paper down there so that the screw cannot fall in?

    Eric Snyder -

Conclusion

To reassemble your device, follow these instructions in reverse order.

The Raptor

Member since: 28/11/16

6246 Reputation

3 comments

Does anyone have a source for a new power supply?

AustinMike -

Still no source fora power supply huh?

Steve -

I recently purchased a MS Surface Studio 6th Generation computer and it seems that the USB ports don’t work properly and the headphone jack is dead…. Any ideas what I need to do to fix it before I send it back?

reowens -