Introduction

These steps describe how to disassemble a Toto E-Max Fill Valve. Please note that one helpful commenter suggested that they did not need to remove the fill valve from the toilet before flushing it; you can therefore regard the early instructions on removing the fill valve from the toilet as possibly optional.

  1. NdEjcsyRdkDU2E1F
    NdEjcsyRdkDU2E1F
    xDDTngTxMtQNSCcu
    gm4ws3RTu6HBF1CM
    • Lift the tank lid up and away from the toilet tank.

  2. HQfV5nBOn32IFM1h
    HQfV5nBOn32IFM1h
    tqOauZQFoswJ4GGj
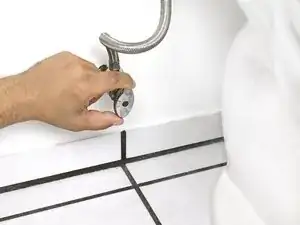
    • Shut off the stop valve underneath the toilet by turning it clockwise until it becomes hand tight.

    • The appearance of this valve may differ from toilet to toilet, but most operate the same. Some valves require multiple turns to stop the water while others only require a quarter turn.

  3. eJGLUXfm3KnW61QU
    eJGLUXfm3KnW61QU
    mPD54RDTOpwdLFxn
    Rt6SvjBV1PdFL2uZ
    • Disconnect the fill valve's rubber refill tube from the top of the overflow tube.

  4. RDtvNaEAUNptSe5S
    RDtvNaEAUNptSe5S
    w2DM2nrht4E5TxIF
    • Push down the flush lever.

    • Hold the lever down until water stops draining from the tank.

    • A small amount of water will remain in the bottom of the tank.

    • If the flush lever or pull chain have become disconnected, lift up the toilet flapper to drain the tank.

  5. pUyvrLJPjUOcjWWH
    pUyvrLJPjUOcjWWH
    tPaNBlm3JljTwnCZ
    c4MENEfuYV2U1Iix
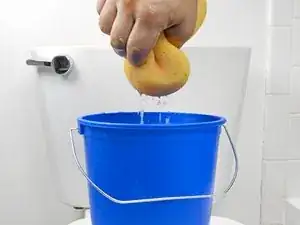
    • Use a sponge to soak up and remove any remaining water from the toilet tank.

    • Periodically squeeze the excess water from the sponge.

    This is kind of funny but it worked. I had absolutely no sponges at the house, but had leftover diapers our granddaughter outgrew. I thought outside the box and ended up being impressed with the outcome. I opened up the diapers and placed in the remaining tank water. Viola, it immediately began absorbing the water. I used 4 diapers and it did the trick. Just have a leak proof trash bag on hand. No sponge, no bucket, no mess!

    Jody Broussard -

  6. jTWcD1EZwsadZKYI
    jTWcD1EZwsadZKYI
    OygxTnSfv4jvhKqJ
    bPj5CVl5vCAFlWAZ
    • Place a bucket under the supply tube to catch any dripping water.

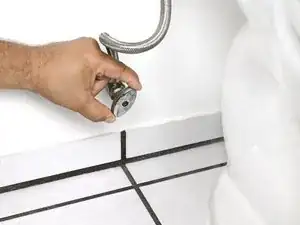
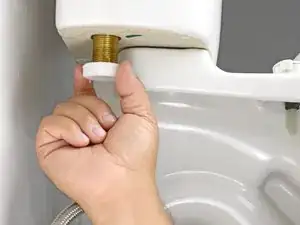
    • Turn the coupling nut on the supply tube clockwise until it releases from the threaded shank on the bottom of the tank.

  7. ieulJrBFE2APeswH
    ieulJrBFE2APeswH
    FcYqe5qG3YRjVHKe
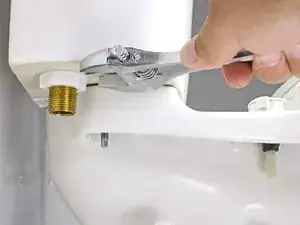
    • Using an adjustable wrench, turn the locknut on the threaded shank counter-clockwise until it becomes loose.

  8. vJtTLiQO5ZVCjnwJ
    vJtTLiQO5ZVCjnwJ
    JihEx4n6lgdyR1G3
    kkhOPLxDUQyTpgRb
    • Turn the locknut counter-clockwise until it releases from the threaded shank.

  9. PSDUqoExwNQcLMxf
    PSDUqoExwNQcLMxf
    Q1QMXdChxUC5v1By
    • Lift the entire fill valve out of the tank.

    • When installing a new valve, be sure to adjust the float so that the water line stops one inch below the overflow tube.

  10. rJdLjdTucFlEIuEv
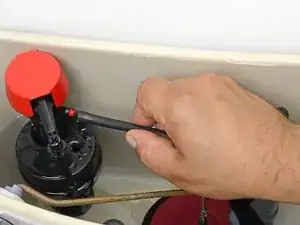
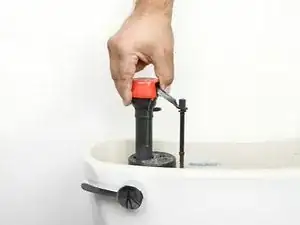
    • This is our friend the Toto E-Max Fill valve. Unfortunately, she is leaking. Specifically, the shutoff is incomplete, so water continues to flow even after the float is fully lifted.

  11. tuROSJ2WgKtkOYe6
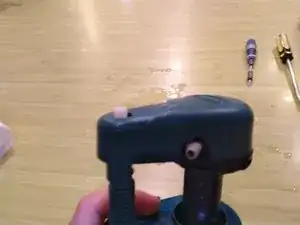
    • The next step is to remove the green top cap. It's held on by tabs, light flexing should allow you to remove it.

  12. I1jrYilTBgHu4kGG
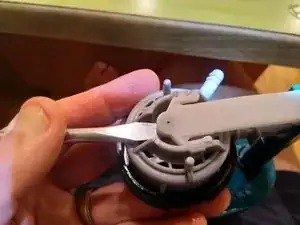
    • Here is the valve lever[*]. We need to remove it. It's held in by two pegs. Each one is attached to a flexible tang. use a thin blade or screwdriver to push each tang in, while gently lifting the lever.

    • [*} I have no idea if this is the right name.

  13. vUGbRvJ1M2D4SaNp
    • Here we see one peg released. Note that I'm applying very gentle lifting pressure, not prying it upward.

  14. jtvbaBBrOZbjnwSt
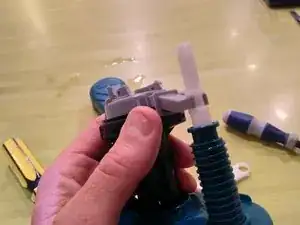
    • Valve lever released! You are a champion. BTW, I made up the name "valve lever". I hope you're not laughing at me.

  15. ur5NRUx2kMvMThXV
    • This is the other end of the valve lever. You should be able to easily release it from the green collar.

  16. sw6Oygq4sFLITXgU
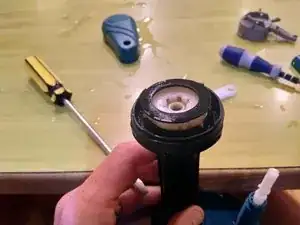
    • Next, gently pop off the green collar that links the valve lever to the threaded float lift shaft.

  17. YRPHaHsi5vvDNIFw
    YRPHaHsi5vvDNIFw
    CGUykIihatOQJLcE
    • Gently snap the white float pole out of the jaws of the top cap. When you do this, the float assembly will drop.

  18. ui6m4nyS2bTirGNC
    • Rotate the valve cover an eighth of a turn counter-clockwise to release it.

  19. 12AtVSToWUH2TYUF
    12AtVSToWUH2TYUF
    EyTcgvppjj5nB1OC
    • Yay! We got to the valve seal. Clean it off or replace it, and reverse steps to reassemble.

    This is the only instruction I found that helped me understand how to disassemble, thank you! If you are trying to fix the valve, leave it in place in your tank; once you get to the last image above , you need to flush it out by placing a cup upside down over this, turn your water supply back on and run it for about 30 seconds. Turn water supply off , reassemble in reverse order, turn supply on and if you were lucky like me the float will do its job! - Laura

    Laura Wallace -

Conclusion

To reassemble your device, follow these instructions in reverse order.

John Clements

Member since: 05/11/17

504 Reputation

One comment

Thank you! I did not expect to find a guide for a Toto toilet repair on a (mainly) electronics site, but here it is!

It worked perfectly when my toilet started running continuously on a Saturday evening.

I was able to take everything apart without even removing it from the tank, so it was a 15min fix!

Thank you!

Graham Allen -