Introduction

If you have ever noticed a gradual decrease in performance from your 8-inch UTILITECH #HVT-8H desk fan, it may be time to replace the motor. The culprit for the fan's failure is typically periods of dust buildup, which can destroy the fan's motor if not cleaned.

Generally, people choose to throw away their desktop fans because it does not seem worth the hassle to fix the broken parts. Trashing the fan is not only a waste of all the other parts that are in good condition, but also a waste of money. Buying a new fan can be four times as expensive as replacing the motor. Additionally, it is beneficial to learn how to fix things, especially when there is little risk involved.

Before you begin the repair, be sure to unplug the fan from the power outlet. Also prepare plenty of space for this repair to ensure an ample amount of room for all the components to rest on.

  1. nsakoOaYLcJKkQjZ
    • Use a spudger to remove the screw covers.

    • Pry gently to avoid breaking the clips.

  2. DXx4OpQr3iOTNJU2
    DXx4OpQr3iOTNJU2
    xeneMNROMbs4BgXH
    aVwXtS5fdleGMDmJ
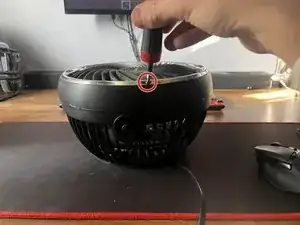
    • Use your Phillips #0 screwdriver to remove the 8 mm screw that attaches the fan to its stand.

    • Repeat step 1 and 2 on the other side of the fan.

  3. LQSyBOXJIO6UiMP4
    LQSyBOXJIO6UiMP4
    QLJOLRVAGp3lCBXG
    • Use a spudger to remove the silver screw cover from the front of the fan.

    • Do not try to force the piece off as it could break. Instead, gently pry around the entire fan until it pops loose.

  4. 6ZEpQkWEGPFaDcRd
    6ZEpQkWEGPFaDcRd
    vI6F6KfaJjIOQKHj
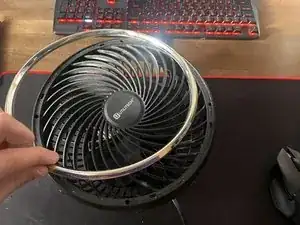
    • Use a Phillips #00 screwdriver to remove the four 6 mm screws that hold the fan cover in place.

  5. rEkJbcaCuemgq1em
    rEkJbcaCuemgq1em
    TJlobORcSTtnXSdA
    UGvFaBEf3oaamLZx
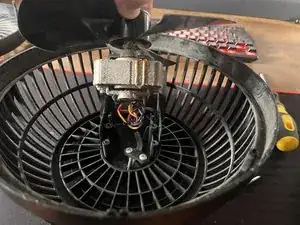
    • Use a Phillips #0 screwdriver to remove the two 8 mm screws that attach the motor assembly to the base of the fan.

  6. XtOYhyeEoKEgmf1S
    XtOYhyeEoKEgmf1S
    loVxtUFoC5EOfcpK
    HPnRxlUjGF1qNIv1
    • Remove the power control knob by pulling on the knob backward.

    • Use a 10 mm socket wrench to remove the 10 mm nut that holds the power control piece in place.

  7. MVPwvbBXdxFjPojK
    MVPwvbBXdxFjPojK
    sg4OImm25C3YRVNA
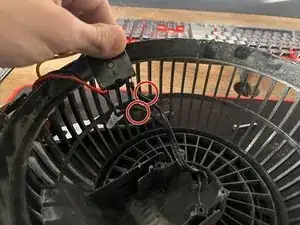
    • Use a Phillips #0 screwdriver to remove the two 8 mm screws that fasten the power plug to the base.

  8. jVdqZymOSmLAugKa
    jVdqZymOSmLAugKa
    3TQRyRoJJFJtYqAV
    OAAqkTyTBQlTCxTs
    • Cut the two black cables to release them from the motor assembly.

    • Be sure to cut as closely as you can to the base of the cables so you don't lose a lot of length.

  9. MsynSlEIs6vWmCRy
    MsynSlEIs6vWmCRy
    GvjscWK2QALLWuZT
    • Use a wire stripper on the black wires to expose the metal underneath the rubber.

    • Strip about 13 mm from the end of both wires.

  10. PvgeTeTLbUeJGOjO
    PvgeTeTLbUeJGOjO
    oUC2wHEVDyDyEWuU
    • Connect the exposed power plug wires to the new motor assembly by twisting the two exposed wires together.

    • Wrap electrical tape around the newly connected wires.

Conclusion

To reassemble your device, follow these instructions in reverse order.

Joseph Pemberton

Member since: 26/02/24

181 Reputation

0 comments