Introduction
A snag on a branch. That's all it takes to ruin the sweater grandma knitted for you. Due to the intricacies that is the knitting process, people often feel hopeless when there is a hole in their knitted sweater. The loose strands, the ruined patterned stitches, all of it seems impossible to repair. However, there is still a chance for salvation and this guide here will tell you all about it.
Using needlework and crochet techniques, this repair guide will take you through the steps of repairing holes in knitwear while making it look perfect and brand new again.
Tools
-
-
Thread your desired yarn color through the needle.
-
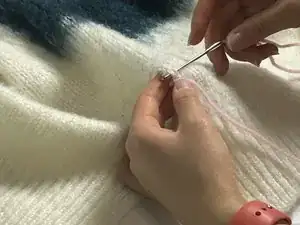
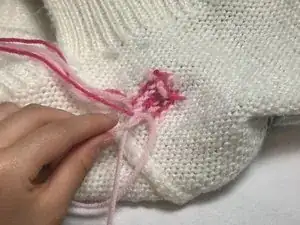
In the row next to the hole, insert your needle into the bottom-most stitch from the back to the front, pulling all the way through (Image 2).
-
Insert your needle into the V-shaped stitch above, going through both loops of the stitch (Image 3).
-
-
-
Insert your needle back into the bottom stitch (from Step 1), pulling all the way through.
-
Cut your thread, making sure to leave enough yarn to cover the rest of the hole.
-
-
-
Re-thread your needle.
-
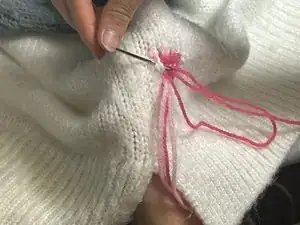
In the stitch above your starting stitch (from steps 1 and 2), insert your needle from back to front, pulling all the way through (Image 1).
-
Insert your needle into the V-shaped stitch above, going through both loops of the stitch (Image 2).
-
Insert your needle back into the stitch below, pulling all the way through.
-
Cut your thread (same length as the first cut).
-
-
-
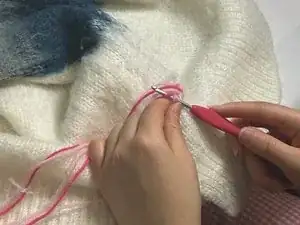
Switch to using your crochet hook.
-
In the next row, insert hook into bottom loop (Image 1).
-
Hook underneath the thread above (Image 2).
-
Pull the thread through the loop (Image 3).
-
-
-
Thread yarn through edge of the damaged hole.
-
Needle light pink yarn through dark pink yard beneath.
-
-
-
Thread the top-most strand of light pink yarn through the needle.
-
Stick the needle through the stitch right beside it and pull it through.
-
-
-
Push the needle underneath the two stitches right above from the left, and pull the thread through.
-
Do the same, but starting from the left side.
-
-
-
Using the dark pink thread, push the needle through the right side of the next two stitches underneath the new light pink stitches.
-
Repeat but starting from the left side.
-
-
-
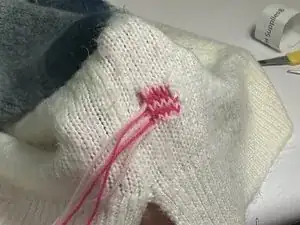
Once the needle is pulled through, it should create a V-shaped stitch just like the one above it.
-
Continue all the way down the height of the hole.
-
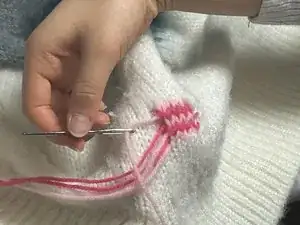
Tuck loose strands of yarn into the back.
-
-
-
When all the stitches are complete, tie off each loose strand in the back with a secure knot.
-
Trim off excess strands of yarn.
-