
Introduction
This repair is for an Apple iPhone 5. This process works on all iPhone 5 carriers and colors.
The display assembly includes the home button assembly, front camera assembly, earpiece speaker, and the LCD shield plate.
-
-
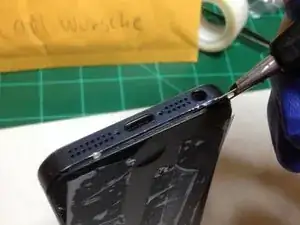
Take the 5-Point Pentalobe screwdriver to remove two 3.6 mm Pentalobe screws next to the Lighting Connector (Charging Port).
-
-
-
Extend the blade 2mm from closed position.
-
Place blade between the display assembly and the phone housing.
-
Push down between the display assembly and the phone housing until you see a gap. Once you see the gap, pry up using the blade to keep the gap.
-
-
-
Now that there is a fixed gap, use your plastic pry tool to pry around the display assembly, to separate the screen from the phone.
-
-
-
Gently lift the display assembly away from the phone, and make a 90 degree angle with respect to the horizontal.
-
-
-
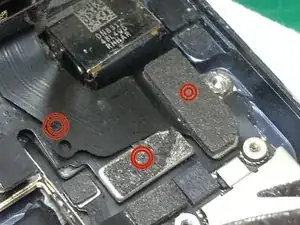
Locate the Connector Protective plate, it is at the top right of the phone. Along the side of the power button.
-
Take your #000 Phillips head screwdriver to unscrew three Phillip screws holding the Connector Protective plate to the logic board.
-
Once all the Phillips screws and removed, remove the Connector Protective Plate from the phone.
-
-
-
Now that the three cables are disconnected, remove the old Display Assembly and store it safely.
-
-
-
Using compressed air specifically for electronics, blow away any dust and trash from the phone.
-


To reassemble your device, follow these instructions in reverse order.