Desoldering Technique
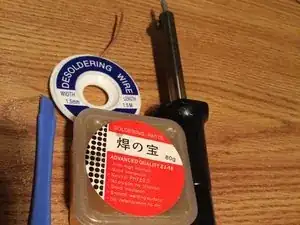
These are some common tools used to work on this device. You might not need every tool for every procedure.
First used in the second generation of computers back in the 1950's, through-hole soldering is the simplest form of soldering in which leads on the components are inserted into plated through-holes (PTH). The leads are then soldered to pads on the opposite side of the PTH.
Though it provides very strong mechanical bonds, drilling the additional holes in the printed circuit boards makes it much more expensive than other methods such as surface mounting.
Soldering can be dangerous if you don't follow a few basic safety procedures. You are working with tools that are hot, and melted metals. You want to make sure you don't burn yourself. It's a good idea not to wear loose fitting clothing that could get in the way when you are working, as well as tie your hair back if it is long. It is also important to wash your hands after you do any soldering. Some solder contains lead, and you don't want to be eating that.
The four basic safety rules:
Soldering only takes a little bit of basic equipment. You need a soldering iron to heat the solder, an iron stand to put the iron on so it doesn't burn the table, and solder.
A soldering iron is a pen shaped tool with a fine tip that heats up. One of the ways soldering irons are measured by is wattage. For most basic soldering, a 25 to 50 Watt soldering iron will work without any problems. Most irons are simple single temperature models, but it is also possible to buy advanced solder stations where you can directly set the tip temperature with a dial or knob.
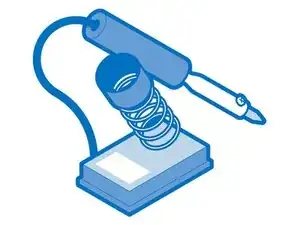
A soldering iron stand is used to keep the hot tip of the soldering iron from burning the table or work surface when you set the iron down. They are often included with higher end soldering irons, but must be purchased separately with most budget models.
There are many different kinds of solder. The simplest type of solder is 60/40 flux cored solder. This solder is made of 60% tin and 40% lead. This kind of solder is inexpensive and easy to work with, however it does contain lead, which can be dangerous to work with if you don't follow proper safety procedures.
An alternative to leaded solder is lead free solder. This kind of solder is more difficult to work with but is better for the environment.
For someone just starting out and learning how to solder, using leaded solder will be much easier.
Now we get to the fun part, actually soldering. The first thing to do is to place the part on the printed circuit board. Make sure that the board and part are clean. Any dirt or debris on the board or the lead will prevent the solder from sticking to everything properly. It can also be helpful to use a small piece of either masking tape or electrical tape to secure the part to the board. You don't need to do this all the time, but if you have trouble with any particular part staying in place, it can help quite a bit. Finally, double check that the part you are soldering is in the right place on your circuit board, and that it is in the right orientation. Some parts, like capacitors, diodes, transistors and integrated circuits will either not work, or be damaged if they aren't put in properly.
Take the iron in one hand, and the solder in the other. When I solder, I hold the iron in my dominent hand, but you should try each way to see what feels best for you. Add a little bit of solder to the tip of the soldering iron. This is called 'tinning' the iron, and it helps protect the tip of the iron, as well as making it transfer heat better. Touch the iron to the joint that you're soldering, making sure to touch both the copper pad on the board as well as the lead on the part. The idea is to heat up every part of the connection to the same temperature so that the solder flows evenly into all the tiny spaces. After a one or two seconds, slowly poke the solder into the joint. If the joint is hot enough, the solder should melt and flow into the joint. You only want to add a few millimeters worth of solder, so don't go crazy. Once you add the solder, slowly pull the iron away from the joint, wipe the tip on a damp sponge, and place the soldering iron into its holder.
A properly done solder joint should look like a cone, with the sides of the solder straight. If they curve in, then there isn't enough solder on the joint, and you should add a little bit more. If it bulges out there's a little too much solder. If this happens, the best thing to do is desolder the joint with desoldering braid and try again. The joint should also be shiny. If it isn't, then the joint didn't get hot enough when it was melted. The way to fix this problem is to reheat the joint and try again.
Once you have a joint that looks good, that's it! Keep on soldering all of the other parts onto the board and you're on your way to having a working electronics project.