28

On UIView you can change the backgroundColour animated. And on a UISlideView you can change the value animated.

Can you add a custom property to your own UIView subclass so that it can be animated?

If I have a CGPath within my UIView then I can animate the drawing of it by changing the percentage drawn of the path.

Can I encapsulate that animation into the subclass.

i.e. I have a UIView with a CGPath that creates a circle.

If the circle is not there it represents 0%. If the circle is full it represents 100%. I can draw any value by changing the percentage drawn of the path. I can also animate the change (within the UIView subclass) by animating the percentage of the CGPath and redrawing the path.

Can I set some property (i.e. percentage) on the UIView so that I can stick the change into a UIView animateWithDuration block and it animate the change of the percentage of the path?

I hope I have explained what I would like to do well.

Essentially, all I want to do is something like...

[UIView animateWithDuration:1.0
 animations:^{
     myCircleView.percentage = 0.7;
 }
 completion:nil];

and the circle path animate to the given percentage.

Fogmeister
  • 76,236
  • 42
  • 207
  • 306

5 Answers5

26

If you extend CALayer and implement your custom

- (void) drawInContext:(CGContextRef) context

You can make an animatable property by overriding needsDisplayForKey (in your custom CALayer class) like this:

+ (BOOL) needsDisplayForKey:(NSString *) key {
    if ([key isEqualToString:@"percentage"]) {
        return YES;
    }
    return [super needsDisplayForKey:key];
}

Of course, you also need to have a @property called percentage. From now on you can animate the percentage property using core animation. I did not check whether it works using the [UIView animateWithDuration...] call as well. It might work. But this worked for me:

CABasicAnimation *animation = [CABasicAnimation animationWithKeyPath:@"percentage"];
animation.duration = 1.0;
animation.fromValue = [NSNumber numberWithDouble:0];
animation.toValue = [NSNumber numberWithDouble:100];

[myCustomLayer addAnimation:animation forKey:@"animatePercentage"];

Oh and to use yourCustomLayer with myCircleView, do this:

[myCircleView.layer addSublayer:myCustomLayer];
Tom van Zummeren
  • 9,130
  • 12
  • 52
  • 63
  • @Fogmeister Hi, am a bit late to the party. Was hoping to ask: how would we implement `- (void) drawInContext:(CGContextRef) context`? Is this where a newly customized property would be drawn? Thanks in advance. – Unheilig Mar 27 '14 at 00:07
  • 1
    @Tom in your sample you set the duration manually to 1... how would you be able to figure out the duration/curve/delay, ect... provided by the UIViewAnimation block? – Georg May 26 '17 at 09:44
19

Complete Swift 3 example:

Final product

public class CircularProgressView: UIView {

    public dynamic var progress: CGFloat = 0 {
        didSet {
            progressLayer.progress = progress
        }
    }

    fileprivate var progressLayer: CircularProgressLayer {
        return layer as! CircularProgressLayer
    }

    override public class var layerClass: AnyClass {
        return CircularProgressLayer.self
    }


    override public func action(for layer: CALayer, forKey event: String) -> CAAction? {
        if event == #keyPath(CircularProgressLayer.progress),
            let action = action(for: layer, forKey: #keyPath(backgroundColor)) as? CAAnimation, 
            let animation: CABasicAnimation = (action.copy() as? CABasicAnimation) {
            animation.keyPath = #keyPath(CircularProgressLayer.progress)
            animation.fromValue = progressLayer.progress
            animation.toValue = progress
            self.layer.add(animation, forKey: #keyPath(CircularProgressLayer.progress))
            return animation
        }
        return super.action(for: layer, forKey: event)
    }

}


/*
* Concepts taken from:
* https://stackoverflow.com/a/37470079
*/
fileprivate class CircularProgressLayer: CALayer {
    @NSManaged var progress: CGFloat
    let startAngle: CGFloat = 1.5 * .pi
    let twoPi: CGFloat = 2 * .pi
    let halfPi: CGFloat = .pi / 2


    override class func needsDisplay(forKey key: String) -> Bool {
        if key == #keyPath(progress) {
            return true
        }
        return super.needsDisplay(forKey: key)
    }

    override func draw(in ctx: CGContext) {
        super.draw(in: ctx)

        UIGraphicsPushContext(ctx)

        //Light Grey
        UIColor.lightGray.setStroke()

        let center = CGPoint(x: bounds.midX, y: bounds.midY)
        let strokeWidth: CGFloat = 4
        let radius = (bounds.size.width / 2) - strokeWidth
        let path = UIBezierPath(arcCenter: center, radius: radius, startAngle: 0, endAngle: twoPi, clockwise: true)
        path.lineWidth = strokeWidth
        path.stroke()


        //Red
        UIColor.red.setStroke()

        let endAngle = (twoPi * progress) - halfPi
        let pathProgress = UIBezierPath(arcCenter: center, radius: radius, startAngle: startAngle, endAngle: endAngle , clockwise: true)
        pathProgress.lineWidth = strokeWidth
        pathProgress.lineCapStyle = .round
        pathProgress.stroke()

        UIGraphicsPopContext()
    }
}

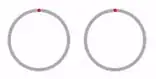
let circularProgress = CircularProgressView(frame: CGRect(x: 0, y: 0, width: 80, height: 80))
UIView.animate(withDuration: 2, delay: 0, options: .curveEaseInOut, animations: {
    circularProgress.progress = 0.76
}, completion: nil)

There is a great objc article here, which goes into details about how this works

As well as a objc project that uses the same concepts here:

Essentially action(for layer:) will be called when an object is being animated from an animation block, we can start our own animations with the same properties (stolen from the backgroundColor property) and animate the changes.

Andrey Gordeev
  • 30,606
  • 13
  • 135
  • 162
David Rees
  • 6,792
  • 3
  • 31
  • 39
3

For the ones who needs more details on that like I did:

there is a cool example from Apple covering this question.

E.g. thanks to it I found that you don't actually need to add your custom layer as sublayer (as @Tom van Zummeren suggests). Instead it's enough to add a class method to your View class:

+ (Class)layerClass
{
    return [CustomLayer class];
}

Hope it helps somebody.

makaron
  • 1,585
  • 2
  • 16
  • 30
  • There is a problem with Apple’s example code. It still animates the bulb even if you disable animations: `[self setOn:!self.on animated:NO];` – bio May 24 '20 at 15:04
0

you will have to implement the percentage part yourself. you can override layer drawing code to draw your cgpath accroding to the set percentage value. checkout the core animation programming guide and animation types and timing guide

Swapnil Luktuke
  • 10,385
  • 2
  • 35
  • 58
0

@David Rees answer get me on the right track, but there is one issue. In my case completion of animation always returns false, right after animation has began.

UIView.animate(withDuration: 2, delay: 0, options: .curveEaseInOut, animations: {
    circularProgress.progress = 0.76
}, completion: { finished in
   // finished - always false
})

This is the way it've worked for me - action of animation is handled inside of CALayer.

I have also included small example how to make layer with additional properties like "color". In this case, without initializer that copies the values, changing the color would take affect only on non-animating view. During animation it would be visble with "default setting".

public class CircularProgressView: UIView {

    @objc public dynamic var progress: CGFloat {
        get {
            return progressLayer.progress
        }
        set {
            progressLayer.progress = newValue
        }
    }

    fileprivate var progressLayer: CircularProgressLayer {
        return layer as! CircularProgressLayer
    }

    override public class var layerClass: AnyClass {
        return CircularProgressLayer.self
    }
}


/*
* Concepts taken from:
* https://stackoverflow.com/a/37470079
*/
fileprivate class CircularProgressLayer: CALayer {
    @NSManaged var progress: CGFloat
    let startAngle: CGFloat = 1.5 * .pi
    let twoPi: CGFloat = 2 * .pi
    let halfPi: CGFloat = .pi / 2


    var color: UIColor = .red
    // preserve layer properties
    // without this specyfic init, if color was changed to sth else
    // animation would still use .red
    override init(layer: Any) {
        super.init(layer: layer)
        if let layer = layer as? CircularProgressLayer {
            self.color = layer.color
            self.progress = layer.progress
        }
    }

    override init() {
        super.init()
    }

    required init?(coder aDecoder: NSCoder) {
        super.init(coder: aDecoder)
    }

    override class func needsDisplay(forKey key: String) -> Bool {
        if key == #keyPath(progress) {
            return true
        }
        return super.needsDisplay(forKey: key)
    }

    override func action(forKey event: String) -> CAAction? {
        if event == #keyPath(CircularProgressLayer.progress) {
            guard let animation = action(forKey: #keyPath(backgroundColor)) as? CABasicAnimation else {
                setNeedsDisplay()
                return nil
            }

            if let presentation = presentation() {
                animation.keyPath = event
                animation.fromValue = presentation.value(forKeyPath: event)
                animation.toValue = nil
            } else {
                return nil
            }

            return animation
        }

        return super.action(forKey: event)
    }

    override func draw(in ctx: CGContext) {
        super.draw(in: ctx)

        UIGraphicsPushContext(ctx)

        //Light Gray
        UIColor.lightGray.setStroke()

        let center = CGPoint(x: bounds.midX, y: bounds.midY)
        let strokeWidth: CGFloat = 4
        let radius = (bounds.size.width / 2) - strokeWidth
        let path = UIBezierPath(arcCenter: center, radius: radius, startAngle: 0, endAngle: twoPi, clockwise: true)
        path.lineWidth = strokeWidth
        path.stroke()

        // Red - default
        self.color.setStroke()

        let endAngle = (twoPi * progress) - halfPi
        let pathProgress = UIBezierPath(arcCenter: center, radius: radius, startAngle: startAngle, endAngle: endAngle , clockwise: true)
        pathProgress.lineWidth = strokeWidth
        pathProgress.lineCapStyle = .round
        pathProgress.stroke()

        UIGraphicsPopContext()
    }
}

The way to handle animations differently and copy layer properties I have found in this article: https://medium.com/better-programming/make-apis-like-apple-animatable-view-properties-in-swift-4349b2244cea