This is simple to do if you can tolerate some ugly effects in the resulting image. If this image with the different background color will be shown as a downscaled version of the original image, then these effects might not be noticeable and all is good.
So here is the simple approach:
- Flood fill from the pixel at (0, 0) assuming it is a background pixel (white in your example) and accept minor differences when performing the flood fill. The background pixels are replaced by transparent points.
- The step above gives a mask, which you can, for example, perform erosion and gaussian filtering.
- Paste the "flood-filled" image with the mask created above.
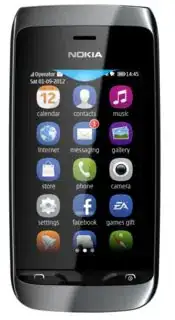
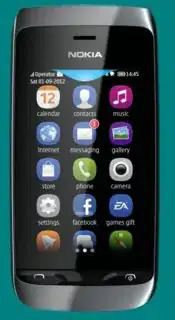
Here is what you can expect from this approach. Input image and then two transformations to different background colors.

import sys
import cv2
import numpy
from PIL import Image

def floodfill(im, grayimg, seed, color, tolerance=15):
    width, height = grayimg.size
    grayim = grayimg.load()
    start_color = grayim[seed]

    mask_img = Image.new('L', grayimg.size, 255)
    mask = mask_img.load()
    count = 0
    work = [seed]
    while work:
        x, y = work.pop()
        im[x, y] = color
        for dx, dy in ((-1,0), (1,0), (0,-1), (0,1)):
            nx, ny = x + dx, y + dy
            if nx < 0 or ny < 0 or nx > width - 1 or ny > height - 1:
                continue
            if mask[nx, ny] and abs(grayim[nx, ny] - start_color) <= tolerance:
                mask[nx, ny] = 0
                work.append((nx, ny))
    return mask_img

img = Image.open(sys.argv[1]).convert('RGBA')
width, height = img.size
img_p = Image.new('RGBA', (width + 20, height + 20), img.getpixel((0, 0)))
img_p.paste(img, (3, 3))
img = img_p
img_g = img.convert('L')
width, height = img.size

im = img.load()
mask = floodfill(im, img_g, (0, 0), (0, 0, 0, 0), 20)

mask = numpy.array(mask)
se = cv2.getStructuringElement(cv2.MORPH_ELLIPSE, (7, 7))
mask = cv2.erode(mask, se)
mask = cv2.GaussianBlur(mask, (9, 9), 3)
mask = Image.fromarray(mask)

result_bgcolor = (0, 0, 0, 255) # Change to match the color you wish.
result = Image.new('RGBA', (width, height), result_bgcolor)
result.paste(img_p, (0, 0), mask)

result.save(sys.argv[2])