2

I want to design a login page like this enter image description here

in this page using box shadow in ios i tried layer shadow like this but this one not showing like above image plz guide.

I tried

imageView.layer.shadowColor = [UIColor purpleColor].CGColor;
imageView.layer.shadowOffset = CGSizeMake(0, 1);
imageView.layer.shadowOpacity = 1;
imageView.layer.shadowRadius = 1.0;
imageView.clipsToBounds = NO;

but it shows

enter image description here

thanks in advance

update

using below code:

UIImageView *imag = (UIImageView*)[self.view viewWithTag:1];
    imag = [[UIImageView alloc] initWithFrame:CGRectMake((screenWidth/100)*12, (screenHeight/100)*10, (screenWidth/100)*75, (screenHeight/100)*61)];
    [imag setBackgroundColor:[UIColor whiteColor]];
    [imag.layer setOpacity:0.4];
    [imag.layer setShadowOpacity:1.0];
    [imag.layer setShadowColor:[[UIColor blackColor] CGColor]];
    [imag.layer setShadowOffset:CGSizeMake(0.0, 0.0)];
    [imag.layer setShadowRadius:8.0];
    [imag setClipsToBounds:FALSE];
    [imag.layer setMasksToBounds:FALSE];
    [self.view addSubview:imag];

ios 6 it shows like below image but it working on ios 7

enter image description here

Prasanth S
  • 3,725
  • 9
  • 43
  • 75

3 Answers3

7

I've got that on my screen:

enter image description here

with this code snippet:

[_backgroundBoxWithShadow.layer setOpacity:0.4];
[_backgroundBoxWithShadow setBackgroundColor:[UIColor whiteColor]];
[_backgroundBoxWithShadow.layer setShadowOpacity:1.0];
[_backgroundBoxWithShadow.layer setShadowColor:[[UIColor blackColor] CGColor]];
[_backgroundBoxWithShadow.layer setShadowOffset:CGSizeMake(0.0, 0.0)];
[_backgroundBoxWithShadow.layer setShadowRadius:8.0];

[_imaginaryTextBoxWithShadow.layer setShadowColor:[[UIColor blackColor] CGColor]];
[_imaginaryTextBoxWithShadow.layer setShadowOffset:CGSizeMake(-4.0, 4.0)];
[_imaginaryTextBoxWithShadow.layer setShadowRadius:4.75];
[_imaginaryTextBoxWithShadow.layer setShadowOpacity:0.4];

NOTE: none of the views contains the other one, they are siblings in the same superview. however the result looks identical to the original screenshot in my view – you still can play with the values to refine the result for your final wish.


update

you posted that fragment of your code based on my answer with saying "not working":

CGFloat screenWidth = self.view.bounds.size.width;
CGFloat screenHeight = self.view.bounds.size.height;

// BEGIN - your code
UIImageView *imag = (UIImageView *)[self.view viewWithTag:1]; // the line is pointless here, anyway...
imag = [[UIImageView alloc] initWithFrame:CGRectMake((screenWidth/100)*12, (screenHeight/100)*10, (screenWidth/100)*75, (screenHeight/100)*61)];
[imag setBackgroundColor:[UIColor whiteColor]];
[imag.layer setOpacity:0.4];
[imag.layer setShadowOpacity:1.0];
[imag.layer setShadowColor:[[UIColor blackColor] CGColor]];
[imag.layer setShadowOffset:CGSizeMake(0.0, 0.0)];
[imag.layer setShadowRadius:8.0];
// END - your code

[self.view addSubview:imag];

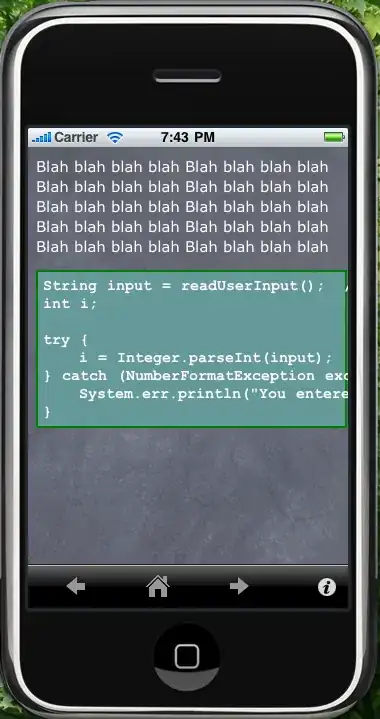
that is how it looks on a real iPhone5 on my side, it looks to be working perfectly:
enter image description here

please post a screenshot(!) about it if that is different on your side.


NOTE: you have to keep both the view's clipsToBounds and layer's masksToBounds FALSE, otherwise the shadow will be cut off.


that looks correct in Interface Builder:

enter image description here

or in you can add that to your code explicitly:

[imag setClipsToBounds:FALSE];
[imag.layer setMasksToBounds:FALSE];

update for iOS6.1

after eventually it turned out, you need a solution for iOS6, I have found that solution as working as well on my devices with iOS6.1:

[_backgroundBoxWithShadow.layer setOpacity:0.4];
[_backgroundBoxWithShadow setBackgroundColor:[UIColor whiteColor]];
[_backgroundBoxWithShadow.layer setShouldRasterize:TRUE];
[_backgroundBoxWithShadow.layer setRasterizationScale:[[UIScreen mainScreen] scale]];
[_backgroundBoxWithShadow.layer setShadowOpacity:1.0];
[_backgroundBoxWithShadow.layer setShadowColor:[[UIColor blackColor] CGColor]];
[_backgroundBoxWithShadow.layer setShadowOffset:CGSizeMake(0.0, 0.0)];
[_backgroundBoxWithShadow.layer setShadowRadius:8.0];

as you might see on your side as well, the final result looks like this on iOS6.1:
enter image description here

Community
  • 1
  • 1
holex
  • 23,961
  • 7
  • 62
  • 76
2

Because of the way iOS 6 composites opacity you're going to have a tough time getting it to work using the CALayer's shadow properties.

iOS 6 doesn't composite the entire thing and apply the opacity at the end as iOS 7 does, but instead seems to apply it to all underlying views, meaning you can see through your semi transparent white foreground view and see the shadow beneath it.

If you do want iOS 6 support I recommend using a pre-composited 9 patch image that is stretched to make up the semi transparent background with the shadow.

UIImage* image = [self resizableBackgroundImageWithShadowRadius:20
                                                    shadowColor:[UIColor blackColor]
                                                      fillColor:[UIColor colorWithWhite:1 alpha:0.5]];

UIImageView* imageView = [[UIImageView alloc] initWithFrame:CGRectMake(50, 50, 100, 200)];
[imageView setImage:image];
[self.window addSubview:imageView];

.

- (UIImage*) resizableBackgroundImageWithShadowRadius:(CGFloat) shadowRadius shadowColor:(UIColor*) shadowColor fillColor:(UIColor*) fillColor
{
    const CGFloat stretchExcess = shadowRadius / 2.0;
    const CGFloat stretchDimension = shadowRadius + stretchExcess;
    const CGFloat shadowDimension = shadowRadius * 2.0;
    const CGFloat imageDimension = shadowDimension + stretchDimension;
    const CGSize imageSize = CGSizeMake(imageDimension, imageDimension);

    UIGraphicsBeginImageContextWithOptions(imageSize, NO, 0);

    CGContextRef ctx = UIGraphicsGetCurrentContext();

    //  Inner fill path
    UIBezierPath* path = [UIBezierPath bezierPathWithRect:CGRectMake(shadowRadius, shadowRadius, imageSize.width - shadowDimension, imageSize.height - shadowDimension)];

    //  Draw the shadow
    CGContextSaveGState(ctx);
    CGContextSetShadowWithColor(ctx, CGSizeZero, shadowRadius / 2.0, shadowColor.CGColor);
    [[fillColor colorWithAlphaComponent:1] set];
    [path fill];
    CGContextRestoreGState(ctx);

    //  Clear the middle
    [path fillWithBlendMode:kCGBlendModeClear alpha:0];

    //  Draw our fill color
    [fillColor set];
    [path fill];

    const CGFloat inset = shadowRadius + stretchExcess;
    UIImage* image = [UIGraphicsGetImageFromCurrentImageContext() resizableImageWithCapInsets:UIEdgeInsetsMake(inset, inset, inset, inset)];

    UIGraphicsEndImageContext();

    return image;
}

Result (iOS 6):

enter image description here

SomeGuy
  • 9,670
  • 3
  • 32
  • 35
  • @S.P you could potentially render a 9 patch image using an image context at runtime so that it's still dynamic and you don't need to include any resources. Let me know if this is something you're interested in and I can look into the implementation. – SomeGuy Jul 31 '14 at 12:00
  • that is not really a best solution, because not every developer has PhotoShop; and even if they have, they will need to recreate the image every occasion when they want to change any tiny details of the shadow or the background. it looks a bit painful idea. – holex Jul 31 '14 at 13:14
  • @holex no that's not actually true. My first example used a Photoshop exported resource to prove how it works. I've updated the answer to not require any Photoshop and not to require any image resources in your app. You can dynamically create the 9 patch image at runtime using dynamic variables. This is actually a lot faster to render compared to your answer, as your answer must first do an off screen render pass to find the alpha channel, and then do another render with the shadow. My answer only requires a single pass, rendered directly onto the screen. – SomeGuy Jul 31 '14 at 13:24
0

Why is it not showing? The code you're linking to should work properly:

imageView.layer.shadowColor = [UIColor purpleColor].CGColor;
imageView.layer.shadowOffset = CGSizeMake(0, 1);
imageView.layer.shadowOpacity = 1;
imageView.layer.shadowRadius = 1.0;
imageView.clipsToBounds = NO;

Double check your outlet connection (if you're using an Interface Builder) and make sure imageView is not nil at the point you call this method (you may put a breakpoint somewhere in this method). Also, make sure you import #import "QuartzCore/CALayer.h" and set clipsToBounds property to NO (otherwise, it won't just show up).

Another caveat may be incorrect frame size — it may actually differ from what it looks like, so it may be one of the reasons why your shadow doesn't appear where you think it should.

You may need to tweak shadow offset, opacity and other options to achieve the desired effect.

UPD: It looks like you're trying to add a drop-shadow to your view. Check out another method described on this StackOverflow question.

Community
  • 1
  • 1
Rinat Khanov
  • 1,566
  • 10
  • 32