An advanced pull to refresh will help you to provide modern approach in your app.
It is very smooth and easy to implement. And it will support for the lower versions also (from v2.3). The below screen shot will recall the new kind of refresh.
UI part
Create an Android from your eclipse or Android studio.
In your activity layout add the SwipeRefreshLayout.
<ScrollView
    android:layout_width="match_parent"
    android:layout_height="match_parent">
    <TextView
        android:text="@string/hello_world"
        android:layout_width="match_parent"
        android:layout_height="wrap_content"
        android:layout_marginTop="16dp"
        android:gravity="center"/>
</ScrollView>
Note : It has only View inside the layout. Add the scrollView inside the SwipeRefresh layout to support pull to refresh. For ListView and GridView no need to add ScrollView inside SwipeRefreshLayout.
code part
Add the following lines in onCreate method of your Activity.
public class SwipeActivity extends Activity implements OnRefreshListener {
SwipeRefreshLayout swipeLayout;
@Override
protected void onCreate(Bundle savedInstanceState) {
    super.onCreate(savedInstanceState);
    setContentView(R.layout.activity_swipe);
     swipeLayout = (SwipeRefreshLayout) findViewById(R.id.swipe_container);
    swipeLayout.setOnRefreshListener(this);
swipeLayout.setColorScheme(android.R.color.holo_blue_bright, android.R.color.holo_green_light, android.R.color.holo_orange_light, android.R.color.holo_red_light);
}
@Override
    public void onRefresh() {
        // TODO Auto-generated method stub
        new Handler().postDelayed(new Runnable() {
            @Override public void run() {
                swipeLayout.setRefreshing(false);
            }
        }, 5000);
    }
}
swipeLayout.setOnRefreshListener(this); sets Refresh listener for your layout.
Loading color schemes are adding using
swipeLayout.setColorScheme(android.R.color.holo_blue_bright, android.R.color.holo_green_light,  android.R.color.holo_orange_light, android.R.color.holo_red_light);
To stop the loading progress swipeLayout.setRefreshing(false);.
Thats it. Run your appplicaton you also did the new pull to refresh.
SWIPE TO REFRESH WITH LISTVIEW
Here I add an example of pull to refresh with listview. Then you will know how easy it is to integrate.
Create a new Activity in your application, add the listview in your SwipeRefreshLayout.
<android.support.v4.widget.SwipeRefreshLayout xmlns:android="http://schemas.android.com/apk/res/android"
    android:id="@+id/swipe_container"
    android:layout_width="match_parent"
    android:layout_height="match_parent" >
    <ListView
        android:id="@+id/listview"
        android:layout_width="match_parent"
        android:layout_height="match_parent" >
    </ListView>
</android.support.v4.widget.SwipeRefreshLayout>
Declare and initialze variables for listview, adapter, String array for list items. Below codes will add the list items from array when you do pull to refresh.
public class SwipeActivity extends ActionBarActivity {

    @Override
    protected void onCreate(Bundle savedInstanceState) {
        super.onCreate(savedInstanceState);
        setContentView(R.layout.activity_swipe);


        if (savedInstanceState == null) {
            getSupportFragmentManager().beginTransaction()
                    .add(R.id.container, new PlaceholderFragment())
                    .commit();
        }
    }


    @Override
    public boolean onCreateOptionsMenu(Menu menu) {

        // Inflate the menu; this adds items to the action bar if it is present.
        getMenuInflater().inflate(R.menu.swipe, menu);
        return true;
    }

    @Override
    public boolean onOptionsItemSelected(MenuItem item) {
        // Handle action bar item clicks here. The action bar will
        // automatically handle clicks on the Home/Up button, so long
        // as you specify a parent activity in AndroidManifest.xml.
        int id = item.getItemId();
        if (id == R.id.action_settings) {
            return true;
        }
        return super.onOptionsItemSelected(item);
    }

    /**
     * A placeholder fragment containing a simple view.
     */
    public static class PlaceholderFragment extends Fragment implements OnRefreshListener {
        SwipeRefreshLayout swipeLayout;
        ListView listView;
        ArrayAdapter adapter;
        ArrayList< String> arrayList;
        String [] array = new String[]{"Apple","Batman","captain America","darkknight"};

        public PlaceholderFragment() {
        }

        @Override
        public View onCreateView(LayoutInflater inflater, ViewGroup container,
                Bundle savedInstanceState) {
            View rootView = inflater.inflate(R.layout.fragment_swipe, container, false);
            swipeLayout = (SwipeRefreshLayout) rootView.findViewById(R.id.swipe_container);
            swipeLayout.setOnRefreshListener(this);
            swipeLayout.setColorScheme(android.R.color.holo_blue_bright,
                    android.R.color.holo_green_light,
                    android.R.color.holo_orange_light,
                    android.R.color.holo_red_light);
            listView= (ListView) rootView.findViewById(R.id.listview);


            adapter = new ArrayAdapter(getActivity(),android.R.layout.simple_list_item_1, appendData());
            listView.setAdapter(adapter);


            return rootView;
        }

        @Override
        public void onRefresh() {
            // TODO Auto-generated method stub
            new Handler().postDelayed(new Runnable() {
                @Override public void run() {
                    appendData();
                    adapter.notifyDataSetChanged();
                    swipeLayout.setRefreshing(false);
                }
            }, 5000);
        }


        private ArrayList appendData(){
            if(arrayList==null)
                arrayList =  new ArrayList();

            for (String items : array) {
                arrayList.add(items);
            }
            return arrayList;
        }
    }

}
Note: I have used appcompat library to support the Actionbar for lower versions. So My Activity extends ActionBarActivity. In updated ADT version of eclipse and studio, your application will be created with fragment concepts. So application is created with instant fragment concepts.
I guess you like this example. Try it yourself and get practiced.
Happy coding :-).
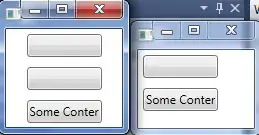
And resultant screen, see this:
And for your existing program, use this link
 :
: